Diagnosing a failing power supply reliably requires more than checking whether the PC turns on, since a PSU can power a system at idle while still failing under the higher current draw of actual gaming load. The process that catches both obvious and intermittent failures involves a visual and smell inspection, a no-load POST test, rail voltage measurement with a multimeter or dedicated tester, and finally a real load test while monitoring for instability.
Owen Pritchard runs PSU diagnostics on his repair bench using POST cards and swap-testing with known-good spare units specifically because power supply problems get misdiagnosed as motherboard, GPU, or even software faults more often than almost any other component category. This guide walks through the same diagnostic sequence in a form usable without a full professional bench, plus what to do once a PSU is confirmed failing.
As an Amazon Associate we earn from qualifying purchases at no extra cost to you. Product prices and availability are accurate as of the date shown and are subject to change.






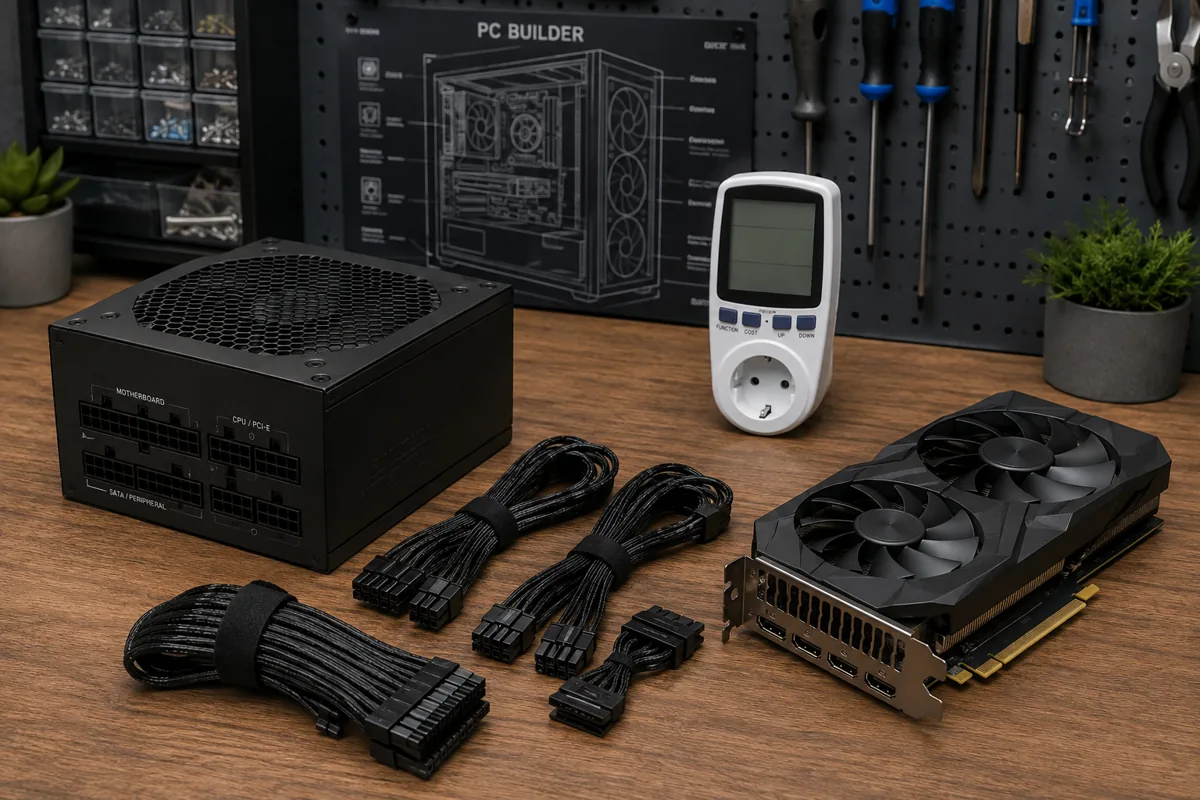
Top 3 picks at a glance
Why PSU Problems Get Misdiagnosed As Other Failures
A power supply sits at the root of every other component’s operation, which paradoxically makes its failures easy to misattribute to whatever component happens to be receiving unstable power at the moment a symptom appears. Random reboots during gaming get blamed on the GPU or drivers, failure to boot gets blamed on the motherboard or RAM, and intermittent crashes get blamed on Windows or specific games, when in each case an unstable or failing PSU rail is the actual root cause.
This misdiagnosis pattern happens because PSU failure modes are often partial rather than total. A completely dead PSU that provides no power at all is actually the easier case to diagnose, since the symptom (nothing turns on, no fans spin, no lights) is unambiguous. A PSU that’s degrading but still functional, delivering power that’s slightly out of voltage spec or that becomes unstable specifically under higher current draw, produces symptoms that look exactly like a dozen other possible hardware or software problems.
The cost asymmetry of misdiagnosis makes this worth taking seriously: replacing a GPU or motherboard based on a wrong diagnosis costs significantly more than a PSU replacement typically would, and the original problem persists afterward since the actual faulty component, the PSU, was never addressed. This is why PSU testing is a standard early step in professional diagnostic workflows for unexplained instability, rather than being left until other, more expensive components have already been swapped without resolving the issue.
Age and load history are useful context when deciding how seriously to suspect the PSU specifically. A PSU that’s 5+ years old, has been run near its rated wattage capacity regularly (common in systems with a high-power GPU paired with a PSU that was only modestly oversized when purchased), or has experienced power surges or brownouts without adequate surge protection is statistically more likely to be the actual cause of new instability than a PSU purchased within the last year or two running well below its rated capacity.
None of this replaces actual testing, covered in the rest of this guide, but it’s useful context for deciding how early to prioritize PSU testing in your overall troubleshooting sequence when a system develops unexplained instability with no single obvious cause.
Symptoms That Specifically Point To The Power Supply
Certain symptom patterns are more strongly associated with PSU problems than with other component failures, and recognizing them helps prioritize where to start testing. A system that won’t power on at all, no fans, no lights, no motherboard debug LED activity, is either a completely dead PSU, a dead motherboard, or in rarer cases a short circuit somewhere in the system, and the paperclip test covered in the next section quickly narrows this down.
Random reboots or complete shutdowns that occur specifically during higher-load moments, transitioning into a demanding game scene, during a GPU-intensive benchmark, or when multiple high-draw components are active simultaneously, are a classic PSU voltage instability symptom, since this is exactly the scenario where a marginal or failing PSU’s ability to maintain stable voltage under increased current demand breaks down.
Burning smells, visible scorch marks around the PSU’s exterior vents, or audible clicking, buzzing, or high-pitched whining specifically from the PSU unit itself (distinct from fan noise) are unambiguous physical warning signs that should prompt immediate power-down and PSU replacement without further diagnostic testing, since these indicate a physical failure that testing won’t meaningfully clarify further and that carries real fire and component-damage risk if continued use persists.
Peripheral or USB device instability, drives disconnecting and reconnecting unexpectedly, USB devices losing power intermittently, or RGB lighting flickering, can indicate marginal PSU rail voltage even when the system itself continues running, since these lower-power devices are sometimes more sensitive to voltage instability than the higher-tolerance CPU and GPU power inputs, making them an early warning sign worth paying attention to before a full system crash occurs.
A PSU fan that’s stopped spinning or is spinning erratically, checkable visually through most case side panels or PSU exhaust vents, is a direct sign of potential PSU cooling failure, which can lead to thermal-related instability or accelerated component degradation inside the PSU even if the unit is still technically delivering power at the time of inspection.
Safe Visual And Smell Inspection Before Any Electrical Testing
Before any electrical testing, power down the system completely, switch off the PSU’s rear power switch if present, and unplug the power cable from the wall, then wait at least a few minutes to allow internal capacitors to begin discharging naturally before proceeding with any inspection or handling.
Visually inspect the PSU’s exterior for any scorch marks, discoloration around vents, or visible bulging or leakage, which would indicate physical component failure inside serious enough to warrant immediate replacement without further diagnostic effort. Check the power cable itself for any fraying, discoloration at the connector ends, or a loose fit at either the PSU or wall outlet end, since a marginal cable can occasionally masquerade as a PSU-side problem.
Smell for any burning or acrid electronic odor near the PSU specifically, distinct from normal dust-burning-off smell that can occur briefly on any component after a period of disuse; a persistent, specifically PSU-localized burning smell is a stronger indicator of internal component failure than a fleeting whiff that clears after a few seconds.
Check all cable connections at both the PSU end and the component end (motherboard 24-pin, CPU 4/8-pin, GPU power connectors) for a fully seated, secure fit, since a loose connection can produce symptoms nearly identical to genuine PSU failure without the PSU itself being at fault at all. Reseating every PSU-related connection firmly is a zero-cost step worth doing before any further diagnostic work.
Dust buildup inside the PSU’s intake vents, visible without opening the unit itself, can contribute to internal overheating that accelerates component aging; a light external cleaning with compressed air held at a safe distance from the vents, performed with the unit unplugged, is a reasonable maintenance step, though it doesn’t address internal dust that only a qualified technician should clean given the internal high-voltage risk.
The Paperclip Test: Confirming Basic PSU Function Without A Full System
The paperclip test isolates the PSU from the rest of the system to confirm it can power on and produce a signal independent of any potential motherboard or component fault. With the PSU fully disconnected from the system and unplugged from the wall, locate the 24-pin ATX connector and identify the green wire (typically pin 4 on most standard layouts, though checking a pinout diagram for your specific PSU brand is worth doing since exact pin position can vary) and any black ground wire.
Bend a paperclip into a U shape and insert it to bridge the green wire’s pin directly to an adjacent black ground pin on the same connector, which simulates the “power on” signal the motherboard normally sends to the PSU. With the paperclip bridging these two pins, plug the PSU into the wall and switch it on if it has a rear switch.
A functioning PSU’s fan should spin up immediately upon bridging the connection, indicating the unit is able to power on and, at minimum, drive its own cooling fan. If the fan doesn’t spin at all, this points strongly toward a genuinely dead or severely failed PSU, since this test bypasses every other system component and isolates the PSU’s most basic on/off function specifically.
A fan spinning during this test confirms basic power-on function but does not confirm the PSU is delivering correct, stable voltage across all its rails, which is why this test is a useful first checkpoint but not a complete diagnosis on its own; a PSU can pass the paperclip test and still be delivering out-of-spec voltage that causes real instability once connected to an actual system under load.
This test should only be performed with the PSU fully disconnected from all other components, never with the paperclip bridge in place while the PSU remains connected to a motherboard, since this test is specifically designed to isolate the PSU alone and mixing it with a connected system removes that isolation and reintroduces the ambiguity the test is meant to eliminate.
Measuring Rail Voltages With A Multimeter Or Dedicated PSU Tester
A dedicated PSU tester, a small standalone device the 24-pin and other connectors plug into directly, provides a fast pass/fail readout across the PSU’s main voltage rails (typically +12V, +5V, +3.3V, and standby voltage) without needing to manually probe individual pins, making it the more convenient option for a quick check, though it typically only confirms rails are present within a rough acceptable range at no load rather than precise voltage measurement.
A multimeter provides more precise, specific voltage readings and can measure any individual pin directly, useful both for a more rigorous check than a basic tester provides and for situations where a dedicated tester isn’t available. With the paperclip test setup described above (PSU powered on via the bridged 24-pin connector), carefully probe the multimeter’s positive lead against the relevant colored wire pin (yellow for +12V, red for +5V, orange for +3.3V) and the negative lead against a black ground pin, reading the resulting voltage.
Acceptable voltage tolerance for ATX power supplies is generally within plus or minus 5% of the nominal rated voltage, meaning a +12V rail should read between approximately 11.4V and 12.6V, a +5V rail between 4.75V and 5.25V, and a +3.3V rail between 3.135V and 3.465V. Readings outside these ranges, even at no load, indicate a PSU that’s already out of spec and a strong candidate for replacement regardless of what other symptoms are present.
It’s important to recognize that no-load voltage readings, whether from a dedicated tester or a multimeter with the paperclip test, represent a best-case scenario for the PSU, since it’s not being asked to deliver any real current at that moment. A PSU that reads acceptable voltages at no load can still fail under real load, which is why this step should be treated as a useful screening test rather than a definitive all-clear, especially when the original symptoms specifically involved load-related instability rather than a complete failure to power on.
For CPU and GPU-specific power connectors beyond the main 24-pin, similar voltage checks can be performed with a multimeter while the system is running normally (rather than the isolated paperclip test setup), carefully probing accessible pins on connected cables, though this requires more care given the system is live and under real operating conditions during the measurement.
Load Testing: Catching Failures That Only Appear Under Demand
Since no-load testing can miss a PSU that fails specifically under real current draw, load testing while the PSU is actually connected to and powering a working system is the more complete diagnostic step, particularly for symptoms that specifically occurred during gaming or other demanding tasks rather than at idle or during simple boot.
With the PSU connected normally to the system, run a monitoring tool capable of reading voltage rails in real time if your motherboard and monitoring software support it (many motherboard monitoring utilities and tools like HWiNFO display live +12V, +5V, and +3.3V rail readings alongside temperature and clock speed data), then run a demanding stress test or game while watching for voltage readings drifting outside the acceptable tolerance range described in the previous section.
A PSU that shows stable, in-tolerance voltage at idle but drifts noticeably out of range or shows significant fluctuation specifically once a demanding load (GPU stress test, CPU stress test, or ideally both simultaneously to simulate real gaming load) begins is exhibiting exactly the load-instability failure pattern that no-load testing alone cannot catch, and this result is a strong, specific confirmation that the PSU is the root cause of load-related symptoms.
If your specific motherboard or monitoring software doesn’t expose live rail voltage readings, an alternative diagnostic approach is a swap test: temporarily installing a known-good, adequately rated spare PSU (borrowed, or a friend’s known-working unit of sufficient wattage) into the system and confirming whether the original instability symptoms disappear under the same load conditions that previously triggered them. If symptoms resolve with a different PSU under identical load and settings, this strongly confirms the original PSU as the cause without requiring direct voltage measurement at all.
Extended load testing, running a stress test for 30+ minutes rather than just a few minutes, is worth doing specifically for intermittent symptoms that don’t reproduce quickly and reliably, since some marginal PSU failures only manifest after the unit has been under sustained load long enough to heat up internally, a pattern that mirrors how the overheating-related instability described in our PC overheating guide can sometimes be confused with a PSU-specific issue if testing is cut short.
PSU Wattage And Age As Ongoing Risk Factors
A PSU running consistently close to its rated maximum wattage experiences more thermal and electrical stress than one with meaningful headroom, which accelerates component aging inside the unit, particularly the electrolytic capacitors responsible for smoothing output voltage. As a general guideline, keeping typical system power draw under roughly 80% of the PSU’s rated capacity during normal gaming loads provides a reasonable safety margin and reduces long-term stress on the unit.
Systems that have had a GPU upgrade without a corresponding PSU capacity reassessment are a common source of this problem: a PSU that was appropriately sized for a previous, lower-power GPU can end up running much closer to its capacity ceiling after a significant GPU upgrade, even though the PSU itself hasn’t changed or aged in that time, making a wattage recalculation worthwhile any time a major power-hungry component is added or upgraded.
Component quality tier matters independently of age and load: PSUs from reputable manufacturers using higher-grade capacitors (commonly Japanese-brand capacitors, referenced in many PSU reviews and specification sheets) generally show slower degradation over equivalent years of service compared to budget units using lower-grade components, meaning a 5-year-old high-quality PSU may show less degradation than a 3-year-old budget unit run under similar conditions.
80 PLUS efficiency certification (Bronze, Gold, Platinum, Titanium tiers) primarily indicates energy efficiency at time of manufacture rather than a direct predictor of long-term reliability, though higher-tier certified units frequently, though not universally, use higher-quality internal components as part of achieving that efficiency rating, making it a loosely correlated but not definitive quality signal worth considering alongside brand reputation and warranty length rather than relying on alone.
Warranty length offered by the original manufacturer is a useful practical signal of expected reliability, since manufacturers calibrate warranty periods (commonly ranging from 3 years on budget units to 10-12 years on premium units) based on their own component quality and expected failure rates, making a PSU’s original warranty length worth checking when assessing how much longer a specific aging unit is likely to remain reliable.
When A “Working” PSU Still Needs Replacing
A PSU can pass every test described in this guide, power on correctly, deliver in-tolerance voltage at no load, and even maintain reasonable stability under a load test, while still being a reasonable candidate for proactive replacement if it’s old enough and has enough service history that capacitor aging is a realistic near-term concern, particularly for a system that’s otherwise being kept and upgraded rather than fully replaced.
Efficiency loss is a subtler sign of aging that doesn’t show up as an obvious instability symptom: an aging PSU’s actual efficiency (how much input power is converted to usable output versus lost as heat) degrades gradually, which can show up as a system running warmer overall and drawing more wall power for the same workload compared to when the PSU was new, detectable with a wall power meter comparing current draw against historical figures if available.
Audible coil whine or fan noise that’s gradually increased over time, even without any accompanying instability symptoms, can indicate internal component wear worth monitoring, though coil whine specifically is also a normal characteristic of many PSUs from new and isn’t automatically a sign of failure on its own without other corroborating symptoms.
For systems undergoing a significant component upgrade (a new, more power-hungry GPU, additional storage or peripherals increasing total system draw), proactively replacing an aging PSU alongside the upgrade, rather than waiting for it to fail under the new higher load, is a reasonable precaution given the asymmetric cost of PSU failure potentially damaging the new, more expensive components it would be powering.
There’s no fixed universal age at which a PSU must be replaced regardless of condition, but combining age, load history, warranty status, and any of the subtler signs described here gives a more complete picture than relying on the absence of an obvious failure symptom alone, particularly for a system where the cost of a PSU-caused cascading failure would be high relative to the modest cost of proactive replacement.
Safe Replacement And Disposal Of A Failed Or Failing PSU
When replacing a confirmed failing PSU, size the replacement based on your system’s actual peak power draw with reasonable headroom (per the 80% guideline discussed earlier) rather than simply matching the old unit’s wattage, particularly if any component upgrades are planned in the near future that would increase total system draw beyond what the original PSU was sized for.
Confirm connector compatibility with your specific motherboard and GPU before purchasing, checking for correct 24-pin, CPU power (4-pin, 8-pin, or combined 4+4), and GPU power connector types and quantities (including newer 12VHPWR/12V-2×6 connectors required by some recent high-end GPUs), since connector mismatches, while sometimes solvable with adapters, are better avoided by matching connector types directly where possible.
Never open a failed PSU to inspect or attempt repair of internal components yourself, since the capacitors inside can retain a dangerous electrical charge for an extended period even after the unit has been unplugged, posing a genuine shock hazard to anyone without specific training and proper discharge equipment; this work should be left to a qualified electronics technician if internal repair is ever pursued at all, though replacement is nearly always the more practical choice for a consumer PSU regardless.
Dispose of a failed PSU through proper electronics recycling channels rather than standard household trash, since PSUs contain materials (capacitors, circuit boards, sometimes specific hazardous materials depending on manufacturing era and region) that most electronics recycling programs are specifically equipped to handle safely; many electronics retailers and municipal recycling programs accept PSUs and similar components at no cost.
After installing a replacement PSU, repeat the same monitoring and load-testing approach described earlier in this guide for a period to confirm the new unit is delivering stable voltage under real load, both as a final confirmation the original diagnosis was correct and as a baseline check that the new unit itself isn’t defective, which does occasionally happen even with new hardware.
Troubleshooting: Diagnosing Random Reboots Step By Step
For a system experiencing unexplained random reboots or shutdowns with no obvious single cause, work through this sequence to systematically narrow down whether the PSU is responsible before considering other components.
First, check Windows Event Viewer for the specific error recorded at the time of each reboot; a “Kernel-Power” critical error with no preceding warning is consistent with a sudden loss of power (pointing toward PSU or connection issues), while a different, specific error code may point toward a driver, software, or different hardware cause entirely, making this a useful early filter before deeper PSU-specific testing.
Second, note whether reboots correlate specifically with higher system load (gaming, benchmarking) or occur randomly including at idle, since load-correlated reboots point more strongly toward PSU voltage instability under demand, per the load testing section above, while idle-inclusive random reboots broaden the suspect list to include RAM, motherboard, or overheating causes as well.
Third, reseat all PSU cable connections firmly (24-pin, CPU power, GPU power) as a zero-cost first physical check, since a marginally loose connection can produce intermittent symptoms nearly identical to genuine PSU failure, and this step alone resolves a meaningful fraction of “failing PSU” tickets that turn out to be a connection issue instead.
Fourth, run the no-load paperclip and multimeter tests described earlier to rule out a grossly out-of-spec PSU, then proceed to load testing with live rail voltage monitoring or a swap test using a known-good spare PSU if available, since this combination catches the large majority of both obvious and load-specific PSU failure patterns.
Fifth, if PSU testing comes back clean across both no-load and load conditions, redirect troubleshooting toward RAM (run a memory diagnostic tool), overheating (per our dedicated overheating guide), and driver or Windows-level causes, since a genuinely healthy PSU that’s been thoroughly tested rules out the most commonly assumed cause and should shift suspicion toward these other realistic possibilities rather than continuing to focus on the PSU without further evidence.
Frequently Asked Questions
Can a failing power supply damage other components?
Yes, a PSU delivering unstable voltage or that fails catastrophically can send a damaging voltage spike through the motherboard, CPU, GPU, and storage devices simultaneously, which is why a suspected failing PSU should be tested and replaced promptly rather than left in service on the assumption it’s only causing minor inconvenience.
Will a PSU tester catch every possible failure?
A basic PSU tester confirms the rails are present and within a rough voltage range at no load, but it can’t catch voltage instability that only appears under real load, which is why load testing or a multimeter check while the PSU is actually powering a system gives a more complete picture than a standalone tester alone.
Is it safe to open a PSU to inspect it myself?
No, PSU capacitors can hold a dangerous electrical charge even after the unit is unplugged for a significant period, so external inspection, testing through the output connectors, and multimeter checks are the appropriate DIY steps, while opening the case itself should be left to someone with specific training in high-voltage capacitor discharge safety.
How long do PC power supplies typically last?
A quality PSU from a reputable brand, run within a reasonable percentage of its rated capacity, commonly lasts 7 to 10 years or more, while a budget unit or one consistently run near its maximum rated wattage tends to show capacitor aging and efficiency loss sooner, often within 4 to 6 years.
My PC randomly reboots under load but the PSU tests fine at idle. What does that mean?
This is one of the more common failure patterns and specifically indicates a PSU that can maintain stable voltage with minimal load but fails to sustain it under the higher current draw of gaming or stress testing, meaning idle-only testing methods like a basic tester or a paperclip test won’t catch it and a real load test is necessary to confirm.
For the testing hardware referenced throughout this guide, see our best power supply tester roundup and best diagnostic tools for gaming PC for broader monitoring software picks. To reduce future PSU stress from unstable wall power, our best surge protector for gaming PC and best UPS for gaming PC guides cover protective hardware worth pairing with any replacement unit. Anyone opening the case for testing should also check best anti static wrist strap before handling internal components.