In esports shooters like Valorant, Counter-Strike 2, Overwatch 2, Apex Legends, and Rainbow Six Siege, visual fidelity is secondary to clarity, consistency, and input latency. The goal of tuning Windows and in-game graphics settings is not to make the game look better, but to make enemies easier to see, frames more stable, and mouse input more immediate. That means prioritizing high, stable frame rates over maximum textures, disabling effects that add visual noise or input lag, and letting your GPU focus on rendering speed rather than eye candy. As of early 2026, both NVIDIA and AMD drivers and Windows 11 itself include several latency-reduction and scheduling features that directly affect competitive shooters, so configuring them correctly matters as much as your in-game video options.
This guide gives you actionable, exact settings you can apply today. It covers the Windows-level toggles that affect all shooters, the recommended in-game values and why they help, and how to adapt them for low-end, mid-range, and high-end PCs. Every change includes how to verify it and how to reverse it if you do not like the result.
As an Amazon Associate we earn from qualifying purchases at no extra cost to you.


Our Top Picks
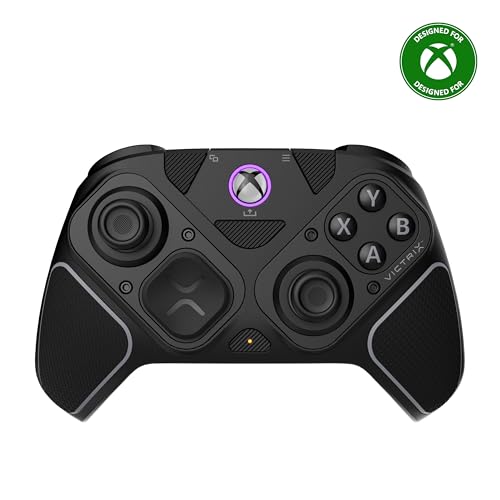 Turtle Beach Victrix Pro BFG Reloaded Wireless GamingOne Size2.4 x 6.3 x 4.1 inches0.58 poundsCheck on Amazon


Top 3 picks at a glance
Quick Recommended Settings
| Setting | Recommended Value | Why |
|---|---|---|
| Windows Display > Graphics > Hardware-accelerated GPU scheduling | On (requires restart) | Reduces scheduler overhead and can lower frame-time spikes when GPU-bound |
| Windows Settings > Gaming > Game Mode | On | Prevents background Windows updates and services from stealing CPU during play |
| Windows Settings > System > Display > HDR | Off for competitive play | HDR adds tone-mapping latency and washes out enemy contrast on most monitors |
| NVIDIA Control Panel > Low Latency Mode / AMD Software > Anti-Lag+ | On / Enabled | Aligns CPU submission with GPU render to cut input lag without major frame rate cost |
| In-Game Display Mode | Fullscreen Exclusive (or Fullscreen) | Gives the game direct control of the display and reduces compositor latency vs. Borderless Windowed |
| In-Game V-Sync | Off | Eliminates added input delay; use a frame rate limiter instead to control tearing |
| In-Game Frame Rate Limit | 3-5 FPS below monitor max refresh (e.g., 237 for 240Hz) | Keeps G-Sync/FreeSync engaged while avoiding V-Sync fallback latency |
| NVIDIA Reflex / AMD Anti-Lag+ (in-game) | On + Boost where available | In-engine latency reducer; more effective than driver-only low latency when supported |
| Resolution & Render Scale | Native resolution at 100% scale | Maintains pixel-perfect enemy edges; lowering scale blurs distant heads |
| Texture Quality | Medium to High | Minimal FPS cost on modern VRAM, avoids blurry texture streaming |
| Shadow Quality | Low | High shadows hide enemies and cost significant GPU time |
| Anti-Aliasing | Off or FXAA Low / MSAA 2x only if needed | Heavy AA softens enemies and adds blur at distance; light AA reduces jaggies with less cost |
| Effects, Bloom, Motion Blur, Depth of Field, Ambient Occlusion | Off / Low / Disabled | All add visual clutter and obscure targets during fast movement |
| Model / Character Detail | High | Keeps enemy models sharp and distinct at range |
| Anisotropic Filtering | 4x to 8x | Sharpens angled ground textures with negligible performance cost |
Setting-by-Setting
Hardware-Accelerated GPU Scheduling (HAGS)
What causes it: By default, the CPU manages VRAM scheduling. Under high frame rates this adds scheduling overhead and can cause micro-stutters. How to check: Press Win + I, go to System > Display > Graphics > Change default graphics settings. Look for Hardware-accelerated GPU scheduling. Check Task Manager > Performance > GPU to confirm your GPU supports it. What to do: Toggle it to On, then restart your PC when prompted. In the same menu, set Optimization for windowed games to Off for shooters you run in Fullscreen. How to undo: Return to the same menu and toggle it Off, then restart. If you see stuttering in older DirectX 11 titles after enabling, turn it off.
Game Mode and Background Activity
What causes it: Windows background tasks, search indexing, and update checks can cause CPU spikes that translate to frame-time hitches. How to check: Go to Settings > Gaming > Game Mode and verify it is On. Press Ctrl + Shift + Esc to open Task Manager, click Processes, and sort by CPU during a Deathmatch warmup to spot background apps using more than 2-3% CPU. What to do: Leave Game Mode On. Also go to Settings > Apps > Startup and disable OneDrive, Spotify, and browser updaters from auto-launch. For shooters, set the game’s .exe priority to High only via Task Manager > Details > Right-click game.exe > Set priority > High, do not use Realtime. How to undo: Re-enable Game Mode Off and re-enable startup apps from the same Startup page.
Fullscreen Exclusive vs. Borderless Windowed
What causes it: Borderless Windowed forces the Desktop Window Manager to composite the frame, adding one frame of latency and sometimes capping refresh. How to check: In-game go to Video > Display Mode. If you see Borderless or Fullscreen Windowed, you are in the composited path. Press Alt + Enter; if the game briefly blacks out and resizes, it switched to exclusive Fullscreen. What to do: Select Display Mode > Fullscreen or Fullscreen Exclusive. Set your native resolution there, for example 1920×1080 or 2560×1440, and set Refresh Rate to the highest your monitor reports, such as 144Hz, 240Hz, or 360Hz. How to undo: Switch back to Borderless Windowed in the same menu if you need fast Alt + Tab multi-tasking while streaming.
V-Sync, G-Sync / FreeSync, and Frame Rate Limit
What causes it: V-Sync queues frames to avoid tearing, which adds significant input delay. Leaving frame rate uncapped with V-Sync off can push you out of the variable refresh range and cause tearing. How to check: In-game Video > V-Sync should read Off. On your monitor’s on-screen display, verify Adaptive Sync / G-Sync / FreeSync is On. In NVIDIA Control Panel go to Display > Set up G-SYNC and confirm Enable G-SYNC is checked. What to do: Turn V-Sync Off in-game. Turn V-Sync On in NVIDIA Control Panel > Manage 3D settings > Vertical sync > On, or set AMD Software > Gaming > Wait for Vertical Refresh > Always Off but enable Radeon Enhanced Sync Off. Then set an in-game FPS limit: in Valorant Video > General > Limit FPS Always, in CS2 Settings > Video > Advanced > Max FPS, to 3 to 5 below your refresh, for example 141 for 144Hz, 237 for 240Hz, 355 for 360Hz. How to undo: Disable the frame cap by setting it to 0 or Off and set NVIDIA Control Panel Vertical sync back to Use the 3D application setting.
NVIDIA Reflex Low Latency and AMD Anti-Lag+
What causes it: The CPU can prepare frames faster than the GPU can render them, causing a queue that increases latency between mouse movement and screen update. How to check: Open the shooter’s Video or Graphics settings and look for NVIDIA Reflex Low Latency or AMD Anti-Lag+. In Valorant it is under Video > General > NVIDIA Reflex Low Latency, in Overwatch 2 under Options > Video > NVIDIA Reflex, in Apex Legends under Video > Advanced > NVIDIA Reflex. What to do: Set it to On + Boost if available, otherwise On. If the game does not have Reflex, go to NVIDIA Control Panel > Manage 3D settings > Program Settings > select your game > Low Latency Mode > On, or AMD Software > Gaming > Graphics > Anti-Lag > Enabled. Do not enable both driver-level and in-game Reflex at once; prefer the in-game option. How to undo: Set Reflex back to Off in-game and Low Latency Mode back to Off in the driver.
Resolution, Render Scale, and Sharpness
What causes it: Lowering render scale below 100% reduces pixel count the GPU shades, but it blurs distant enemies and makes head-level pixels blend with backgrounds. How to check: In-game Video > Resolution should match Windows Settings > System > Display > Display resolution. Look for Render Scale, Resolution Scaling, or 3D Resolution. If it shows 75% or 80%, you are rendering below native. What to do: Set Resolution to native and Render Scale / 3D Resolution to 100%. If you need more performance, lower it to 95% rather than dropping resolution, and add Image Sharpening at low strength: NVIDIA Control Panel > Manage 3D settings > Image Sharpening > On with Sharpen 0.30 and Ignore film grain 0.17. How to undo: Return Render Scale to 100% and disable Image Sharpening.
Texture Quality and VRAM Management
What causes it: Textures that are too low cause streaming blur and can make enemy skins harder to distinguish, while textures too high can exceed VRAM and cause stutters. How to check: Check VRAM usage in-game if shown, or open MSI Afterburner overlay with RivaTuner and watch Dedicated VRAM. Path to check files: for shader cache issues, navigate to C:\Users\%USERNAME%\AppData\Local\NVIDIA\GLCache or AMD shader cache at C:\Users\%USERNAME%\AppData\Local\AMD\DxCache. What to do: Set Texture Quality to Medium if you have 6GB VRAM or less, High if you have 8GB or more. Set Texture Filtering Quality in NVIDIA Control Panel to High performance and Anisotropic Filtering to 4x or 8x. In Valorant set Material Quality to Medium, in CS2 set Texture Filtering Mode to Anisotropic 4x. How to undo: Raise textures to High or set Anisotropic Filtering back to Application-controlled.
Shadows, Ambient Occlusion, and Light Effects
What causes it: Dynamic shadows and ambient occlusion add GPU load and darken corners where enemies hide, which can either help or hurt visibility depending on implementation. In most esports titles high shadows add noise without competitive benefit. How to check: In Video > Advanced Graphics, locate Shadow Quality, Dynamic Shadows, and Ambient Occlusion. Move in a dim corner of the map and watch if shadows flicker or darken player models. What to do: Set Shadow Quality to Low, Ambient Occlusion to Off, and Shadow Detail to Low. Keep CS2’s Boost Player Contrast to Enabled to compensate for flatter lighting. Disable Bloom, Lens Distortion, and Vignette where available. How to undo: Set Shadows back to Medium and Ambient Occlusion to Medium if you prefer more depth cues for single-player use.
Anti-Aliasing and Clarity Options
What causes it: Temporal anti-aliasing (TAA) smooths edges but smears moving targets, while MSAA is sharp but very costly. How to check: In Video > Graphics Quality, find Anti-Aliasing. Test by strafing past a wire fence or distant head at 100 meters; if edges ghost, TAA is too strong. What to do: For Valorant set Anti-Aliasing to MSAA 2x or None, for CS2 set Multisampling Anti-Aliasing Mode to 2x MSAA, for Overwatch 2 set Anti-Alias Quality to Low – FXAA. Turn off Motion Blur, Depth of Field, and Distortion. If available, set NVIDIA DLAA to Off and FidelityFX Super Resolution to Off for native clarity. How to undo: Set Anti-Aliasing back to MSAA 4x or TAA if you prefer smoother visuals over sharpness.
Effects, Shaders, and Post-Processing
What causes it: Effects Quality, Shader Detail, and Post-Processing add particles, heat haze, and explosions that obscure tracers and muzzle flash. How to check: In the shooting range, fire an automatic weapon and throw a utility particle; if the screen fills with bloom, effects are too high. Check Settings > Video > Effects Detail. What to do: Set Effects Detail to Low, Shader Detail to Low, and Post-Processing to Low. In Apex Legends set Volumetric Lighting to Disabled and Dynamic Spot Shadows to Off. In Siege set Lens Effects and Zoom-In Depth of Field to Off. How to undo: Raise Effects and Shader Detail to Medium for fuller visuals when not playing ranked.
By Hardware Tier
Low-End PCs (Integrated Graphics, GTX 1650 / RX 6500 XT class, 8GB RAM)
Prioritize frame-time stability over resolution. Use native 1920×1080 but if frame rates dip, drop Render Scale to 90% before dropping resolution to 1600×900. Set all esports titles to Low preset, then manually raise Texture Quality to Medium and Model Detail to Medium to keep enemies recognizable. Set Shadows to Low, Effects to Low, Anti-Aliasing to Off, Ambient Occlusion to Off. In Windows, set Power Mode to Best Performance at Settings > System > Power > Power mode and set Graphics preference for the game to High performance at Settings > System > Display > Graphics > select game > Options > High performance. Clear shader cache if stuttering persists: go to C:\Users\%USERNAME%\AppData\Local\Temp and delete the game’s shader folder, then verify files via Steam > Library > Right-click game > Properties > Installed Files > Verify integrity. Undo by restoring the Low preset and setting Power Mode back to Balanced.
Mid-Range PCs (RTX 3060 / RTX 4060 / RX 6600 XT / RX 7600 class, 16GB RAM, 144Hz to 240Hz)
This tier can hold native resolution at high refresh with tweaked settings. Use the Quick Recommended Settings table as your baseline. Set Texture Quality to High, Anisotropic 8x, Model Detail to High, but keep Shadows Low, Effects Low, and Post-Processing Low. Enable NVIDIA Reflex On + Boost or AMD Anti-Lag+ Enabled in-game, set Low Latency Mode to On in driver if no in-game toggle exists, and cap frames 3 to 5 below refresh as described. In NVIDIA Control Panel set Power management mode to Prefer maximum performance for the game profile and Texture filtering – Quality to High performance. If you stream, run the game in Fullscreen and set OBS to Game Capture, not Display Capture, to avoid extra compositor load. Undo by resetting the driver profile via Manage 3D settings > Restore defaults.
High-End PCs (RTX 4070 and above / RX 7800 XT and above, 240Hz to 360Hz)
You have headroom to keep clarity maxed while minimizing latency. Keep Render Scale at 100% and Resolution at native, even at 2560×1440. Set Texture Quality to High, Model Detail to High, Anisotropic 8x, Anti-Aliasing to MSAA 2x or FXAA Low for slightly cleaner edges without blur. Leave everything else that adds clutter at Low or Off: Shadows Low, Ambient Occlusion Off, Bloom Off, Motion Blur Off, Depth of Field Off, Distortion Off. Enable Reflex On + Boost and set the frame cap accurately: 237 for 240Hz, 355 for 360Hz. In Windows Settings > System > Display > Advanced display, confirm refresh is set to the maximum, for example 240Hz or 360Hz, not 60Hz. For fine-tuning, use the game’s config file: Valorant at C:\Users\%USERNAME%\AppData\Local\VALORANT\Saved\Config, CS2 at Steam\steamapps\common\Counter-Strike Global Offensive\game\csgo\cfg\video.txt, and back up the file before editing. Undo by deleting the custom cap and setting the in-game preset to High.
Common Mistakes
Mistake 1: Leaving V-Sync On in-game while also enabling G-Sync. What causes it is the double queue: G-Sync handles tearing, V-Sync in-game adds queue delay on top. Check Video > V-Sync and driver G-SYNC status. Fix by turning V-Sync Off in-game and controlling sync only in the driver with a frame cap. Undo by re-enabling in-game V-Sync.
Mistake 2: Using Borderless Windowed for lower Alt-Tab delay. What causes it is DWM composition latency and sometimes forced triple buffering. Check Display Mode. Fix by switching to Fullscreen and using Win + Tab or second monitor for multitasking. Undo by switching back to Borderless.
Mistake 3: Setting Render Scale below 90% to chase frames. What causes it is under-rendering then upscaling, which blurs distant heads into the background. Check Render Scale percentage. Fix by keeping 100% and instead lowering Shadows and Effects first, which cost more frames with less visibility loss. Undo by raising scale back to 100%.
Mistake 4: Maxing Anti-Aliasing and Ambient Occlusion for smoother looks. What causes it is TAA ghosting and darkened corners that hide enemies. Check Anti-Aliasing and Ambient Occlusion values. Fix by setting Anti-Aliasing to 2x MSAA or FXAA Low and Ambient Occlusion to Off. Undo by restoring to High.
Mistake 5: Forgetting Windows refresh rate. What causes it is Windows defaulting to 60Hz after driver updates, capping your monitor. Check Settings > System > Display > Advanced display > Choose a refresh rate. Fix by selecting the highest, such as 240Hz, and confirming in the monitor OSD that it shows 240Hz. Undo by setting it back to 60Hz if needed for troubleshooting.
Mistake 6: Editing config files without backups. What causes it is syntax errors or read-only flags that prevent saves. Check file location and right-click > Properties > Read-only. Fix by copying video.txt or GameUserSettings.ini to the Desktop before editing, and edit with Notepad. Undo by restoring the backup copy.
FAQ
Should I use DLSS or FSR in esports shooters?
What causes it: DLSS and FSR reconstruct a lower-resolution image, which can add latency and soften distant targets even in Quality mode. How to check: In Video > Graphics look for DLSS, FSR, or XeSS. If it is set to Performance or Balanced, you are rendering below native. What to do: For competitive ranked play keep them Off at 100% render scale. Use them only if your hardware cannot otherwise maintain your monitor’s refresh, and then use DLSS Quality or FSR Quality at most, with sharpening around 0.30. How to undo: Set DLSS/FSR back to Off and Render Scale to 100%.
Does Hardware-Accelerated GPU Scheduling increase FPS?
What causes it: HAGS changes how VRAM is scheduled, not raw shader speed, so its benefit depends on being CPU or GPU bound. How to check: Enable the in-game performance graph: in Valorant press Settings > Video > Stats > Show Frame Time, in CS2 use console command fps_max and net_graph, in Overwatch 2 Options > Video > Display Performance Stats. Compare frame-time variance with HAGS On vs. Off. What to do: Keep it On for most modern GPUs and test one evening with it Off if you see hitches in older shooters. How to undo: Toggle it Off in System > Display > Graphics and restart.
Why does my game look washed out after turning HDR off?
What causes it: Windows and the monitor may still be in an HDR color profile, or the in-game brightness is tuned for HDR. How to check: Go to Settings > System > Display > HDR and confirm it shows Off, then check your monitor OSD under Picture Mode. In-game check Video > Brightness or Gamma. What to do: Set monitor Picture Mode to Standard or FPS, set in-game Brightness to 50 to 60% and increase Digital Vibrance slightly if needed: NVIDIA Control Panel > Adjust desktop color settings > Digital vibrance 55% to 65%, or AMD Software > Display > Color > Saturation 110 to 120. How to undo: Re-enable HDR in Windows and set the monitor back to HDR mode.
What is the safest way to reset everything if settings make performance worse?
What causes it: Driver profiles, config edits, and shader caches can conflict after multiple changes. How to check: Note what you changed: driver toggles, in-game video.txt, and Windows Graphics settings. What to do: In-game use Video > Restore Defaults. In NVIDIA Control Panel go to Manage 3D settings > Restore defaults, in AMD Software go to Gaming > Graphics > Reset. Delete shader cache at Settings > System > Storage > Temporary files > DirectX Shader Cache > Remove files. Finally verify game files via Steam > Properties > Installed Files > Verify integrity or via Riot Client > Valorant > Repair. How to undo: Reapply your backed-up config files from the Desktop and re-enable Reflex and frame caps as before.