The best digital calipers for accurate measurements are the Mitutoyo 500-series Digimatic models for dependable workshop precision, while iGaging IP54 calipers offer a strong mid-range balance of accuracy, readability, and price for PC building, 3D printing, and gaming-room projects.
As an Amazon Associate we earn from qualifying purchases at no extra cost to you.
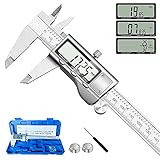


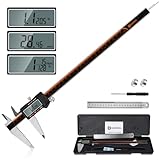
Our Top Picks
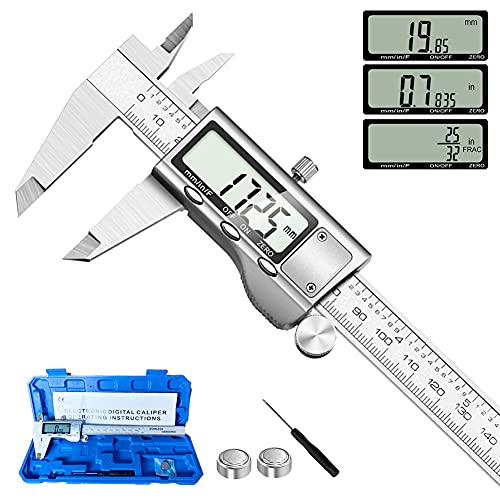

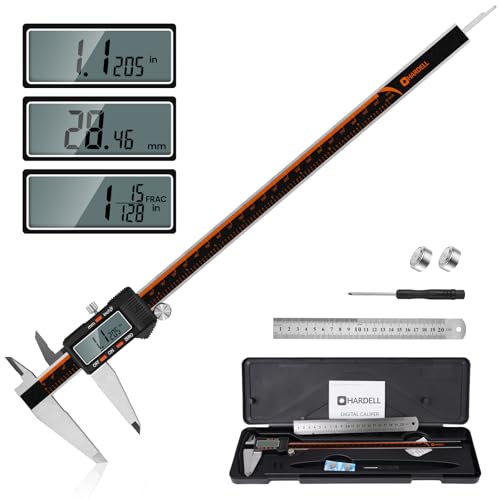
Top 3 picks at a glance
Best digital calipers at a glance
| Use case | Recommended type | Typical resolution | Typical accuracy | Usual market range |
|---|---|---|---|---|
| Professional machining and calibration work | Mitutoyo 500-series Digimatic, 150 mm | 0.01 mm / 0.0005 in | Approximately ±0.02 mm | Usually $150–$300 |
| PC modding, 3D printing, and general workshop use | iGaging IP54 electronic caliper | 0.01 mm / 0.0005 in | Approximately ±0.02–0.03 mm | Usually $40–$100 |
| Occasional household measurements | Neiko 01407A or similar stainless-steel caliper | 0.01 mm / 0.0005 in | Approximately ±0.03–0.05 mm | Usually $20–$40 |
| Large parts and fabrication | 200–300 mm digital caliper | 0.01 mm / 0.0005 in | Often ±0.03–0.05 mm | Usually $50–$180 |
Resolution is the smallest displayed increment, not the same thing as accuracy. A caliper showing 0.01 mm may still be several hundredths of a millimeter away from the true dimension. For PC brackets, fan mounts, cable passthroughs, and printed parts, a dependable ±0.03 mm caliper is usually sufficient. For bearing fits, precision-machined spacers, and quality-control work, pay more for better manufacturing, calibration, and repeatability.
Top choice: Mitutoyo 500-series Digimatic
Mitutoyo’s 500-series Digimatic calipers are the safest choice when measurement reliability matters more than the lowest purchase price. The common 150 mm version combines 0.01 mm metric resolution with inch display capability, hardened stainless-steel measuring surfaces, a rigid beam, and a smooth thumb roller.
The important advantage is not merely the number printed on the specifications sheet. The jaws tend to close with less play, the slide feels more consistent, and repeated measurements are less sensitive to small changes in hand pressure. That matters when checking whether a 3D-printed bracket is actually uniform or whether a replacement screw, standoff, or heat sink will fit a tight opening.
Choose the standard 150 mm model unless you regularly measure objects wider than about 120 mm. Longer 200 mm and 300 mm versions provide more reach but are heavier, more expensive, and easier to flex if pressure is applied carelessly.
Why it costs more
- Better jaw alignment and less slide looseness.
- More consistent repeatability over repeated readings.
- Hardened stainless-steel contact surfaces that resist wear.
- A clearer, more dependable metric-imperial switching system.
- Better documentation and a stronger calibration ecosystem.
Best mid-range option: iGaging IP54 calipers
iGaging IP54 digital calipers are a practical middle ground for enthusiasts. Their sealed design is better suited to dusty workshops than an unsealed bargain caliper, and many models offer a large display, thumb wheel, zeroing at any position, and switching between millimeters and inches.
These calipers are especially useful for PC work because a large display can be read while holding a component in the other hand. Look for a model with hardened stainless-steel jaws, a lock screw, depth rod, and a stated accuracy of approximately ±0.02 or ±0.03 mm. “IP54” indicates protection against limited dust ingress and splashing; it does not make the tool waterproof or safe to rinse under a tap.
For everyday projects, the main compromise compared with Mitutoyo is long-term consistency. A mid-range caliper can provide excellent readings, but check it against known references more often and replace it if the slide develops noticeable side-to-side movement.
Best budget choice: Neiko 01407A and similar stainless-steel models
The Neiko 01407A is a reasonable low-cost choice for occasional measurements such as checking screw diameters, case-panel thickness, desk clearances, and 3D-print dimensions. Its stainless-steel construction is preferable to very light plastic-bodied calipers, which can flex and produce misleading readings.
Budget calipers are most useful when the measurement is not near a critical tolerance. For example, measuring a 25 mm cable hole to decide whether a grommet will fit is well within their comfort zone. They are less suitable for determining whether a shaft is exactly 10.00 mm or whether a bearing seat has a few hundredths of a millimeter of clearance.
Before buying, check that the jaws meet evenly, the display returns to zero, and the metric and inch readings change correctly. Some inexpensive models consume batteries quickly or wake when moved, so battery access and automatic shutoff are worth considering.
How to choose the right digital caliper
1. Match accuracy to the tolerance
Start with the tolerance of the part, not the advertised resolution. If a part must fit within ±0.10 mm, a caliper rated around ±0.03 mm leaves a useful margin. If the acceptable tolerance is only ±0.02 mm, a typical digital caliper is not enough; use a micrometer, gauge blocks, or a more specialized instrument.
For general PC building and gaming hardware, the caliper is excellent for dimensional planning but should not be treated as a final authority for precision machining. It can tell you whether a graphics card is likely to fit a case, but it cannot replace a proper gauge when manufacturing tolerances are extremely tight.
2. Prefer hardened stainless-steel jaws
Jaw material affects both durability and repeatability. Hardened stainless steel resists scratches and edge wear, while soft or poorly finished jaws can gradually develop burrs. Inspect the inside measuring faces: they should be flat, smooth, and free from visible gaps when closed.
Use the outside jaws for thickness and diameter, inside jaws for openings, and the depth rod for holes and recesses. Do not twist the tool inside a hole; side loading can make the reading appear larger and can damage the rod.
3. Treat display size as a usability feature
A large, high-contrast display is more useful than an extra decimal place if you often measure inside a dark PC case. Auto-off saves battery power, while a hold function can preserve a reading after removing the tool. A thumb roller and lock screw also help when repeating a measurement.
Metric-imperial switching should be controlled by a physical button that changes the display without moving the jaws. Confirm that the tool displays the correct unit before recording a value. An inch reading rounded to four decimal places can appear more precise than it really is, so retain the stated accuracy of the tool when making decisions.
4. Check battery design and power consumption
Most digital calipers use a small button cell, commonly an LR44-type battery or a silver-oxide equivalent. Battery life varies widely because auto-off behavior, display size, and sensor electronics differ between models.
Here is a practical power-budget estimate. Suppose a caliper draws 20 microamps while active, is used for 30 minutes per day, and draws only 1 microamp while in standby for the remaining 23.5 hours. The daily consumption is:
Active use: 0.020 mA × 0.5 hours = 0.010 mAh.
Standby use: 0.001 mA × 23.5 hours = 0.0235 mAh.
Total: approximately 0.0335 mAh per day, or about 12.2 mAh per year. A nominal 150 mAh cell could theoretically last more than 12 years under those assumptions, but real batteries self-discharge, voltage falls, and many calipers draw considerably more current. In practice, several months to a few years is a more sensible expectation. Remove the battery if storing the caliper for a long period.
Decision matrix for common gaming and workshop projects
| Your situation | What to buy | Why |
|---|---|---|
| Checking GPU clearance and case openings | 150 mm mid-range caliper | Good reach, readable display, and adequate accuracy |
| Designing a replacement bracket for 3D printing | IP54 stainless-steel model | Dust resistance and repeatable measurements are useful around filament debris |
| Measuring bearings, shafts, or machined spacers | Mitutoyo 500-series plus a micrometer | The caliper is convenient, but the micrometer handles tighter tolerances |
| Measuring large radiators or custom panels | 200–300 mm model | Extra jaw depth prevents awkward extensions and estimates |
| Using the tool only a few times each year | Budget stainless-steel model | Lowest cost, provided you verify zero and jaw alignment first |
How to get repeatable readings
- Wipe the jaws and the part before measuring. Dust can add several hundredths of a millimeter.
- Close the jaws gently until they contact the part; do not squeeze, especially on plastic.
- Keep the jaws square to the surface. A tilted caliper measures a diagonal rather than the true width.
- Take three readings, opening and repositioning the tool each time.
- If the results vary by more than the tolerance you care about, inspect jaw alignment, slide play, dirt, and measuring pressure.
- Zero the caliper after closing the jaws, but never assume zeroing corrects a damaged or worn tool.
For a quick accuracy check, measure a known object such as a certified gauge block or a new precision drill shank. A nominal 10.00 mm reference that repeatedly reads 10.02, 10.03, and 10.02 mm indicates a small offset but good repeatability. Readings of 9.98, 10.04, and 10.01 mm suggest technique, jaw alignment, or slide-play problems.
Frequently asked questions
Can a digital caliper measure both inside and outside dimensions?
Yes. Use the outside jaws for thickness and diameter, the inside jaws for openings, and the depth rod for holes and recesses. Avoid twisting the tool inside a hole, since side loading can affect the reading and damage the rod.
Can I use a digital caliper to check whether a graphics card will fit in my case?
Yes, it can help you check whether a graphics card is likely to fit. It is useful for dimensional planning, but it should not be treated as a final authority when manufacturing tolerances are extremely tight.
How can I tell if a budget caliper is working properly?
Check that the jaws meet evenly, the display returns to zero, and the metric and inch readings change correctly. Also inspect the measuring faces for visible gaps, scratches, or burrs, which can affect durability and repeatability.
Is an IP54 digital caliper waterproof?
No. IP54 indicates protection against limited dust ingress and splashing, but it does not make the caliper waterproof or safe to rinse under a tap. Its sealed design is better suited to dusty workshops than an unsealed bargain caliper.
Should I remove the battery when storing a digital caliper?
Yes, remove the battery if you plan to store the caliper for a long period. Battery life varies with the model’s auto-off behavior, display, and sensor electronics, and the article notes that real batteries also self-discharge.
Final verdict
Buy a Mitutoyo 500-series Digimatic if you need the best digital calipers for dependable accuracy, repeatability, and long-term service. Choose an iGaging IP54 model for most PC building, 3D printing, and hobby workshop tasks, and select a Neiko 01407A or comparable stainless-steel budget caliper for occasional, non-critical measurements. Whatever the price, correct technique, clean jaws, sensible tolerances, and regular reference checks matter more than a display that simply shows extra digits.