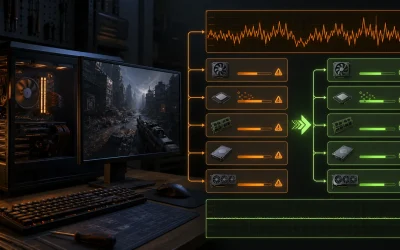
Fix PC overheating by first identifying which specific component is actually running hot using a monitoring tool during real gameplay load, then working through the most common causes in order of likelihood: dust buildup, poor case airflow direction, degraded thermal paste, and cooler mounting pressure. Most overheating cases trace back to one of these four causes rather than requiring a full hardware replacement.
Owen Pritchard treats overheating tickets the same way on his diagnostics bench every time: confirm the actual temperatures with data rather than guessing from a hot-feeling case exterior, then eliminate causes methodically rather than reapplying thermal paste as a first resort before checking simpler explanations. This guide walks through diagnosis, the most common fixes, and what to do if a PC is shutting down from heat.
As an Amazon Associate we earn from qualifying purchases at no extra cost to you. Product prices and availability are accurate as of the date shown and are subject to change.




Top 3 picks at a glance
What Actually Counts As Overheating: Real Temperature Thresholds
“Overheating” is a specific, measurable condition, not just a PC that feels warm to the touch, and the temperature that qualifies varies by component. Modern CPUs, including AMD Ryzen and Intel Core desktop chips, are generally rated to operate safely up to somewhere between 90-100°C depending on the specific model, with the chip’s own protection automatically throttling clock speed once it approaches that ceiling to prevent damage. The practical concern isn’t hitting 100°C briefly during a demanding load spike, it’s sustaining temperatures near that ceiling for extended periods, which indicates cooling capacity is genuinely insufficient for the chip’s heat output.
GPUs have similar but somewhat lower typical ceilings, with most modern cards throttling in the 83-90°C range depending on the specific model and vendor’s thermal design. NVIDIA and AMD both publish a specific throttle temperature for each GPU model in their technical specifications, and checking your specific card’s rated limit is more accurate than relying on a generic number, since limits vary meaningfully between a compact single-fan card and a larger triple-fan design of the same GPU chip.
The table below gives realistic reference ranges for common gaming PC components under sustained load, useful for a quick sanity check against your own monitored readings.
| Component | Normal Under Load | Concerning | Throttling/Danger Zone |
|---|---|---|---|
| Desktop CPU (Ryzen/Core, air or AIO cooled) | 60-80°C | 80-90°C | 90°C+ |
| Desktop GPU | 65-78°C | 78-85°C | 85°C+ |
| VRM/motherboard power stages | Under 70°C | 70-90°C | 90°C+ |
| NVMe SSD | Under 55°C | 55-70°C | 70°C+ (thermal throttling) |
These ranges assume a reasonably built system with adequate case airflow and a cooler appropriately sized for the CPU or GPU’s power draw; a high-end 240mm+ AIO cooler should keep a demanding CPU comfortably in the “normal” range under most gaming loads, while a small stock cooler on a high-power CPU may run in the “concerning” range even when functioning correctly, simply because it’s undersized for that specific chip’s heat output.
Idle temperatures matter less than load temperatures for diagnosing a real problem, since idle readings vary widely based on ambient room temperature and case design without necessarily indicating an issue; the meaningful diagnostic data comes from monitoring temperatures during 15-30 minutes of actual demanding gameplay or a stress test, not a brief glance at desktop idle numbers.
Diagnosing Which Specific Component Is Actually Overheating
Before applying any fix, confirm which component is actually the problem using a monitoring tool, since guessing based on case exterior temperature or general system sluggishness frequently leads to fixing the wrong thing. HWiNFO provides comprehensive sensor readings for CPU, GPU, motherboard VRMs, and storage simultaneously in one interface, while MSI Afterburner’s on-screen display overlay shows key temperatures directly during actual gameplay, which is more useful than checking temperatures only at the desktop.
Run a demanding game or a dedicated stress test (Cinebench for CPU, a GPU-specific tool like FurMark or 3DMark’s stress test for GPU) for at least 15-20 minutes while monitoring, since some thermal problems only manifest after sustained load builds up heat throughout the case, not within the first few minutes of a session. A brief 2-minute test can miss a genuine problem that only appears once the whole system has thermally saturated.
Compare your readings against the reference table above and against your specific component’s rated specifications, available on the manufacturer’s product page, since a generic “too hot” impression without a specific number to compare against makes it impossible to confirm whether there’s an actual problem or the system is simply running within normal, if warm, parameters for a demanding modern gaming PC.
Pay attention to the pattern of the temperature rise, not just the peak number: a CPU that climbs steadily to 95°C and stays there throughout a session indicates a genuine sustained cooling deficit, while a brief spike to 90°C during a specific demanding scene followed by a drop back to 75°C is a normal response to a temporary load spike and less concerning on its own.
If both CPU and GPU show elevated temperatures simultaneously, and neither was previously running hot under the same workload, the cause is more likely a whole-system issue (case airflow, ambient room temperature, dust buildup throughout the case) rather than a component-specific cooler problem, which should guide which fix category to investigate first.
Case Airflow: Getting Intake And Exhaust Balance Right
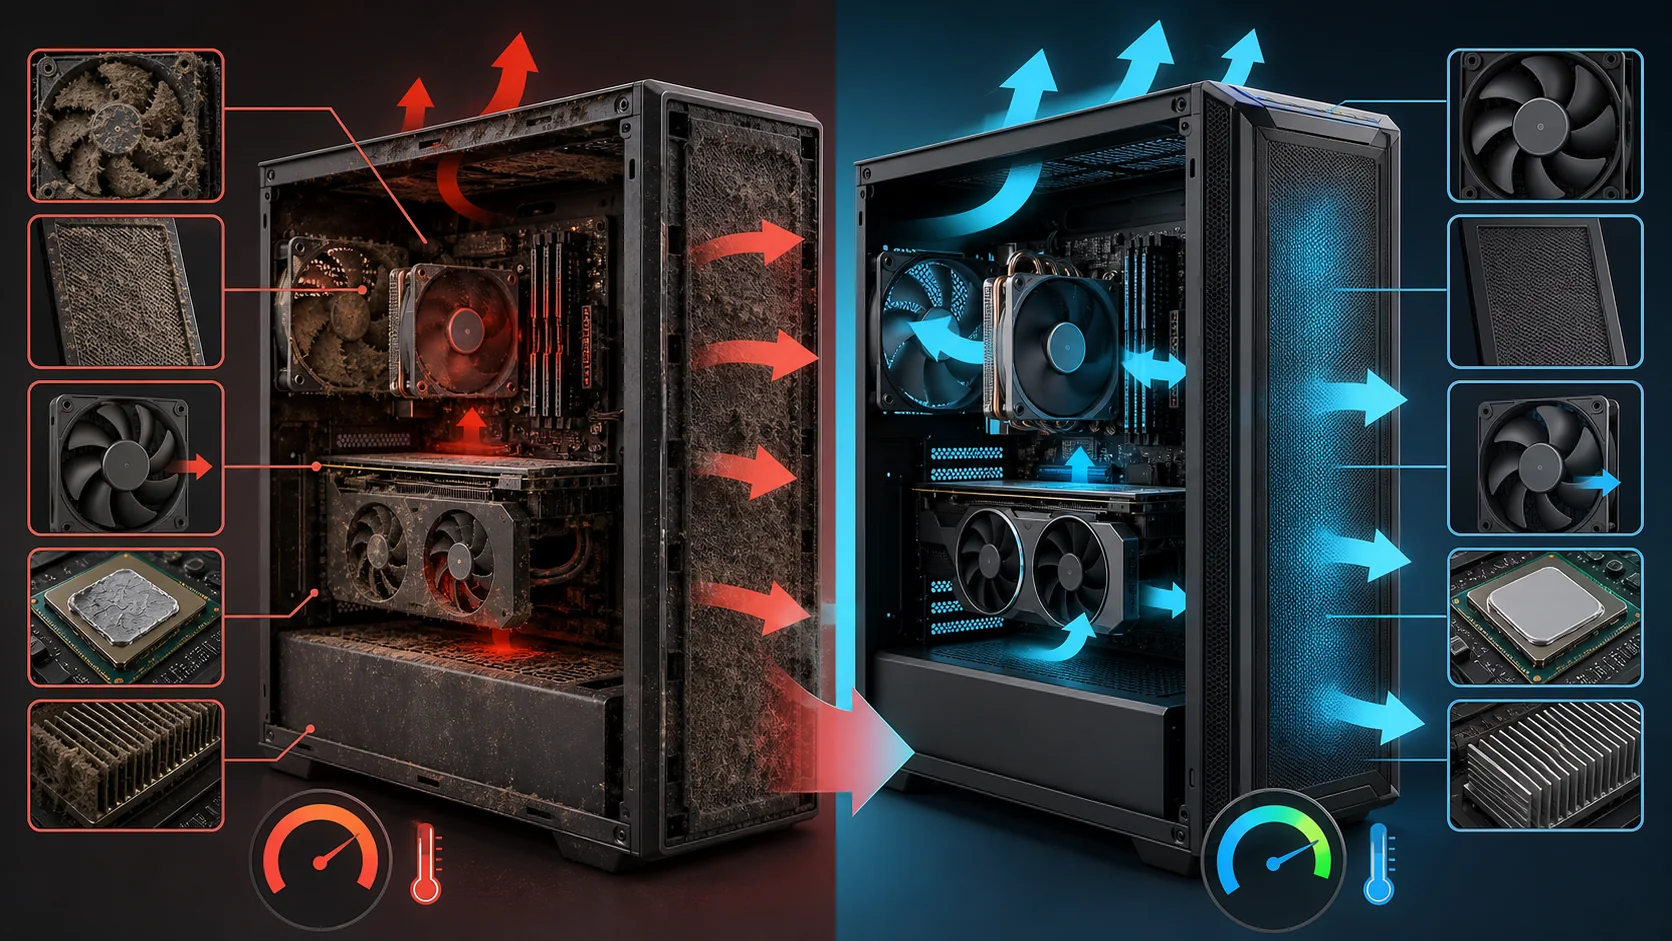
Case airflow works on a simple principle that’s frequently misapplied: cool air needs a clear path in, and hot air needs a clear path out, with fans configured to support that direction rather than working against each other. A common mistake is having front intake fans and top exhaust fans both pulling air in the same general direction without a clear overall path, or having more exhaust than intake capacity, which creates negative pressure that pulls dust in through every unfiltered gap in the case rather than through the intended, filtered intake fans.
A standard, effective configuration for most mid-tower cases uses front and possibly bottom fans as intake, and rear and top fans as exhaust, creating a front-to-back and bottom-to-top airflow path that naturally follows how hot air rises while sweeping fresh air across the components generating the most heat (CPU and GPU) along the way. This isn’t the only valid configuration, but it’s a reliable default for a typical ATX case layout.
Slightly positive case pressure, meaning marginally more intake airflow than exhaust airflow, is generally preferable to negative pressure because it forces air to enter primarily through filtered intake points rather than being pulled in through unfiltered gaps and cutouts throughout the case, which reduces dust accumulation on internal components over time even though it has a smaller direct effect on temperatures themselves.
Cable management, while often treated as a cosmetic concern, has a real airflow impact: a case interior with loose cables draped across the main airflow path between intake and exhaust fans creates physical obstruction that measurably reduces effective airflow, particularly in smaller cases with less open internal volume to begin with. Routing cables behind the motherboard tray or bundling them away from the direct fan-to-component airflow path is a low-cost fix with a real thermal benefit.
Case fan quantity and size also matter: two or three well-placed 120mm or 140mm fans generally outperform a larger number of smaller, cheaper fans in both airflow volume and noise level, since larger fans move more air per rotation at lower RPM than small fans working harder to move the same volume, making fan size worth prioritizing over simply adding more fans to a poorly ventilated case.
Dust Buildup: The Most Common Silent Cause Of Gradual Overheating
Dust accumulation is the single most common cause of a PC’s temperatures gradually creeping up over months of use without any other change to the system, and it’s frequently overlooked because the process is slow enough that users don’t notice the gradual shift compared to a sudden, obvious cause. A heatsink or radiator with a heavily dust-clogged fin stack can show a 10-20°C temperature increase compared to the same hardware clean, since dust physically blocks the airflow through the narrow fin gaps where heat actually transfers from metal to moving air.
Dust accumulates fastest on components directly in an intake airflow path (front intake fans, CPU cooler if positioned to pull air from the front of the case, and any exposed radiator or heatsink fins) and in dead zones with reduced airflow where dust settles rather than being carried through and out the case. Homes with pets, carpeted rooms, or systems positioned on the floor rather than a desk tend to accumulate dust noticeably faster than average.
Cleaning frequency should scale with environment: a typical household system benefits from a thorough dust cleaning every 3-6 months, while systems in dustier environments (near construction, in a garage, in a home with pets shedding heavily) may need attention as often as monthly to prevent buildup from meaningfully affecting temperatures between cleanings.
Effective cleaning uses compressed air held at a safe distance to blow dust out of fin stacks and fan blades, ideally performed outdoors or in a well-ventilated area to avoid redistributing dust back into the room, combined with holding fans still (they can spin fast enough under compressed air pressure to generate excess voltage and potentially damage the fan’s bearing or controller) while cleaning them. A soft brush helps dislodge more stubborn, compacted dust that air alone doesn’t fully clear, particularly on CPU cooler fin stacks with tight spacing.
Dust filters on intake fans, standard on most modern cases, need their own separate cleaning since a clogged filter reduces intake airflow even if the components behind it are relatively clean, effectively creating the same restriction problem at an earlier point in the airflow path. Most filters can be removed and rinsed or vacuumed independently of a full internal cleaning session, and checking them monthly is a low-effort habit that prevents them from becoming a bottleneck.
Thermal Paste: When Reapplication Actually Helps
Thermal paste fills microscopic imperfections between the CPU’s integrated heat spreader and the cooler’s contact surface, both of which appear smooth to the eye but have enough surface irregularity at a microscopic level that direct metal-to-metal contact would leave significant air gaps, and air is a poor heat conductor compared to a properly applied paste layer. Degraded, dried-out, or improperly applied paste is a real and common cause of elevated temperatures, but it’s also frequently blamed for problems actually caused by dust or airflow issues covered earlier in this guide.
Most quality thermal pastes remain effective for 2-4 years under normal conditions before meaningfully degrading, though pastes marketed as “high-performance” liquid metal or certain lower-quality budget pastes can behave differently, either lasting longer (liquid metal, though with its own handling risks) or degrading faster (some budget pastes prone to drying out within 1-2 years). If a system’s temperatures have crept up gradually over a year or more with dust and airflow already ruled out or addressed, paste degradation becomes a reasonable next suspect.
Reapplication involves removing the cooler, cleaning off the old paste completely from both the CPU’s heat spreader and the cooler’s contact plate using isopropyl alcohol (90%+ concentration) and a lint-free cloth or coffee filter, then applying a fresh, appropriately sized amount of new paste, commonly a pea-sized dot in the center for most modern coolers with sufficient mounting pressure to spread it evenly, though some cooler manufacturers recommend a specific spread pattern worth checking against your specific cooler’s instructions.
Over-application is a more common mistake than under-application; too much paste can squeeze out the sides during mounting and, in rare cases, spread onto motherboard components if it’s electrically conductive paste (most standard silicone-based pastes are not conductive, but liquid metal pastes specifically are and require more careful, minimal application). Under-application leaves gaps that don’t get filled during the mounting pressure’s spread, which can leave a section of the CPU with genuinely poor thermal contact.
Reseating the cooler with fresh, correctly applied thermal paste is one of the more involved fixes on this list, requiring the cooler to be fully removed and remounted, so it’s worth confirming through monitoring that dust and airflow aren’t the actual explanation before committing the time to this step, particularly for AIO liquid coolers where remounting is more involved than a simple air cooler.
CPU Cooler-Specific Issues: Air Coolers And AIO Pumps
Air coolers rely entirely on mounting pressure, contact surface flatness, and fan performance to move heat, and a loose mount, even one that’s still technically attached, can create uneven contact pressure across the CPU’s heat spreader that produces higher temperatures than a properly torqued mount, even with otherwise identical paste and hardware. Checking that all mounting screws or clips are evenly and fully tightened according to the cooler manufacturer’s specified torque or tightening pattern (typically a diagonal, alternating pattern similar to tightening lug nuts on a wheel) resolves uneven pressure issues.
AIO (all-in-one liquid) coolers introduce a component air coolers don’t have: a pump, which can degrade or fail independently of the radiator and fans. A failing pump typically shows as CPU temperatures that are unusually high relative to the radiator fans clearly spinning and the radiator itself feeling only mildly warm rather than hot, since coolant isn’t circulating effectively to carry heat from the CPU block to the radiator for the fans to actually dissipate.
AIO pump noise, a distinct grinding, rattling, or buzzing sound different from normal fan noise, is often an early warning sign of pump wear or air bubbles trapped in the loop, both of which can precede a more significant cooling capacity drop. Most AIO coolers have a limited useful lifespan, commonly 5-7 years, after which pump degradation becomes more likely regardless of how well the system has been maintained otherwise.
Radiator fin clogging affects AIO coolers the same way it affects any heatsink, and because AIO radiators are often mounted at the top or front of a case with less visible, easy access than an air cooler’s more exposed fin stack, radiator dust buildup can go unnoticed longer, making it worth specifically checking during any dust cleaning session even if it’s not the first thing you’d think to inspect.
For systems where an AIO pump is confirmed failing through the temperature and noise symptoms described, replacement of the entire AIO unit is typically necessary rather than a component-level repair, since AIO loops are sealed, factory-filled systems not designed for field servicing or coolant top-up by end users in the way older, more involved custom liquid cooling loops were.
GPU-Specific Overheating Causes
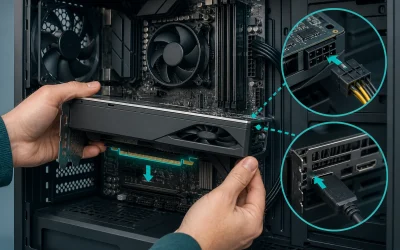
GPU cooling differs from CPU cooling primarily in that the entire cooler, fans, heatsink, and often a backplate, is a single integrated unit specific to that card, meaning most GPU thermal problems trace back to dust accumulation on the card’s own fin stack, thermal paste or pad degradation between the GPU die and its cooler (less common than CPU paste issues but does happen on older cards), or fan bearing wear causing reduced airflow despite the fan appearing to spin normally.
GPU sag, where a heavy card’s weight causes it to tilt downward in its PCIe slot over time, doesn’t directly cause overheating on its own but can affect airflow patterns within the case in a way that reduces cooling efficiency, and it’s also a mechanical stress concern for the PCIe slot itself. A GPU support bracket, either a purpose-built accessory or a simple improvised support, addresses this and indirectly helps maintain the card’s intended airflow orientation.
Multi-fan GPU coolers can develop a specific problem where one fan fails or slows significantly while others continue operating normally, which is easy to miss on a quick visual check but shows up clearly as elevated temperatures despite fans appearing to be spinning; software monitoring tools that report individual fan RPM, rather than just an aggregate cooling status, help catch this specific failure mode.
Case positioning affects GPU cooling more than CPU cooling in some layouts, since a GPU positioned close to the case’s bottom or front panel with restricted clearance can struggle to pull in fresh air if the case’s front panel design restricts airflow (some front panels prioritize a solid aesthetic look over open mesh, which measurably reduces intake airflow available to both case fans and adjacent GPU fans).
Undervolting the GPU, reducing its voltage slightly below stock while maintaining similar clock speeds through software tools like MSI Afterburner, is a software-side option worth considering for GPUs running hot even after physical fixes are addressed, since a well-tuned undervolt can reduce both power draw and temperatures by a meaningful margin with little to no performance loss, though it requires some testing to find a stable configuration for your specific card.
Ambient Room Temperature And Case Placement
Ambient room temperature sets a hard floor under which all other cooling measures operate; a PC in a room at 30°C (86°F) will run every component several degrees hotter than the identical PC in a room at 20°C (68°F), simply because the coolant, air, and metal throughout the cooling system all start from a higher baseline temperature with less capacity to absorb additional heat before reaching a given threshold.
Case placement within a room matters more than many builders account for: a case pushed directly against a wall, inside an enclosed desk cubby with no airflow clearance, or positioned in direct sunlight through a window all restrict the fresh air supply available to intake fans, effectively raising the local ambient temperature the system draws from even if the room’s overall temperature seems reasonable. Leaving at least 10-15cm of clearance around intake and exhaust vents, and avoiding fully enclosed furniture placement without ventilation cutouts, meaningfully helps.
Seasonal temperature swings, particularly in homes without consistent air conditioning, can shift a system from comfortably cool in winter to noticeably hotter in summer using identical hardware and settings, which is worth recognizing as an environmental factor rather than assuming something has changed or failed within the PC itself when temperatures rise specifically during warmer months.
For systems in genuinely difficult thermal environments (unconditioned rooms in hot climates, enclosed furniture placements that can’t be changed), more aggressive cooling investments, larger radiators, higher static-pressure fans, or simply accepting a somewhat more conservative performance profile through undervolting or a slight power limit reduction, may be more practical than chasing a hardware fix for what’s fundamentally an environmental constraint.
Software And BIOS Fan Curve Tuning
Default fan curves set by motherboard manufacturers and GPU vendors are often conservative, prioritizing quiet operation at moderate loads over maximum cooling performance, which can leave meaningful cooling capacity unused simply because fans aren’t ramping up aggressively enough in response to rising temperatures. Adjusting fan curves through the motherboard’s BIOS/UEFI fan control settings, or through a dedicated software utility, to ramp more aggressively at lower temperature thresholds can meaningfully improve sustained load temperatures at the cost of somewhat higher noise.
Most motherboard BIOS interfaces provide a graphical fan curve editor where you set target fan speed percentages at specific temperature checkpoints, and a more aggressive curve (higher fan speed at lower temperatures) trades some acoustic comfort for better sustained cooling, a reasonable trade for users specifically troubleshooting an overheating issue rather than optimizing for silence.
GPU fan curves are typically adjusted through the vendor’s own software (NVIDIA App, AMD Adrenalin) or third-party tools like MSI Afterburner, following the same principle: a more aggressive curve improves sustained cooling at the cost of fan noise, and testing a custom curve during a demanding gaming session shows whether the tradeoff is worthwhile for your specific noise tolerance and thermal needs.
Case fan curves, controlled either through the motherboard’s fan headers via BIOS or through case-specific control software for RGB/smart case fans, should generally be configured to respond to case or CPU temperature rather than running at a single fixed speed regardless of load, ensuring intake and exhaust capacity scales with actual cooling demand rather than being either unnecessarily loud at idle or insufficient under load.
It’s worth revisiting fan curve settings after any physical change to the system, dust cleaning, thermal paste reapplication, or a new cooler installation, since the optimal curve for a system running 10°C cooler after a cleaning may reasonably be adjusted to be quieter without sacrificing the temperature headroom the cleaning itself provided.
Troubleshooting: A PC That Shuts Down From Overheating
A PC that shuts down unexpectedly specifically during demanding tasks, rather than randomly at idle, is a strong indicator of a genuine thermal protection shutdown rather than a power supply or other unrelated fault, and should be addressed methodically rather than assumed to require immediate hardware replacement.
First, check the system’s error logs (Windows Event Viewer, or the motherboard’s own logged thermal events if available) for any recorded critical temperature event around the time of the shutdown, which confirms whether the shutdown was genuinely thermal in nature rather than coincidentally timed with a different underlying issue like a power delivery fault.
Second, open the case and visually inspect for the most common causes covered in this guide: heavy dust buildup on the CPU cooler, GPU, and any radiator, a CPU cooler that’s become loose or disconnected from its mounting, and confirm all case and cooler fans are actually spinning when the system is powered on, since a completely stopped fan (from a failed bearing or a disconnected cable) is a straightforward and common cause of a sudden severe overheating shutdown.
Third, if fans are spinning and the cooler is securely mounted with no obvious dust blockage, run a monitoring tool immediately upon boot and watch temperatures climb during a controlled, moderate stress test rather than jumping straight to the demanding game or task that originally triggered the shutdown, to identify at what temperature and how quickly the concerning rise happens in a more controlled, observable setting.
Fourth, if temperatures climb unusually fast (reaching throttle or shutdown temperatures within seconds of load starting, rather than gradually over several minutes) this pattern points more strongly toward a mounting or thermal paste contact failure (effectively no functional heat transfer happening at all) rather than a capacity issue where the cooler is working but simply insufficient, and remounting the cooler with fresh paste following the earlier section’s steps is the appropriate next action.
If a careful cleaning, remount, and fan curve check all fail to resolve shutdown behavior, and temperatures are confirmed high through monitoring rather than being a red herring, the cooler itself may be genuinely undersized for the CPU or GPU’s actual power draw (common after a GPU or CPU upgrade without a corresponding cooling upgrade), warranting a cooler upgrade rather than further troubleshooting of the existing one.
Frequently Asked Questions
What CPU and GPU temperatures actually count as overheating?
Sustained CPU temperatures above 85-90°C under gaming load and GPU temperatures above 83-85°C are generally considered the point where thermal throttling begins on most modern chips, though brief spikes to these levels during heavy load aren’t automatically a problem if temperatures drop back down once the load eases.
How do I know if it’s my CPU or GPU that’s overheating?
Run a monitoring tool like HWiNFO or MSI Afterburner’s on-screen display during gameplay and watch both temperatures simultaneously, since a CPU running hot while the GPU stays cool points to CPU cooling issues, and the reverse pattern points to the GPU, rather than assuming one or the other without checking.
Does dust really make that much difference to temperatures?
Yes, a heavily dust-clogged heatsink or radiator can raise temperatures by 10 to 20°C compared to a clean one, since dust acts as an insulating layer that blocks airflow through the fins where heat transfer actually happens, making it one of the most common and easily fixed causes of gradual overheating.
How often should thermal paste be replaced?
Most quality thermal pastes remain effective for 2 to 4 years under normal use, though pump-out effects on some AIO coolers and paste that’s dried out or degraded can cause a noticeable temperature rise sooner, making a check worthwhile if temperatures have crept up gradually over a year or more with no other explanation.
Is it normal for a laptop to run hotter than a desktop PC?
Yes, laptops have inherently less physical space for heatsinks, fans, and airflow paths than a desktop case, so laptop CPUs and GPUs are commonly tuned to run closer to their thermal limits by design, though the same dust, airflow, and paste troubleshooting steps still apply when a laptop’s temperatures exceed its own normal baseline.
For the cleaning and maintenance tools referenced throughout this guide, see our best PC cleaning kit and best PC dust filters roundups. If a full remount is on the table, our best thermal paste guide compares the options mentioned here, and best diagnostic tools for gaming PC covers the monitoring software used to confirm results before and after any fix.