
Yes, building a PC is easy enough for most beginners: modern parts are keyed so they only fit one way, the steps are a handful of repeatable actions, and the whole job usually takes a first-timer between three and six hours including cable routing and Windows installation. It is not effortless, though. The difficulty comes from choosing compatible parts and from five specific steps where first-time builders most often stumble. If you can follow a written manual, use a screwdriver and stay patient, you can do it.
This guide gives an honest assessment: how difficult each stage is, how long it takes, which tools you need, the five places beginners fail and how to avoid them, and the situations where buying a prebuilt PC is the smarter choice.
As an Amazon Associate we earn from qualifying purchases at no extra cost to you.


Our Top Picks


Top 3 picks at a glance
Quick answer
| Question | Honest answer |
|---|---|
| Is it easy for a beginner? | Yes, if you plan compatible parts and follow manuals |
| Which part is hardest? | Choosing compatible parts, not assembling them |
| How long does it take? | About 3 to 6 hours the first time |
| What tools? | A Phillips screwdriver and a few cable ties |
| Can I break something? | Yes, but damage is rare if you avoid force, static and bent socket pins |
| Is it cheaper than a prebuilt? | Sometimes; it depends on current prices and sales |
| When should I buy a prebuilt instead? | When you value time and a single warranty more than choice |
Why building a PC is easier than it looks
A desktop PC is a set of standard modules. The manufacturers of processors, boards, memory and power supplies follow common standards, so the parts connect with a small number of well-defined connectors. Most connectors are keyed, which means they have a shape that only lets them go in one way: the 24-pin motherboard cable, the SATA connectors, the memory modules and the processor itself.
- Few tools. A single Phillips screwdriver handles almost every screw. Many cases and boards also include the screws you need.
- Good documentation. Motherboard and case manuals include diagrams for each connector.
- Standard layout. The sequence is nearly always the same: processor, memory, storage, cooler, board in case, power, graphics card, front panel cables.
- Visible feedback. RAM clicks, power cables click, and most boards have small lights that tell you where a start-up problem is.
The other side of the story is that a mistake can be expensive. A bent socket pin on an LGA socket, a missing CPU power cable that you only find after mounting everything or a graphics card that does not fit the case all cost time or money. That is why planning and slow, careful assembly matter more than skill.
How long does it take?
| Stage | First-time estimate | Experienced builder | What takes the time |
|---|---|---|---|
| Planning and checking compatibility | 2 to 10 hours (spread over days) | 30 to 60 minutes | Reading spec pages, comparing sizes |
| Unboxing and prep | 20 to 30 minutes | 10 minutes | Laying out parts, reading manuals |
| Installing CPU, RAM, SSD and cooler on the board | 30 to 60 minutes | 15 minutes | Careful CPU placement and cooler mounting |
| Mounting in the case, power and cables | 60 to 120 minutes | 30 to 45 minutes | Cable routing and front panel header pins |
| First boot, BIOS update, memory profile | 20 to 40 minutes | 10 minutes | Waiting for memory training, BIOS updates |
| Windows 11 installation, drivers, updates | 45 to 90 minutes | 30 to 45 minutes | Downloads and restarts |
| Total build and setup | 3 to 6 hours | 1.5 to 2.5 hours |
These figures are typical ranges drawn from beginner guides and manufacturer instructions, not measurements from a specific build. Plan a full afternoon or evening, and do not try to finish in a rush before a deadline.
What tools do you need?
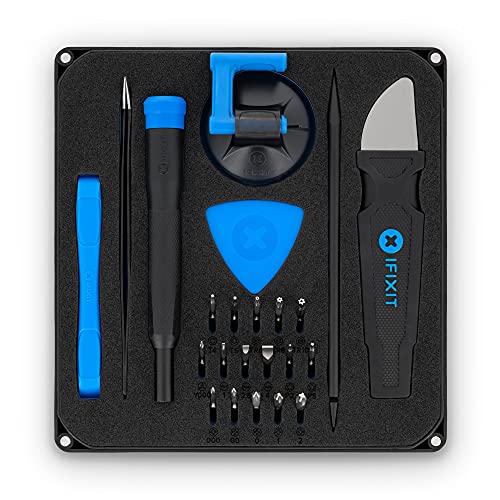
| Item | Required? | Use |
|---|---|---|
| Phillips #2 screwdriver (magnetic tip helps) | Yes | Case, board, drive and cooler screws |
| Small Phillips screwdriver (#0 or #1) | Often | M.2 SSD screw, small board screws |
| Cable ties or hook-and-loop straps | Recommended | Tidy cables for airflow |
| Flashlight or phone light | Recommended | See inside the case |
| Flat work surface (table, not carpet) | Yes | Building the board outside the case |
| USB flash drive (8 GB or more) | Yes, for Windows | Windows 11 installer |
| Second device with internet | Yes | Make the installer, download BIOS and drivers |
| Anti-static wrist strap | Optional | Touching bare case metal is a common alternative |
| Thermal paste | Usually not | Most coolers include it |
You do not need soldering, special glue or specialised measuring equipment. Windows 11 can be installed from a USB drive created with Microsoft’s Media Creation Tool, and a licence can be entered later.
The five steps where beginners fail
Most failed first builds come from the same few mistakes. Knowing them in advance is the best protection.
1. Choosing incompatible parts
This is the number one problem and it happens before any assembly. A processor must match the motherboard socket (AM5 for current AMD desktop chips, LGA1851 for Intel Core Ultra 200S), memory must match the board (DDR5 on those platforms), the case must hold the board size, and the graphics card must fit the case and the power supply must have the right connectors.
How to avoid it: use a parts-list tool to flag mismatches, then confirm on manufacturers’ pages. Check the motherboard’s CPU support list for the minimum BIOS version, and prefer a board with a BIOS flashback button if your processor is newer than the board.
| Check | Where to look |
|---|---|
| CPU and board socket match | Both product pages |
| BIOS supports the CPU | Board maker’s CPU support list |
| RAM type and slots | Board spec page |
| GPU length versus case | Case and card spec pages |
| Cooler height versus case | Case and cooler spec pages |
| PSU wattage and connectors | Graphics card maker’s recommendation |
2. Installing the CPU and cooler badly
The processor goes in with no force. Match the triangle on the corner of the processor to the marker on the socket, lower it in, and close the lever or frame. Forcing it can bend pins on an LGA socket, which is hard to repair. For the cooler, remove any plastic film from its base, apply paste as the manual says (a pea-sized amount, or none if it is pre-applied), and tighten the screws in a cross pattern in small turns so pressure is even.
How to avoid it: read the socket section of the board manual first, work in good light, and do not touch socket pins.
3. Seating RAM and power cables only halfway
RAM needs firm pressure until both clips click. The 24-pin and the CPU 8-pin (4+4) cables need to be fully inserted, and the graphics card power cables must click all the way in. A half-seated module or cable is the top reason a new PC shows a black screen.
How to avoid it: after you install each, push once more and look at the clips. Use the slots the manual recommends for two memory modules.
4. Mistakes with the case and front panel cables
The tiny front panel connectors for the power switch, reset switch and LEDs are the fiddliest part of a build. The board manual shows the pin layout. Other common case mistakes: forgetting the standoffs (the brass spacers that hold the board off the metal tray), using extra standoffs under areas with no screw hole, and leaving the I/O shield out on boards that do not have it attached.
How to avoid it: match the standoffs to the board size, and connect the power switch pins first. Use the manual’s diagram, and if the power button does not work, you can briefly touch the two power switch pins with a screwdriver to start the board and confirm the rest works.
5. Plugging the monitor into the wrong port and skipping BIOS settings
With a graphics card installed, the monitor cable goes into the card, not the motherboard. Many first builders see a black screen and think the build failed. After the first start, you should also enter the BIOS to enable the memory profile (EXPO on AMD, XMP on Intel), otherwise memory runs slowly. Resizable BAR may also need to be on, though it is often enabled by default.
How to avoid it: plug the monitor into the card, and save a short BIOS checklist: memory profile, boot drive, date and time.
Difficulty by stage
| Stage | Difficulty | Why |
|---|---|---|
| Choosing parts | Medium to hard | Many specifications to compare |
| Installing CPU and RAM | Easy to medium | Keyed parts, but must be careful and firm |
| Installing M.2 SSD | Easy | One small screw, drive fits at an angle |
| Mounting the cooler | Medium | Follow instructions, even pressure |
| Mounting the board and power supply | Easy | Screws and standoffs |
| Cable routing | Medium | Tight spaces, many cables |
| Front panel header pins | Medium | Tiny connectors, polarity for LEDs |
| First boot and BIOS | Easy to medium | Waiting during memory training |
| Installing Windows | Easy | A guided installer |
| Liquid cooling (custom loop) | Hard | Leak risk and maintenance; not advised for a first build |
A simple build sequence
- Lay out parts and manuals on a clean table.
- Install the CPU on the motherboard.
- Install RAM and the M.2 SSD.
- Mount the CPU cooler (or radiator support).
- Install standoffs and the I/O shield in the case, then the power supply.
- Mount the motherboard in the case.
- Connect the 24-pin, CPU 8-pin and front panel cables.
- Install the graphics card and connect its power.
- Connect fans and tidy cables.
- Plug in the monitor, keyboard and mouse, and power on.
- Enter the BIOS, update it if needed, enable the memory profile.
- Install Windows 11 from USB and install drivers.
If the PC does not start
A first build that does not start is common and almost always fixable. Work through these checks in order.
- Wall socket, power supply switch and the supply’s cable.
- Reseat RAM: remove it and push it back in until both clips click. Try one module.
- 24-pin motherboard cable and the CPU 8-pin (4+4) cable are fully seated.
- Graphics card power cables are connected, and the monitor cable is in the card.
- Front panel power switch pins are in the right place.
- Debug lights or code on the board: the manual explains which part each light refers to.
- BIOS version: a new processor on an older board may need a BIOS update.
When to buy a prebuilt instead
Building is not the right answer for everyone. A prebuilt is the better choice in several situations.
| Situation | Build | Prebuilt |
|---|---|---|
| You want specific parts and a custom look | Better | Limited choice |
| You want one warranty and one support contact | Separate warranties per part | Better |
| You have no time or patience for research | Costly in time | Better |
| Parts prices are high or short in supply | May cost more | Can be competitive when sold in sales |
| You want to learn how PCs work and upgrade later | Better | Possible, but some use proprietary parts |
| You need a PC delivered ready for work tomorrow | No | Better |
If you do buy a prebuilt, check that the power supply and motherboard are standard sizes, since some brands use proprietary designs that limit later upgrades. Compare the specification of each part, because some prebuilts economise on the power supply and memory. A middle path is to buy a prebuilt and later upgrade the graphics card and storage yourself, which is easy practice.
How to make your first build easier
- Pick a roomy mid-tower case. Small cases are harder to build in.
- Choose a modular power supply. You connect only the cables you need, which simplifies routing.
- Use an air cooler. It has fewer failure points than liquid cooling, and is simple to fit.
- Build the core on the board box first. Install the CPU, RAM and cooler before mounting it in the case, then test the board starts if you can.
- Watch a build video for your exact case, and read manuals. Two or three sources help you see quirks.
- Take photos before disconnecting anything. Photos show where cables go.
- Keep the boxes and receipts until the build is stable.
Safety basics
Static electricity can harm components, though in practice damage is uncommon. Touch bare metal on the case before handling parts and keep parts in their anti-static bags until the moment you install them. Build on a hard surface rather than carpet. Do not force any part: if it does not go in, check orientation. Switch off and unplug the power supply before changing hardware.
How we compared
We compared manufacturer manuals, specifications and independent guides named below. We did not build or benchmark these systems ourselves.
Sources
- AMD and Intel desktop processor product pages and socket documentation
- Motherboard maker manuals and CPU support lists
- Case maker specification sheets and installation manuals
- Graphics card maker specification pages (recommended power supply)
- Microsoft, Windows 11 installation media and system requirements
- Independent beginner PC building guides from major hardware publications
Frequently Asked Questions
Is it easy to build a PC for the first time?
Yes, for most people. The parts are standardised, most connectors only fit one way, and the sequence is the same for nearly every build. The harder part is choosing compatible components, so spend your time planning.
How long does it take to build a PC?
Plan on three to six hours the first time, including routing cables, the first start and installing Windows. Experienced builders often finish in one and a half to two and a half hours.
Can I damage components while building?
It is possible but unusual. The most common causes are bent processor socket pins, forcing parts that are misaligned, and shorts from extra standoffs. Static damage is rare if you touch bare metal on the case and avoid carpet.
Do I need experience or special tools?
No. A Phillips screwdriver, cable ties and a USB drive for Windows are enough. If you can follow a written manual and work patiently, you can build a PC.
Is building a PC cheaper than buying a prebuilt?
Sometimes. It depends on current parts prices and prebuilt sales. Building gives you control over each part, and you avoid paying for assembly, but a sale on a prebuilt can be competitive, so compare the specification of each part.
What is the most common mistake?
Plugging the monitor into the motherboard instead of the graphics card, and forgetting the CPU power cable. Both make a working build look dead. Check them first if you see a black screen.
Should my first PC have liquid cooling?
Probably not. A good air cooler is simpler and has fewer failure points. Custom loops add leak risk and maintenance, and are better as a second project after you have built a standard PC.
Where can I get help if the PC does not start?
Start with the debug lights and the troubleshooting section of your board manual, then check seating of RAM and power cables. Hardware forums and the support teams of the board and case makers can help if the basics do not fix it.


