
Dust filters are the unsung heroes of a gaming PC. They sit over your intake fans, catching pet hair, carpet fibers, and fine particulates before they can cake onto your GPU heatsink and radiator fins. The catch? A filter that’s doing its job gets dirty — and a clogged filter is worse than no filter at all. Airflow drops, fan RPM climbs, components run hotter, and your carefully tuned fan curves start screaming to compensate. Cleaned the wrong way, filters can also warp, tear, or shed mesh into your case. Done right, the whole job takes 15 minutes and costs nothing but a bit of care.
This guide walks you through removing, cleaning, drying, and reinstalling every type of dust filter found on modern gaming cases — magnetic mesh panels, slide-out trays, and rigid plastic-framed filters — without damaging the mesh or leaving moisture where it doesn’t belong.
As an Amazon Associate we earn from qualifying purchases at no extra cost to you.


Our Top Picks
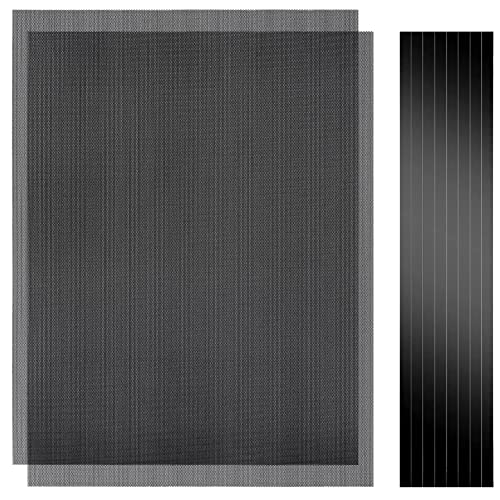
 MoKo 400x300mm DIY PC Case Dust Mesh Fan2 x 400*300mm-1mm hole15.75 x 11.81 x 0.01 inches0.5 PoundsCheck on Amazon
What You Need
| Item | Why | Optional? |
|---|---|---|
| Soft-bristle brush (a clean 1-inch paintbrush or makeup brush works) | Loosens embedded dust from mesh without poking holes | No |
| Microfiber cloths (2–3) | Wipes down filter frames and catches loose dust without lint | No |
| Compressed air can (10 oz) or an electric air duster | Blows dust out of fine mesh from the clean side | No |
| Lukewarm water and a drop of dish soap | Deep-cleaning washable mesh and plastic frames | Yes — only for washable filters |
| Isopropyl alcohol (70%+) | Sanitizes frames and removes sticky residue; dries fast | Yes |
| Cut-to-fit replacement mesh | Patches torn filters or adds coverage over open intake panels; a 400x300mm PVC magnetic mesh sheet runs about $9–around $12 for a 2-pack | Yes |
| Small tray or towel | Contains the dust mess and protects surfaces | Yes |
Step-by-Step
1. Power Down and Unplug (2 minutes)
Shut down Windows properly, flip the PSU switch off, and unplug the power cable. Hold the case’s power button for 5 seconds to drain residual charge. If your case sits on carpet, move it to a hard surface — you don’t want loose fibers sucked in the moment a filter comes off.
2. Remove the Filters (3–5 minutes)
Filter designs fall into three camps. Front panel filters usually slide or magnet-snap off from the bottom or side — check for a finger tab or pull groove. Top panel filters often lift straight up if magnetic, or require thumbscrews on the case roof. Bottom/PSU filters typically slide out from the rear or front of the base. Pull gently and evenly; if a filter resists, look for a latch rather than forcing it. Photograph each filter’s orientation before removal so reinstallation is foolproof.
3. Dry-Brush Loose Dust (2–3 minutes)
Hold each filter over your tray or a trash bin and brush gently in one direction, working from the center outward. For magnetic mesh, support the sheet flat with your hand underneath so it doesn’t flex and pop its adhesive or frame. This pre-clean keeps gunk out of your sink and out of the air.
4. Blast With Compressed Air (2–3 minutes)
Hold the can upright and spray from the clean side (the side that faces into the case) in short bursts, holding the nozzle 4–6 inches away. Blowing from the clean side pushes dust out the way it came in rather than driving it deeper into the weave. Keep the can upright — tilting releases cold propellant that can crack plastic frames. If you use an electric duster, start on low and keep it moving.
5. Deep Clean Washable Filters (5 minutes, plus drying)
Most modern mesh and nylon filters are washable; paper-based or adhesive-backed filters are not — check your case manual if unsure. Run lukewarm water through the filter from the dirty side, add a single drop of dish soap, and swish gently with your fingers. Rinse until the water runs clear. Never use hot water (it can warp PVC frames) and never scrub with anything abrasive.
6. Dry Completely (30–60 minutes, mostly hands-off)
Shake off excess water, blot both sides with a dry microfiber cloth, then lay the filter flat on a towel in a ventilated room. Give it at least 30 minutes; dense mesh can take up to an hour. Trapped moisture near your PSU or motherboard invites corrosion and short circuits — this step is non-negotiable.
7. Inspect, Patch, and Reinstall (3–5 minutes)
Hold each filter up to a light. Look for torn mesh, gaps at the frame, or magnetic strips that have peeled. Small tears can be patched with cut-to-fit mesh — trim a 400x300mm PVC sheet slightly oversize, cut to shape with scissors, and either magnet it in place or secure it with the adhesive backing many sheets include. Then reinstall filters in their original orientation: the dusty-catching side must face outward, toward incoming air. A filter installed backward collects dust on the inside, where it’s harder to reach.
8. Restart and Verify (2 minutes)
Reconnect power, boot up, and listen. Fan noise should be noticeably lower than before cleaning, and idle CPU/GPU temperatures (check with any monitoring utility) should drop a few degrees if the filters were badly clogged. If temps don’t improve, your radiator or heatsinks — not the filters — may need attention.
Mistakes to Avoid
Running the PC with filters removed “just for a week.” An open intake pulls in far more dust than a dirty filter ever blocked, and you’ll compound the problem in days.
Using a vacuum nozzle directly on mesh. Strong suction can deform fine mesh and yank magnetic filters out of their frames. If you vacuum, use a brush attachment at low power from a distance.
Soaking non-washable filters. Adhesive-backed and paper filters disintegrate or delaminate. When in doubt, dry-clean only.
Reinstalling damp. Even slightly moist filters wick humidity onto fan blades and nearby components. Wait the full drying time.
Ignoring the positive/negative pressure balance. If your intake filters are heavily clogged while exhausts are open, your case goes negative-pressure and starts pulling unfiltered air through every seam. Clean intakes and exhausts together.
Disposing of dust in the open room. Tap filters out into a trash bag so the finest particles — the ones hardest on lungs — don’t resettle on your desk.
How Often
Cadence depends on your environment. As a baseline for most homes in 2026, do a dry clean (brush and compressed air) every 4–6 weeks, and a wash with water every 3–4 months. Adjust from there:
Every 2–3 weeks: Homes with shedding pets, carpeted floors, or a tower on the floor near the baseboard.
Every 6–8 weeks: Hard floors, no pets, tower on or under a desk.
Every 8–12 weeks: Air-purified rooms, minimal foot traffic, positive-pressure fan setups.
After any renovation or heavy smoke exposure: Clean immediately, regardless of schedule.
Quick visual check: if you can’t see light through the mesh when held up to a lamp, it’s overdue.
When to Call a Pro or Replace
Filters themselves rarely need professional help, but replacement beats cleaning when the mesh is torn, the frame is warped so it no longer seats flush, the magnetic strip has delaminated, or odors and grime survive a wash. Standard fan filters cost $3–$15 depending on size; universal cut-to-fit sheets like a 2-pack of 400x300mm PVC magnetic mesh at around $9–around $12 cover multiple fans and odd-shaped intakes for pennies per patch. Cut roughly 10–15mm oversize, trim to fit, and trim corner notches for screws.
Call a technician instead if cleaning the filters doesn’t restore reasonable temperatures — the problem is likely clogged heatsink fins, a failing fan, or dried thermal paste, and a pro can safely service those. Also call a pro if you ever see dust combined with discoloration or a burnt smell near the PSU; don’t open a power supply yourself, as internal capacitors hold a charge.
FAQ
Can I run my gaming PC without dust filters at all?
Technically yes, and airflow improves slightly, but you’ll trade a 15-minute chore for a deep internal cleaning every few months. Unfiltered intakes pull hair and grit directly onto GPU fans and heatsinks, which shortens component life. Filtered intakes with slightly reduced airflow are almost always the better trade.
Do dust filters really hurt airflow and performance?
A clean fine mesh filter typically costs you a small amount of static pressure — rarely enough to matter with modern high-static-pressure fans. A visibly dusty one can cut intake airflow dramatically, raising internal temperatures by several degrees and forcing fans to run louder. The lesson: filtered but clean beats unfiltered, and clean beats dirty by a wide margin.
What’s the difference between magnetic, slide-out, and screw-in filters?
Magnetic sheets lift off in seconds and are the easiest to clean, but they can shift if the panel gap is large. Slide-out trays are convenient but track dust in their rails. Screw-in rigid-frame filters offer the best seal but take the longest to remove. If your case lacks filters, magnetic cut-to-fit mesh is the simplest retrofit since it needs no drilling or screws.
Can I use a hairdryer or leave filters in the sun to dry?
A hairdryer on cool or low heat is fine, but keep it 6+ inches away and never use high heat — PVC frames and magnetic strips can warp. Direct sunlight is also risky for extended periods for the same reason. Air-drying flat on a towel indoors for 30–60 minutes is the safest method and rarely worth rushing.









