Installing your RAM in dual channel mode is the single easiest way to double your memory bandwidth without spending extra money. When done correctly, your two memory sticks work in parallel through the CPU’s memory controller, giving you smoother gameplay, faster file transfers, and better performance in memory-intensive tasks. This guide will walk you through identifying the right slots, physically installing the sticks, and confirming dual channel is active in software.
Prerequisites: You need a motherboard that supports dual channel memory (virtually all modern desktop boards do), a matched pair of DDR4 or DDR5 DIMMs with the same capacity, speed, and timings, and a Phillips-head screwdriver to open your case. You should also know how to power down your PC completely and access your BIOS.
Before You Start
Power off your PC, switch the power supply to OFF (0), and unplug the power cable. Press and hold the case power button for 5 seconds to drain residual power. Work on a non-carpeted surface and touch your case’s bare metal frame every few minutes to discharge static.
| What you need | Why | Optional? |
|---|---|---|
| Matched pair of DDR4 or DDR5 DIMMs (identical kit) | Ensures both channels run at the same speed, capacity, and timings for stable dual channel operation | No |
| Motherboard manual (printed or PDF on phone) | Confirms exact DIMM slot labels (A1, A2, B1, B2) and recommended population order | No |
| Phillips #2 screwdriver | Removes side panel and secures components if needed | No |
| Anti-static wrist strap | Prevents electrostatic discharge from damaging memory or motherboard | Yes |
| Flashlight or headlamp | Helps you read small slot labels printed on the motherboard PCB | Yes |
| CPU-Z utility installed on Windows | Verifies channel mode, DRAM frequency, and timings after installation | Yes – but highly recommended for verification |
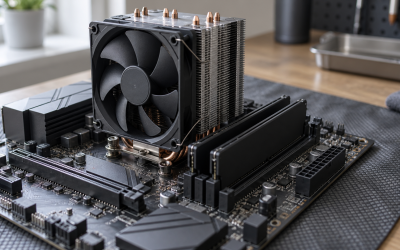
Check your motherboard’s DIMM configuration before you start. Most ATX and micro-ATX boards have four slots labeled from the CPU outward as A1, A2, B1, B2 or DIMM_A1, DIMM_A2, DIMM_B1, DIMM_B2. For two sticks, the correct dual channel slots are almost always A2 and B2 (the second and fourth slots from the CPU). If you only have two slots total, both will be used.
Step-by-Step
Step 1: Identify the Correct Slots for Dual Channel (2 minutes)
Open your motherboard manual to the page titled Memory Installation, DIMM Population, or Memory Configuration. Look for a table that shows recommended slot usage for two DIMMs. On ASUS boards it appears under Specifications > Memory; on MSI boards under Detail Specifications > Memory; on Gigabyte boards under Memory Support List. If you do not have the manual, look closely at the motherboard itself. The slots are color-coded or labeled in small white text next to each slot. For most boards as of 2026, the correct pair is A2 and B2. Note which latches are at the top and bottom of each slot.
Step 2: Prepare the Case and Slots (3 minutes)
Remove the left side panel (viewed from the front) by unscrewing the two rear thumbscrews and sliding the panel back. Locate the four RAM slots to the right of the CPU cooler. If you are replacing old RAM, release the retention clips at both ends of each occupied slot by pressing them outward. The stick will pop up at an angle. Pull it straight out without rocking. If slots A2 and B2 are empty and have dust in them, use a short burst of compressed air held 6 inches away. Leave the retention clips in the open position.
Step 3: Install the First DIMM in Slot A2 (2 minutes)
Hold the first RAM stick by its edges without touching the gold contacts. Align the notch on the bottom edge of the DIMM with the key in slot A2. The notch is off-center so it only fits one way. Place the stick vertically above the slot and press straight down with even pressure on both ends using your thumbs. You should hear a distinct click as both retention clips snap closed automatically. Visually confirm both clips are fully latched and the stick is level. The top edge should be flush and not wobbling.
Step 4: Install the Second DIMM in Slot B2 (2 minutes)
Repeat the exact process for the second stick in slot B2, which is typically two slots over from A2 with one empty slot between them. Again, align the notch, press firmly until both clips click, and verify the module is seated evenly. Do not use slot A1 or B1 for a two-stick configuration unless your manual specifically instructs you to. Using adjacent slots such as A1 and A2 will force single channel mode.
Step 5: Close Up and First Boot (2 minutes)
Reattach the side panel and reconnect your power cable, monitor, keyboard, and mouse. Flip the power supply switch back to ON (I) and press the power button. The system may power cycle two or three times as it trains the new memory. This is normal. If the system posts, you will see the motherboard splash screen. If it does not post and the DRAM debug LED stays lit, power off and reseat both sticks.
Step 6: Enable XMP / EXPO in BIOS (3 minutes)
During boot, repeatedly tap Delete or F2 to enter BIOS/UEFI. For ASUS: Press F7 to enter Advanced Mode > Ai Tweaker > Ai Overclock Tuner > select XMP I or DOCP. For MSI: Go to OC > A-XMP or DRAM Profile > select Profile 1. For Gigabyte: Go to Tweaker > Extreme Memory Profile (X.M.P.) > select Profile 1. For ASRock: Go to OC Tweaker > DRAM Configuration > Load XMP Setting. Select the profile that matches the rated speed printed on your RAM kit (for example, DDR4-3200 or DDR5-6000). Press F10 > Yes to save and exit. The system will reboot.
Step 7: Confirm Frequency and Voltage Are Applied (2 minutes)
Re-enter BIOS after enabling XMP/EXPO to confirm. Navigate to the same menu where you enabled the profile and verify DRAM Frequency shows your kit’s rated speed, DRAM Voltage shows the correct value (typically 1.35V for DDR4 XMP and 1.25V to 1.40V for DDR5 EXPO), and DRAM Timing shows the advertised CAS latency values. If any value shows Auto or a lower speed like 2133 or 4800, the profile did not apply. Try selecting Profile 1 again and saving.
Verify It Worked
Once you are back in Windows, you need to confirm the system is actually running in dual channel mode, not just that the sticks are installed.
Method 1 – Task Manager: Press Ctrl + Shift + Esc > Performance > Memory. Look at Slots used. It should read 2 of 4. Note that Task Manager does not always show channel mode, so use this only to confirm both sticks are detected and total capacity is correct.
Method 2 – CPU-Z (Most Reliable): Open CPU-Z > Memory tab. Check the field labeled Channel #. It must say Dual. Also check DRAM Frequency. Remember this shows half the effective rate because DDR is double data rate. So DDR4-3200 will show as approximately 1600 MHz, and DDR5-6000 will show as 3000 MHz. If it shows Single, power down and move your sticks to A2 and B2.
Method 3 – BIOS: Reboot and tap Delete to enter BIOS. On the main EZ Mode screen (ASUS), MSI EZ Mode, or Gigabyte Easy Mode, look for Memory Information or DRAM Status. It should list both DIMMs with their size and show Dual Channel or Dual.
If any method shows only half your installed capacity or only one DIMM, one stick is not fully seated. Power off, unplug, and press each stick down again until the side clips click.
Mistakes to Avoid
Mistake 1: Installing Sticks in Adjacent Slots (A1 + A2)
What causes it: Populating the two slots closest to the CPU feels intuitive and the color coding on some boards is confusing. This forces both sticks onto the same memory channel, leaving the second channel empty, so the system reverts to single channel mode.
How to check: Open CPU-Z > Memory tab > Channel # will read Single. Alternatively, your BIOS main screen will show Single Channel under Memory Information.
What to do: Power off, switch PSU to OFF, unplug, and move the stick from A1 to B2 so your final configuration is A2 and B2. Press firmly until both retention clips lock.
How to undo: If you need to revert for troubleshooting, move the sticks back to any configuration and clear CMOS by shorting the CLRTC or JBAT1 pins for 10 seconds or removing the coin-cell battery for 5 minutes with the system unplugged.
Mistake 2: Mixing Different RAM Kits
What causes it: Combining an old 8GB stick with a new 16GB stick, or mixing kits with different speeds, voltages, or CAS latencies. The memory controller will downclock to the slowest stick and may disable dual channel or become unstable.
How to check: In CPU-Z > SPD tab, select each slot from the Memory Slot Selection dropdown and compare Module Size, Max Bandwidth, and Timings Table. If they differ, you have a mismatched pair. Task Manager > Performance > Memory may also show RAM running at a lower speed than advertised.
What to do: Use a factory-matched kit sold as a single package (for example, 2 x 16GB). If you must use mixed sticks, enter BIOS > Ai Tweaker / OC / Tweaker > DRAM Frequency and manually set it to the lower of the two kits’ rated speeds and set DRAM Voltage to the higher of the two required voltages within the safe range of 1.20V to 1.45V for DDR4 or 1.10V to 1.45V for DDR5.
How to undo: Remove the mismatched stick, install only the matched pair in A2 and B2, and load BIOS defaults via Exit > Load Optimized Defaults > F10 to save.
Mistake 3: Forgetting to Enable XMP / EXPO
What causes it: By default, DDR memory boots at JEDEC baseline speed (2133, 2400, or 4800 MT/s depending on generation) until you manually load the overclock profile stored on the stick. Users assume installation alone gives full speed.
How to check: Open CPU-Z > Memory tab and look at DRAM Frequency. If it shows around 1066 MHz for a DDR4-3200 kit or 2400 MHz for a DDR5-6000 kit, XMP/EXPO is not enabled. Task Manager > Performance > Memory > Speed will also show the baseline speed.
What to do: Reboot > tap Delete > Advanced Mode > Ai Tweaker / OC / Tweaker > enable XMP I / EXPO Profile 1 > F10 to save and exit.
How to undo: Return to the same BIOS menu and set Ai Overclock Tuner / A-XMP / Extreme Memory Profile back to Auto or Disabled, then press F10 to save. This returns memory to JEDEC speed if the XMP profile causes crashes.
Mistake 4: Not Seating RAM Fully
What causes it: Fear of applying too much pressure, so the DIMM is inserted at an angle and only one retention clip locks. One side of the gold contacts remains exposed, causing no boot, boot loops, or only one stick being detected.
How to check: With the system powered off and unplugged, visually inspect both ends of each DIMM. Both plastic retention clips should be fully vertical and snapped into the notches on the stick. If you can see gold contacts on one side, it is not seated. The DRAM debug LED on the motherboard may also stay solid red, yellow, or orange.
What to do: Open both retention clips, lift the stick out, realign the notch, and press straight down with firm, even pressure on both corners until you hear two clicks. Do not rock the stick side to side.
How to undo: If the system fails to post after reseating, power off, remove both sticks, and reinstall only one stick in A2 to test if the system boots. If it does, add the second stick to B2.
FAQ
Do both RAM sticks need to be exactly the same size for dual channel?
For guaranteed dual channel, yes. Use two identical sticks from the same kit with the same capacity, speed, and timings. Some motherboards support Flex Mode with mismatched capacities (for example, 8GB + 16GB), where the first 16GB runs in dual channel and the remaining 8GB runs in single channel, but this is slower and less stable than a matched pair. For best results, buy a kit labeled as 2 x 8GB or 2 x 16GB.
Which slots should I use if I have four RAM slots and only two sticks?
Use A2 and B2, the second and fourth slots counting outward from the CPU socket. This is the daisy-chain topology recommendation for nearly all modern boards from ASUS, MSI, Gigabyte, and ASRock. Check your manual under DIMM Population to confirm, but A2/B2 is the standard for two-DIMM dual channel operation. Leave A1 and B1 empty.
How do I know if dual channel is working without opening the case?
In Windows, download and open CPU-Z, then go to the Memory tab and look for Channel # which will say Dual if it is active. You can also enter BIOS by pressing Delete during boot and checking the Memory Information section on the EZ Mode or Easy Mode front page, which explicitly states Single or Dual. Task Manager > Performance > Memory confirms both sticks are detected but does not reliably show channel mode on all systems.
Can I add two more sticks later to fill all four slots?
Yes, but for best stability add an identical kit with the same exact model number, speed, voltage, and timings as your current kit. Install the new pair in the remaining slots A1 and B1. After installation, enter BIOS and verify DRAM Frequency and XMP/EXPO are still correctly applied, as four DIMMs can sometimes require slightly higher voltage or looser timings. If the system becomes unstable with four sticks, enter BIOS > Ai Tweaker / OC Tweaker > DRAM Voltage and increase by 0.02V increments within the safe range, or disable XMP and run at JEDEC speed.