Setting up multiple case fans correctly is the difference between a quiet, cool PC and one that breathes hot air in circles. Done right, your intake fans feed cool air to your GPU and CPU cooler, exhaust fans pull heat out, and everything ramps up only when it needs to. This guide walks you through planning your airflow direction, mounting and connecting each fan, and tuning fan curves in your BIOS so the whole system runs cool and quiet. Budget about 60–90 minutes total, most of it spent in fan-curve tuning rather than hardware work.
Prerequisites: a case with at least two fan mounts (front and rear), two or more fans (120 mm or 140 mm), a Phillips #2 screwdriver, and a motherboard with enough fan headers. If you have more fans than headers, you’ll also need a fan hub or PWM splitter. An open workspace with good lighting helps, and a can of compressed air is smart if you’re adding fans to an existing build.
Before You Start
Good airflow follows one simple rule: front and bottom are intake, rear and top are exhaust. Warm air rises, so matching your fans to that natural flow gets you the best cooling with the least noise. Every fan has small arrows molded into its side frame showing airflow direction and spin direction — check them before mounting anything, because a single reversed fan can undo your entire layout.
| What you need | Why | Optional? |
|---|---|---|
| 2–6 case fans (120 mm or 140 mm) | At least one intake and one exhaust to establish airflow through the case | No |
| Phillips #2 screwdriver | Most fan screws are 6-32 or self-tapping case screws | No |
| Spare motherboard fan headers (4-pin PWM preferred) | Each fan needs power and control; check your motherboard manual for header locations | No |
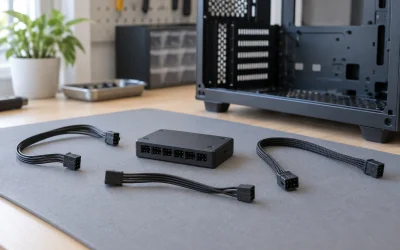
| PWM fan hub or Y-splitter | Lets you run multiple fans from one header if you have more fans than headers | Yes — only if short on headers |
| SATA or 3-pin ARGB power for the hub | Powered hubs draw fan current from SATA, not the motherboard header | Yes — hub-dependent |
| Cable ties or velcro straps | Keeps fan cables away from blades and routed behind the motherboard tray | Yes |
| Compressed air | Cleaning dust from mounts and filters before installing new fans | Yes |
| Thermometers/FPS-free stress tool (HWiNFO64, free) | For verifying temperatures and fan speeds after setup | Yes — any monitoring tool works |
One more decision before you touch a screw: positive, negative, or neutral pressure. Running slightly more intake than exhaust (positive pressure) reduces dust buildup because air enters through filtered mounts only. A common target is one more intake fan than exhaust, or intake fans with higher total airflow. If you can’t decide, front intake plus rear exhaust with one extra front fan is the safest default.
Step-by-Step
1. Plan and label your airflow (10 minutes)
Count your fan mounts and assign each one a role: front mounts become intake, rear becomes exhaust, top mounts become exhaust (or skip them if you have a liquid cooler up top). Write the plan down. Then check each fan’s side arrows: airflow points in the direction the fan pushes air (usually out the side with the support struts and sticker), and the curved-arrow symbol shows spin direction. Orient each fan so its airflow arrow points the correct way for its role.
2. Mount the intake fans (10–15 minutes)
Hold each intake fan against its mount from inside the case with the airflow arrow pointing inward. Start all four screws a few turns by hand before tightening in an X pattern so the fan corner mounts don’t crack. If your case has removable front panels and dust filters, install the filter side facing outward. Do not overtighten — snug is enough. Route the fan cable toward the nearest cable channel, not across the fan blades’ path.
3. Mount the exhaust fans (5–10 minutes)
Install rear and top exhaust fans with airflow arrows pointing out of the case. If a top mount sits directly above your CPU cooler and you plan to add a top radiator later, leave that mount empty for now — a fan there will need to be removed anyway.
4. Connect fans to headers (10 minutes)
Plug each fan’s 4-pin PWM cable into a motherboard fan header, matching the orientation of the notch on the connector. Consult your motherboard manual for header names and locations — common layouts include CPU_FAN, CPU_OPT, SYS_FAN1–4, CHA_FAN1–3, and PUMP_FAN. Rules of thumb:
- CPU_FAN — your CPU cooler’s fan (the motherboard may refuse to boot or throw a “CPU Fan Error” if this is empty).
- SYS_FAN/CHA_FAN — case fans, ideally intake fans on one header and exhaust on another so you can tune them separately.
- PUMP_FAN — liquid cooler pump, if applicable; it should run at a fixed speed, not a curve.
If you’re using a PWM hub, connect the hub’s SATA power cable to your PSU first, then plug fans into the hub ports, and connect the hub’s control cable to a SYS_FAN header. Cable-manage with ties as you go.
5. Set initial fan behavior in BIOS/UEFI (10 minutes)
Power on and tap the BIOS key during boot — Del or F2 on most boards. Navigate to the fan control section:
- ASUS: Q-Fan Control, or Fan Xpert inside the OS via Armoury Crate.
- MSI: Settings → Hardware Monitor → Fan Speeds, or Smart Fan mode.
- Gigabyte: Smart Fan 6 (press F6 in most Gigabyte BIOSes).
- ASRock: FAN-Tastic Tuning, under the Hardware Monitor tab (press F6).
For each header, confirm the PWM mode matches your fan (PWM for 4-pin fans, DC/Voltage for 3-pin fans — mismatched modes cause fans to run at full speed constantly or not at all). Set the PUMP_FAN or pump header to a fixed 100% or the manufacturer’s rated duty cycle. Leave case fans on their default curves for now; you’ll tune them after verifying airflow direction.
6. Verify airflow direction (5 minutes)
With the side panel off and the system idling, hold a thin strip of tissue paper near each fan mount. Intake mounts should push the strip toward the inside of the case; exhaust mounts should push it outward. If any fan moves air the wrong way, shut down, unscrew it, flip it, and reconnect — this is a five-minute fix now versus a rebuild later.
7. Tune fan curves (15–25 minutes)
Back in the BIOS fan control screen, select each case-fan header and edit its curve. You’ll set fan duty percentage against CPU temperature (or motherboard temperature on some boards). A sensible starting curve:
- 30°C or below: 20–25% duty (near-silent idle)
- 40°C: 30%
- 50°C: 40%
- 60°C: 55%
- 70°C: 70%
- 80°C and above: 90–100%
Set the minimum duty so fans reliably spin from a stop — most 120 mm fans need roughly 20–30% to start; test by lowering until a fan stalls, then raise it 5–10 points above that. Enable any “fan stop” or zero-RPM option only for intake fans in a well-ventilated room, and never for exhaust fans on systems that idle warm. Apply, save, and exit — usually F10 to save and confirm.
Verify It Worked
Install HWiNFO64 (free) and open the Sensors panel. Confirm every fan header reports a non-zero RPM that matches what you set — if a header reads 0 RPM with a fan connected, reseat the cable or check PWM mode. Then run a load test: launch a demanding game, or run a free stress utility like OCCT’s CPU test for 10 minutes, and watch CPU package temperature and GPU temperature. A well-configured two-fan setup typically keeps a modern CPU in the 60s–70s°C under load; exact results depend entirely on your cooler, chip, and case, so compare against your own temperatures before the change rather than anyone else’s numbers. The key indicators of success: temperatures under load are stable rather than climbing, and fans stay quiet at idle. Finally, check dust filters after a week — heavy dust on the rear exhaust grille suggests you accidentally went negative pressure and may want to shift one fan to intake.
Mistakes to Avoid
Mounting a fan backwards. What causes it: fan arrows are subtle and people guess orientation. How to check: the tissue-strip test in Step 6, or look for the arrows on the fan frame. What to do: power down, remove the four screws, flip the fan so the airflow arrow points the correct way, remount, and reconnect. How to undo: it’s the same operation — flip it back if you flipped the wrong fan.
Wrong fan mode (PWM vs. DC) on a header. What causes it: mixing 3-pin DC fans and 4-pin PWM fans without adjusting header mode. How to check: a fan stuck at 100% or failing to respond to curve changes usually indicates a mode mismatch. What to do: in BIOS, select the header and set its control mode to PWM for 4-pin fans or DC for 3-pin fans, then re-test the curve. How to undo: switch the header mode back to its previous setting.
Overloading a single header. What causes it: daisy-chaining three or four high-current fans off one motherboard header or an unpowered splitter. How to check: add up the amperage on each fan’s sticker; the total should stay under the header’s rating (commonly 1 A, sometimes listed in watts at 12 V). What to do: move fans to a powered hub with SATA input, or spread them across more headers. How to undo: reconnect fans to their original arrangement if the hub causes new problems.
Fighting nature with top-front exhaust. What causes it: assuming more exhaust is always better. How to check: if a top-front exhaust sits directly above your CPU cooler, it may pull cool intake air out before it reaches components, and your GPU temps rise. What to do: convert that mount to intake or leave it empty and rely on rear/top-rear exhaust. How to undo: restore the fan to its previous position if temps get worse.
Ignoring the CPU_FAN header. What causes it: plugging the CPU cooler fan into a SYS_FAN header. How to check: a “CPU Fan Error” at boot, or the system refusing to POST. What to do: move the cooler fan to CPU_FAN, or in BIOS disable the CPU fan-speed warning (usually under Monitor or Boot → CPU Fan settings) if you run an all-case-fan air-cooled setup intentionally. How to undo: re-enable the warning afterward so a genuine cooler failure isn’t missed.
FAQ
Is positive pressure really better than negative pressure?
For dust control, yes — slightly positive pressure forces air in through filtered intakes instead of through every unfiltered gap and grille. For raw cooling performance, the difference is small compared to total airflow. Aim for marginally more intake than exhaust and don’t obsess further.
Should I connect case fans to the motherboard or use a hub?
Use motherboard headers directly when you have enough of them, because each header gets its own independent curve. Use a powered hub when you have more fans than headers, or when you want several intake fans to follow one shared curve — hubs save headers but fans on the same header share a single speed setting.
Why is one of my fans not spinning?
Work through the checklist: confirm the cable is fully seated at both ends, confirm the header’s BIOS mode matches the fan type (PWM vs. DC), check the minimum duty in the curve — some fans stall below a certain percentage — and try the fan on a known-working header. If it still doesn’t spin on a good header, the fan itself is likely faulty.
Do I need the same fan model everywhere?
No, but matching fans on the same header makes curves easier to tune since identical fans respond identically. Mixing static-pressure-optimized fans on restrictive front intakes with high-airflow fans on open exhaust mounts is a perfectly good hybrid approach and how many enthusiasts set up builds going into 2026.