Setting fan curves is the difference between a gaming PC that whispers during a late-night session and one that sounds like a small jet preparing for takeoff. The idea is simple: you tell each fan exactly how fast to spin at a given temperature, so your system stays cool without ramping to full speed every time you open a game. When it is done badly, the problems show up fast. Fans left on default often idle too loudly, pulse up and down constantly, or stay too slow and let heat build up until the system thermally throttles and forces every fan to 100%. That constant revving is more distracting than steady airflow, and sustained high temperatures can shorten the life of your CPU, GPU, and motherboard components. A well-tuned curve fixes that by keeping noise low at idle and on the desktop, then rising smoothly and predictably only when gaming loads actually demand it.
Our Top Picks
 120mm ARGB Fans 4PIN PWM Computer Case Cooler120×120×25mm4.72 x 4.72 x 0.98 inches0.9 poundsCheck on Amazon
What You Need
Most of this process is software, but a quick hardware check saves time. You will adjust curves in your BIOS/UEFI or with a fan control app, so confirm what kind of fans and headers you have before you start.
As an Amazon Associate we earn from qualifying purchases at no extra cost to you.


| Item | Why You Need It | Optional? |
|---|---|---|
| PWM case fans (120mm or 140mm, standard 25mm thick) | 4-pin PWM fans allow precise speed control from about 20% to 100% (400 to 1600-1800 RPM for most 120mm models). They are the basis for a smooth, quiet curve. Example: 120mm ARGB Fans 4PIN PWM 3-pack units typically run up to 1600 RPM and sell in the $9-$15 range for a triple pack. | No, if you want truly quiet control |
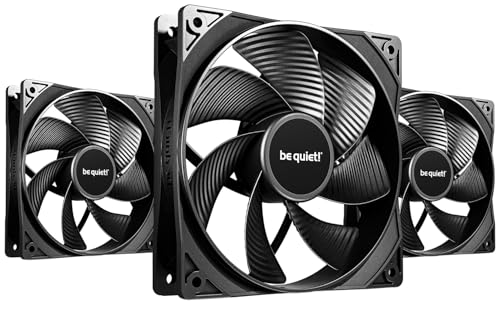
| be quiet! Pure Wings 3 120mm PWM Reverse Triple Pack or similar quality PWM triple pack | A matched set of three 120mm x 120mm x 25mm PWM fans ensures consistent airflow and noise. Each fan weighs about 130-150 grams and draws 1.5-3.6 watts. A triple pack like this is usually $30-$35, which is efficient if you are filling front or side mounts. | Yes, if you already have PWM fans |
| Motherboard with PWM fan headers (4-pin) | Most ATX, micro-ATX, and mini-ITX boards in 2026 include 3-6 hybrid PWM/DC headers. You need at least one free header per fan or a PWM hub/splitter. | No |
| PWM fan hub or splitter cable | Lets you run multiple front intake fans from one header while keeping PWM control. Look for a powered SATA hub for 3+ fans so you do not overload the header (headers are typically rated for 12 watts / 1 amp). | Yes, if you have enough headers |
| BIOS/UEFI access or fan software | You need either BIOS fan control, or Windows software like FanControl, the motherboard vendor utility, or NZXT CAM / Corsair iCUE if you use their controllers. Software lets you base curves on GPU temperature, which BIOS often cannot do. | No, choose one method |
| Temperature monitoring tool | HWiNFO64, HWMonitor, or Ryzen Master / Intel XTU to watch CPU and GPU temps in real time while you test. Needed to verify your curve actually lowers noise without overheating. | No |
| Small screwdriver and compressed air | For reseating fans, tightening anti-vibration mounts, and clearing dust that makes a quiet curve seem loud. | Yes |
Step-by-Step
Step 1: Check Your Fans and Headers (5 minutes)
Shut down the PC and open the side panel. Look at the fan cables: 4-pin connectors are PWM, 3-pin are DC voltage-controlled. Note where each fan is plugged in on the motherboard – labels like CPU_FAN, SYS_FAN1, CHA_FAN2 are printed next to the headers. Standard 120mm fans are 120mm x 120mm x 25mm and fit most cases, while 140mm fans need 140mm mounts. If you have 3-pin fans, you can still build a curve using DC mode, but control will be less precise below about 40-50% speed and you may hear humming or clicking at low RPM. This is a good time to confirm airflow direction: front and bottom should be intake, rear and top should be exhaust. Reverse airflow models, like those in a reverse triple pack, are designed for side or bottom intake where you want the visible side to be clean while still pulling air in.
Step 2: Clean Up and Set a Baseline (10 minutes)
With the PC unplugged, use compressed air to clear dust from front filters, fan blades, and heatsinks. Dust adds 2-5 decibels of perceived noise and forces you to run fans faster for the same cooling. Boot into Windows and record your baseline. At idle on the desktop, note CPU temperature (typically 35-55 degrees Celsius), GPU temperature (30-50 degrees Celsius), and fan RPM. Then start a game or a stress test for 10 minutes and note load temperatures – most modern CPUs target 75-85 degrees Celsius under gaming load, GPUs 65-80 degrees Celsius. If any fan is already at 1500+ RPM at idle, your default curve is too aggressive.
Step 3: Choose Where to Control the Curve (5 minutes)
Decide between BIOS/UEFI and software. BIOS control is reliable, works before Windows loads, and saves settings permanently, but it usually only lets you base the curve on CPU temperature. Windows software like FanControl is more flexible because you can create separate curves for case fans based on GPU temperature, which matters for gaming when the GPU is the hottest component. If you want case fans to react to GPU heat, use software. If you want a set-and-forget quiet profile for CPU and case fans, BIOS is fine. Do not run both at once – pick one so they do not fight each other.
Step 4: Build a Quiet Base Curve in BIOS or Software (15 minutes)
Enter BIOS (usually Delete or F2 during boot) and find the Hardware Monitor, Fan Control, or Q-Fan Control section. Set each fan header to PWM mode if you have 4-pin fans. Then create a gentle slope with 4-5 points. A proven quiet starting point for 120mm PWM fans up to 1600-1800 RPM is: 30 degrees Celsius at 25-30% speed (about 400-500 RPM, nearly inaudible), 50 degrees Celsius at 35-40% (600-700 RPM), 65 degrees Celsius at 50-55% (800-900 RPM), 75 degrees Celsius at 70% (1100-1200 RPM), and 85 degrees Celsius at 90-100% for thermal protection. Set hysteresis to 5-8 degrees Celsius if the option exists – this prevents fans from rapidly cycling up and down when temperature hovers around a trigger point. Apply the same curve to all case fans initially; you will fine-tune later. Save and exit.
Step 5: Create a GPU-Linked Curve for Gaming (10 minutes)
If you use FanControl or a vendor app, create a second curve for front intake and bottom fans that follows GPU temperature instead of CPU. GPUs heat up faster in games and often sit 10-20 degrees hotter than the CPU during gaming. A good GPU-based curve is: 40 degrees Celsius at 25%, 60 degrees Celsius at 45%, 70 degrees Celsius at 65%, and 80 degrees Celsius at 90%. Link exhaust fans to CPU temperature and intake fans to GPU temperature, or use the Mix function in FanControl to have case fans respond to whichever is hotter. This stops the classic problem where CPU-based case fans stay quiet while the GPU cooks inside a warm case.
Step 6: Test for Noise and Heat (15 minutes)
Boot into Windows and test in two phases. First, let the PC sit idle for 5 minutes. You should hear a soft, steady whoosh, not a pulsing hum. If fans ramp up and down every few seconds, increase hysteresis or flatten the low end of the curve. Second, run a demanding game for 15-20 minutes with HWiNFO64 open. Watch for CPU staying under 85-90 degrees Celsius and GPU under 83 degrees Celsius. Listen for steady airflow. If temperatures climb higher than that, raise the mid-range of the curve by 5-10% increments (for example, move 65 degrees from 50% to 60%). If noise is too loud during gaming, lower the curve by 5% at the temperature where it gets intrusive, but never go below 60% at 75 degrees if you see temperatures rising quickly. The goal is a smooth ramp you barely notice.
Step 7: Save Profiles and Fine-Tune Over a Week (5 minutes setup, ongoing observation)
Save your quiet profile in BIOS as Profile 1 and export your FanControl settings if you use software. Keep a second, more aggressive profile for summer or for especially demanding games – just copy the quiet curve and add 10% speed above 70 degrees. Over the next few days, note noise during different tasks: browsing, streaming, and gaming. Small adjustments of 3-5% at a single temperature point make a big difference to perceived noise. If you added new fans, remember they may need 10-20 hours of use for hydraulic or rifle bearings to reach their quietest operation.
Mistakes to Avoid
The most common error is making the curve too flat at the low end by setting 0% speed below 40 degrees Celsius. Most fans stall below 20-30% PWM and will not restart reliably, which causes heat spikes and then a loud full-blast correction. Always set a minimum speed that keeps the fan spinning. Another mistake is using only CPU temperature for all case fans. In gaming, the GPU can push case air to 45-50 degrees Celsius while the CPU sits at 60 degrees, so CPU-only curves leave the GPU starved for fresh air. Avoid linking all fans to one sensor. Do not set a steep vertical jump in the curve, such as 40% at 65 degrees and 90% at 70 degrees. That creates the annoying revving that makes a PC feel loud even if average decibels are low. Keep the slope gradual. Finally, do not ignore fan orientation and dust filters. A perfect curve cannot fix three exhaust fans and no intake, or a front filter clogged with pet hair.
How Often
Check your fan curves seasonally. Room temperature changes of 5-10 degrees Fahrenheit between winter and summer shift idle and load temperatures by a similar amount, so a curve that was silent in winter may run hot in summer. Clean dust filters every 2-4 weeks and do a deeper cleaning with compressed air every 3-6 months. Revisit the curve after any hardware change – new GPU, CPU cooler, or even adding a second SSD behind the front fans can alter airflow. If you update your BIOS, verify that fan settings were not reset to default, which happens on some boards after an update. Otherwise, once tuned, a good curve does not need weekly tweaking.
When to Call a Pro or Replace
If fans make grinding, clicking, or ticking at any speed after cleaning and tightening mounts, the bearing is likely worn – replace the fan. Fans that wobble, do not start until 50-60% PWM, or stay at full speed despite curve changes may have a failed PWM circuit or a damaged header. Try the fan on a different header; if the problem follows the fan, replace it. If the PC overheats or shuts down even with fans at 100% (over 95-100 degrees Celsius on CPU or over 85-88 degrees Celsius on GPU with hot exhaust air), the issue is not the curve – check cooler mounting, thermal paste, or case airflow. For custom loops, small form factor builds with less than 15 liters of volume, or systems where you need to splice or re-pin fan wiring, consider a local PC technician. Also replace fans that are more than 4-5 years old if they have grown louder at the same RPM, as bearing wear is not fixable with software.
FAQ
What is the quietest RPM for gaming without overheating?
For most 120mm gaming fans, 600-900 RPM is the quiet sweet spot at idle and light loads, and 1000-1300 RPM is acceptable during gaming. How quiet that feels depends on the case, fan quality, and how many fans you have. Three 120mm fans at 800 RPM move as much air as one fan at 1500 RPM but with far less noise, which is why triple packs are popular for front intake. Keep at least 30% PWM at the low end so fans do not stall.
Should I use PWM or DC mode?
Use PWM mode for any 4-pin fan. It controls speed by modulating power without lowering voltage, so fans run smoothly and can spin slower without buzzing. Use DC mode only for 3-pin fans. If you set a 3-pin fan to PWM, it will usually run at 100%. If you set a 4-pin fan to DC, you lose low-speed precision and may hear voltage hum. The setting is in BIOS per header or in software.
Why do my fans ramp up and down constantly?
Rapid ramping usually means the curve is too steep or hysteresis is too low. CPU temperatures can spike 10-15 degrees for a few seconds when opening an app, which triggers a jump if your curve jumps 20% in that range. Add 5-8 degrees of hysteresis and smooth the curve so speed changes 10-15% over a 10-degree span instead of all at once. Also make sure fans are not reacting to a noisy temperature sensor – CPU package temperature is more stable than individual core spikes on some systems.
Is it better to run fewer fans faster or more fans slower?
More fans slower is almost always quieter. Airflow scales with total fan area and RPM, while noise rises sharply with RPM. Two or three 120mm intakes at 700-900 RPM will cool better and quieter than one intake at 1600 RPM. If your case supports 3x 120mm in front, filling all three and running them slowly gives you the lowest noise for a given amount of cooling, and lets you keep the curve more gradual.