Dual-channel memory is one of the simplest PC upgrades and configuration wins available: two matched RAM modules can access separate memory channels at the same time, increasing available bandwidth and improving consistency in games, especially on systems using integrated graphics or CPU-limited settings. For best results, prioritize correct physical slot placement first, then confirm dual-channel operation in Windows, then enable the memory profile rated for your kit. Do not chase extreme manual timings until the system is stable.
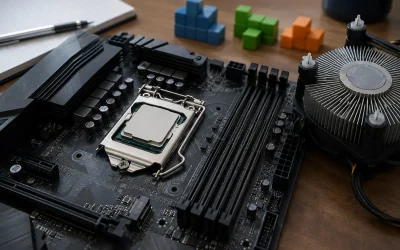
In 2026, most desktop motherboards still use a four-slot layout where the correct two-DIMM configuration is usually slots A2 and B2, not the two slots next to each other. Check the motherboard manual before installing anything, because slot labels and recommended populations can vary. The goal is simple: use a matched pair, install it in the board’s preferred paired slots, enable the correct XMP/EXPO/DOCP profile, and verify stable operation.
As an Amazon Associate we earn from qualifying purchases at no extra cost to you.


Our Top Picks
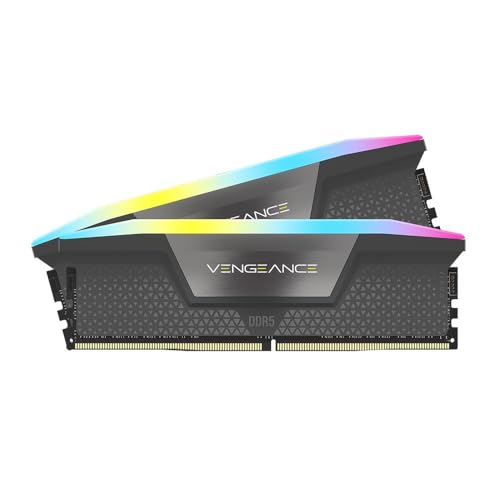
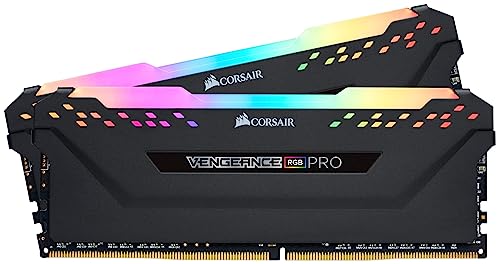

Top 3 picks at a glance
Quick Recommended Settings
| Setting | Recommended value | Why |
|---|---|---|
| DIMM slot population | A2 + B2 for two modules | This is the preferred dual-channel layout on most four-slot desktop boards. |
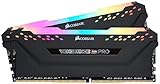
| Memory kit matching | Two identical modules from one matched kit | Matching capacity, speed, and timings reduce compatibility issues. |
| Memory profile | Enable XMP, EXPO, or DOCP Profile 1 | Runs the RAM at its advertised speed and primary timings. |
| DRAM frequency | Kit-rated speed; reduce one step only if unstable | Higher stable frequency generally improves memory bandwidth. |
| DRAM voltage | Profile value, commonly 1.35 V for DDR4 or 1.25–1.40 V for DDR5 | Profiles require their specified voltage to operate correctly. |
| Windows verification | Task Manager and CPU-Z/HWiNFO memory readout | Confirms capacity, active speed, and channel mode. |
| Stability test | Windows Memory Diagnostic plus a long gaming session | Detects obvious errors before they cause crashes or file corruption. |
Setting-by-Setting
Install Two Modules in A2 and B2
Exact value: Install a two-stick kit in the slots labeled A2 and B2. On most boards, these are the second and fourth slots moving outward from the CPU socket.
What causes it: A common dual-channel setup failure occurs when two RAM sticks are installed side by side, such as A1 and A2. Those slots may belong to the same memory channel, causing the system to operate in single-channel mode or in a less optimal training configuration.
How to check: Shut down the PC, switch off the power supply, and unplug the power cable. Open the side panel and read the tiny slot labels printed on the motherboard PCB. Consult the motherboard manual’s “Memory Installation” or “DIMM Population” diagram. In Windows, open CPU-Z and check the Memory tab; the Channel # field should report “Dual.”
What to do: Move the modules to A2 and B2. Release the DIMM latches, remove both sticks by their edges, align each notch with the slot key, and press firmly until the retention clips lock. On boards with one fixed latch, press the movable latch into place and ensure the module sits level.
How to undo: If your motherboard manual explicitly specifies A1 and B1 for two DIMMs, use that documented layout instead. If the system fails to boot after reseating, power it down and reinstall one module at a time in the board’s recommended single-DIMM slot, usually A2, to isolate a seating or module problem.
Use a Matched Memory Kit
Exact value: Use two modules with the same capacity, part number, rated speed, timings, and voltage. For example, use a 2 x 16 GB kit rather than separately purchased 1 x 16 GB modules.
What causes it: Mixed modules can run in dual-channel or “flex mode,” but the motherboard must fall back to settings both sticks can handle. A 16 GB module paired with an 8 GB module generally operates dual-channel only across the matched 8 GB portion of each stick; the remaining capacity runs single-channel.
How to check: In Windows, press Ctrl+Shift+Esc, select Performance > Memory, and note total capacity and speed. Then inspect each physical label or use HWiNFO’s memory-module information to compare part numbers, capacities, and rated specifications.
What to do: Buy or install a matched two-DIMM kit. For gaming, 32 GB as 2 x 16 GB is a practical target for many modern systems, while 16 GB as 2 x 8 GB remains usable for lighter games and budget builds. Avoid mixing DDR4 and DDR5 entirely; they use different slots and are not cross-compatible.
How to undo: If you need to keep unmatched modules temporarily, install equal-capacity sticks in the preferred paired slots and accept reduced speed or partial single-channel operation. Disable the overclocking profile if mixed memory causes crashes.
Enable XMP, EXPO, or DOCP Profile 1
Exact value: Enable the first rated memory profile: XMP Profile 1 on many Intel boards, EXPO I or EXPO Profile 1 on many AMD DDR5 boards, or DOCP on some AMD DDR4 boards.
What causes it: New RAM often starts at a safe JEDEC default speed rather than its advertised speed. For example, a kit sold at a higher rating may boot at a lower default frequency until its profile is enabled. Dual-channel is still active, but available bandwidth is lower than it should be.
How to check: Restart the PC and repeatedly tap Delete or F2 to enter UEFI/BIOS. Look on the EZ Mode or main page for DRAM Frequency, XMP, EXPO, A-XMP, or DOCP. In Windows, check Task Manager > Performance > Memory > Speed. For DDR memory, some utilities display the real clock rather than the effective data rate; a reading near 3000 MHz can correspond to DDR5-6000.
What to do: Select Profile 1, verify that DRAM frequency, primary timings, and DRAM voltage populate automatically, then save with F10. Common menu paths include ASUS: Advanced Mode > Ai Tweaker > Ai Overclock Tuner, MSI: OC > A-XMP/EXPO, Gigabyte: Tweaker > Extreme Memory Profile (X.M.P.), and ASRock: OC Tweaker > Load XMP Setting.
How to undo: Return to UEFI/BIOS and set the profile option to Auto or Disabled. If the PC cannot reach BIOS, use the motherboard’s Clear CMOS button or jumper according to its manual, then boot using default memory settings.
Keep Memory Frequency at the Kit Rating
Exact value: Set DRAM Frequency to the speed printed on the memory kit after enabling its profile. Do not manually exceed the kit rating as a first step.
What causes it: Memory overclocking depends on the CPU memory controller, motherboard trace layout, BIOS version, DIMM count, and module density. Four sticks are typically harder to run at high speeds than two sticks. An aggressive frequency may appear to boot but produce intermittent game crashes, corrupted archives, blue screens, or random application errors.
How to check: Confirm the kit’s rated speed on the label, package, or manufacturer part number. Compare it with Task Manager’s Speed field and the UEFI DRAM Frequency readout. After applying the profile, run Windows Memory Diagnostic by pressing Windows+R, typing mdsched.exe, and choosing Restart now and check for problems.
What to do: Start with the rated profile speed. If errors occur, update the motherboard BIOS using the vendor’s built-in flash utility, then retry. If instability remains, lower DRAM Frequency by one available ratio step while retaining the profile’s timings and voltage where possible. Examples include stepping from DDR5-6400 to DDR5-6200 or DDR5-6000, or from DDR4-3600 to DDR4-3466 or DDR4-3200.
How to undo: Set DRAM Frequency back to Auto, or reload UEFI defaults using the Load Optimized Defaults option. Save and restart.
Leave Advanced Timings and Voltages on Profile Values
Exact value: Use the profile’s automatic primary timings, secondary timings, DRAM voltage, and memory-controller voltage settings. Do not manually raise voltages unless you are intentionally tuning and can test stability.
What causes it: Manual timing changes can reduce latency, but one overly tight value can make a PC unstable even when it seems fine on the desktop. Excess voltage also adds heat and may not solve an underlying compatibility issue.
How to check: In UEFI/BIOS, open the advanced memory timing page. Typical names include DRAM Timing Control, Advanced DRAM Configuration, or Memory Timings. Compare displayed values with the kit’s advertised CAS latency and voltage. Use HWiNFO sensors to watch for memory-related errors if your platform exposes them.
What to do: Leave timing fields on Auto after selecting XMP, EXPO, or DOCP. If manual values are required for troubleshooting, enter only the kit’s published primary timings and voltage, then test before changing anything else.
How to undo: Restore timing fields to Auto and re-enable the memory profile. If the system does not boot, clear CMOS and begin again with defaults.
By Hardware Tier
Low-End and Older Systems
What causes it: Budget systems often ship with one RAM stick, which restricts bandwidth. This matters most for integrated graphics because the GPU uses system memory.
How to check: Open Task Manager with Ctrl+Shift+Esc, then go to Performance > Memory. Check total capacity, speed, and “Slots used.” Inspect the motherboard to identify whether it has two or four DIMM slots.
What to do: Prioritize two matched modules over one larger module. Use 2 x 8 GB when supported and budget-constrained, or 2 x 16 GB when games and background applications regularly exceed 16 GB. Enable the kit profile only if the motherboard and CPU support it reliably; otherwise, stable default speed is preferable to crashes.
How to undo: If a second module causes boot failures, test each module alone in the recommended slot, then run both at default settings before enabling a profile.
Midrange Gaming PCs
What causes it: Midrange CPUs and discrete GPUs can still lose smoothness in CPU-heavy games when RAM is single-channel, incorrectly slotted, or left at default speed.
How to check: Verify “Dual” in CPU-Z or HWiNFO, verify the effective rated speed in Task Manager, and check BIOS for an enabled profile.
What to do: Use 2 x 16 GB in A2/B2, enable XMP/EXPO/DOCP Profile 1, and keep all advanced values on Auto. This is the best balance of capacity, bandwidth, upgrade simplicity, and stability for most gaming PCs.
How to undo: If profile-enabled gaming crashes begin, disable the profile, update BIOS, then retry at one lower frequency step.
High-End Gaming and Creator PCs
What causes it: High-capacity four-DIMM builds place more stress on the memory controller. Filling all slots can prevent the highest advertised profile speed from remaining stable.
How to check: Count installed modules, confirm their part numbers match, and check the motherboard’s qualified-memory list and manual for supported configurations. Test stability after any BIOS or memory change.
What to do: Prefer two higher-capacity matched DIMMs, such as 2 x 32 GB or 2 x 48 GB where supported, rather than four smaller modules if high memory speed matters. Use the rated profile first; reduce speed one step if four-DIMM operation is unstable.
How to undo: Return to two matched DIMMs in A2/B2 or load optimized defaults. Capacity can be added later with a validated matching kit, but stability should take priority over a small frequency gain.
Common Mistakes
Installing sticks in adjacent slots: This is caused by assuming physical proximity means pairing. Check motherboard labels, then move the sticks to A2/B2. Undo by following the board manual if it specifies another layout.
Assuming dual-channel automatically means full rated speed: This is caused by leaving XMP, EXPO, or DOCP disabled. Check Task Manager and BIOS, enable Profile 1, and undo it by selecting Auto if instability appears.
Mixing kits with the same advertised speed: This is caused by treating speed ratings as complete compatibility information. Check part numbers, timings, voltage, and capacity. Replace them with one matched kit, or disable the profile and run conservative defaults if you must keep mixed modules.
Using four DIMMs just to fill empty slots: This is caused by prioritizing appearance over memory-controller load. Check whether two larger modules meet your capacity needs. Use two matched sticks where possible, or lower frequency if all four slots must be populated.
Changing several BIOS values at once: This is caused by trying to optimize frequency, timings, and voltage simultaneously. Check stability after each change. Start with one memory profile, test it, and undo through Load Optimized Defaults if troubleshooting becomes unclear.
FAQ
How do I know whether my RAM is running in dual channel?
What causes it: Windows Task Manager does not always display channel mode directly. How to check: Use CPU-Z’s Memory tab and look for “Channel #,” or check HWiNFO’s memory summary. What to do: If it reports single channel, install matched sticks in A2/B2. How to undo: If moving them prevents booting, return them to the prior slots and consult the motherboard manual.
Does dual-channel RAM require two identical sticks?
What causes it: Different sticks may operate in flex mode or at reduced settings. How to check: Compare capacity, part number, timings, and voltage on both modules. What to do: Use a matched kit for full, predictable dual-channel operation. How to undo: Mixed modules can be retained at default settings if capacity is more important than peak performance.
Should I use XMP or EXPO?
What causes it: The correct name depends on the platform and memory kit. How to check: Look in BIOS for the profile options offered by your motherboard. What to do: Enable the profile designed for your kit, usually XMP on Intel-oriented kits and EXPO on AMD-oriented DDR5 kits. How to undo: Set the profile back to Auto or Disabled if the system becomes unstable.
Is four sticks of RAM still dual channel?
What causes it: Four modules do not automatically create quad-channel operation on mainstream dual-channel boards. How to check: Read the motherboard specifications and verify channel mode in CPU-Z. What to do: Populate matched modules evenly across both channels, following the manual’s four-DIMM layout. How to undo: Remove two modules and use the preferred A2/B2 pair if high-speed profile stability is poor.