
Most people shop for a motherboard the wrong way around when overclocking is the goal. They fixate on the chipset, the RGB, or the number of M.2 slots, then wonder why their CPU throttles under an all-core load while the socket area hits 90°C. The power delivery section — the VRM — is what decides whether your chip can hold its overclock, and it is the single most misunderstood part of a motherboard. The most common mistakes: buying a board with a big marketing number (“18+2 phase design!”) without understanding that doubled phases are often just doubled components, not doubled power; assuming every board in a chipset family has identical VRMs (they rarely do); and completely ignoring heatsink mass and airflow, which matter as much as component ratings on paper. This guide walks through what actually matters when you evaluate VRMs, with concrete numbers so you can compare boards like an editor who has disassembled a few dozen of them.
Our Top Picks


Top 3 picks at a glance
Decide These 3 Things First
1. How much power does your CPU actually draw? This sets your VRM budget. A Ryzen 7 7600 pulls roughly 88W under stock load; an Intel Core i9-14900K can pull 253W or more at stock power limits and spike past 300W when unlocked. Match the board to the chip, not the other way around. Overclocking typically adds 20–40% to sustained draw.
As an Amazon Associate we earn from qualifying purchases at no extra cost to you.


2. Are you overclocking at all? AMD’s Ryzen 7000/9000 chips and Intel’s K-series unlock multipliers; non-K Intel chips and most APUs barely benefit from aggressive VRMs. If you are only enabling PBO or XMP, a mid-tier board is plenty. If you are pushing a 14900K or a Ryzen 9 9950X with a manual all-core overclock, premium power delivery pays for itself in stability.
3. What is your airflow situation? A board with decent VRMs in a case with zero airflow over the socket area will thermally throttle a board with mediocre VRMs in a well-cooled chassis. Be honest here — it changes which tier you should buy.
Phase Count and Component Ratings: Read Past the Marketing
VRM quality starts with the MOSFETs (or “power stages” / SPS, smart power stages). Each stage has a continuous current rating. Budget boards typically use 45–60A stages; mainstream boards like the MSI PRO Z790-A WiFi II use 80A SPS stages; flagship boards like the MSI MPG X870E Carbon MAX WiFi step up to 110A SPS stages. Multiply the per-stage rating by the number of CPU-core phases for a rough sustained capacity: an 80A 16-phase design theoretically delivers 1,280W — far more than any consumer CPU needs — but real-world thermal limits cut that number substantially, which is why heatsinks matter.
Beware of “teamed” versus “doubled” phase counts. A “16+2 (8+8)” design usually means eight controllers paired with doubled components, not sixteen true phases. Doubling components lowers current per stage and heat, which is genuinely good — but a true 12-phase 80A design often outperforms it. Check reviews that photograph the bare PCB rather than trusting the spec sheet. For context: anything with 60A+ stages and at least 12 real CPU-core phases handles a 200W+ overclock on air cooling; 80A+ SPS stages are the sweet spot for high-end chips today.
Heatsink Size, Mass, and Thermal Design
The VRM heatsink converts an electrical spec into a real thermal result. Look for these numbers when you can find them: heatsink fin stack height (aim for 15mm or more of fins, not a flat aluminum slab), total weight (premium VRM heatsinks run 300–500g for the pair; budget boards may use 100–150g pieces of extruded aluminum), and whether the heatsink uses a heatpipe to bridge the two banks. Extended fins that hang over the motherboard edge, like those on the X870E Edge TI WiFi, dramatically increase surface area compared to flat blocks.
Material matters too: aluminum is standard, but thickness and fin density determine dissipation. A heatsink with 0.5–1.0mm fins spaced 2–3mm apart moves far more heat than a solid 10mm block of the same weight. Also check whether the VRM area sits under the exhaust path of your CPU cooler. Tower air coolers naturally cool the left VRM bank; AIO users get nothing for free there.
Airflow and Auxiliary VRM Cooling
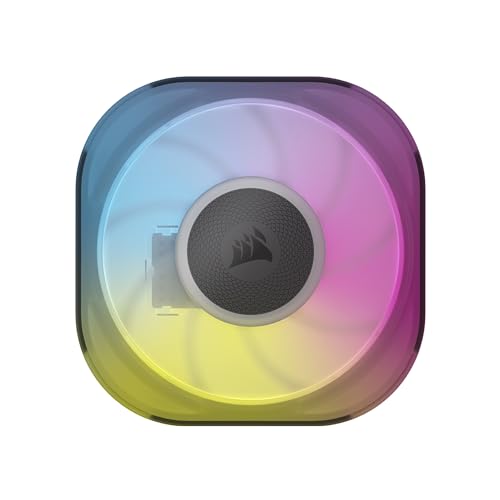
If your case has poor airflow over the socket area, or you run a 300mm radiator that blocks motherboard fans, auxiliary VRM cooling is worth planning for. Dedicated VRM fans exist — the CORSAIR iCUE Link AIO VRM Fan Module ($29) is a 70mm fan with a magnetic dome bearing that mounts near the VRM heatsink and integrates into Corsair’s iCUE Link ecosystem, with tool-free CapSwap installation. A single 70mm fan pushing 10–15 CFM across the VRM heatsinks can drop VRM temperatures 10–15°C in restrictive builds.
Alternatively, position case fans deliberately: one 120mm intake on the side panel blowing across the VRM bank is the classic fix. If your motherboard has a chipset or auxiliary fan header near the socket, wire a VRM fan there so the board can ramp it with thermal load. Note that actively cooled VRMs accumulate dust — plan to clean them every 3–6 months.
Memory VRMs and DDR5 Overclocking
CPU VRMs get the headlines, but if you want to push RAM — and DDR5 rewards it — look at the memory power delivery and board validation. Entry boards ship with a simple controller and modest memory OC support; better boards validate faster kits. Real-world examples from current retail boards: the MSI PRO Z790-A WiFi II supports DDR5-7800+ MT/s overclocked, the MSI MPG X870E Edge TI WiFi validates DDR5-8400+ MT/s, and the Carbon MAX WiFi tops out at DDR5-9000+ MT/s with a 64MB BIOS ROM that leaves room for future AGESA updates. If your RAM goal is 8000 MT/s or higher on AMD, confirm the board explicitly validates that speed — memory controller behavior on AM5 makes board tuning matter more than raw DIMM specs.
Price Tiers: What Each Level Buys You
Budget ($100–180): 50–60A stages, modest aluminum heatsinks, fine for 65–125W CPUs and mild PBO/XMP use. Avoid heavy all-core overclocking on 200W+ chips here.
Mid-range ($180–320): 80A SPS stages, heavier heatsinks, better memory validation. The MSI PRO Z790-A WiFi II (around $190) is the archetype for Intel builds; the MSI MPG X870E Edge TI WiFi (around $320) sits at the top of this tier for AM5 with PCIe 5.0, M.2 Gen5, Wi-Fi 7, and 5G LAN included.
Premium ($320–550+): 90–110A stages, heatpiped heatsink arrays, larger BIOS ROMs, and headroom for 300W+ overclocks. The MSI MPG X870E Carbon MAX WiFi (around $500) is aimed at 9950X/285K owners running sustained all-core loads. Most buyers at this tier are paying for extreme-load stability and longevity, not marginal MHz.
Diminishing returns hit hard above roughly $350 unless your CPU genuinely exceeds 250W sustained.
Warranty, BIOS, and Long-Term Support
Aggressive overclocking stresses boards over years, so support matters. Most major manufacturers warranty consumer motherboards for 3 years; some extend to 5 with registration. Check the BIOS ROM size — a 32MB chip is workable, but 64MB (as on the Carbon MAX) means the board can carry more CPU microcode and memory profiles across future CPU generations. Verify USB BIOS Flashback support so you can recover from a failed overclock or update BIOS without a working CPU installed. A clear CMOS button on the rear I/O saves genuine frustration when a memory overclock fails to POST.
Spec Checklist
| Spec | Budget | Mid-Range | Premium |
|---|---|---|---|
| Price range | $100–180 | $180–320 | $320–550+ |
| Power stage rating | 45–60A | 80A SPS | 90–110A SPS |
| CPU-core phases (real) | 8–12 | 12–16 | 16–20+ |
| Sustained CPU headroom | ~150W | ~250W | 350W+ |
| VRM heatsinks | Aluminum blocks, ~100–150g | Finned, 200–350g | Heatpiped fin stacks, 350–500g |
| DDR5 OC validation | 6400–7200 MT/s | 7800–8400 MT/s | 8400–9000+ MT/s |
| BIOS ROM | 16–32MB | 32MB | 64MB |
| PCIe / M.2 | PCIe 4.0 x16, Gen3/4 M.2 | PCIe 5.0 x16, Gen4 M.2 | PCIe 5.0 x16, Gen5 M.2 |
| Networking | 1G LAN, Wi-Fi 6 | 2.5G LAN, Wi-Fi 6E | 5G LAN, Wi-Fi 7 |
Red Flags
- “22-phase VRM!” claims on $120 boards. Counting doubled or “teamed” components inflates the number; check third-party PCB photos for the real controller and stage count.
- Flat slab heatsinks with no fins. If the VRM heatsink looks like a smooth aluminum brick, assume 150W sustained is the practical ceiling.
- Identical boards, different VRMs. Manufacturers quietly revise power delivery within the same model name across revisions — check board revision numbers and recent reviews before buying.
- No VRM thermal sensor or missing fan header near the socket. You cannot manage heat you cannot measure or cool.
- Only one 8-pin EPS connector on boards marketed for overclocking. High-end builds should see dual 8-pin EPS (each 8-pin carries roughly 235W sustained).
- Suspect pricing on old chipsets. A last-gen board priced like current-gen often has VRM hardware the price no longer justifies.
FAQ
Do I need a premium VRM just to run XMP or EXPO?
No. Memory profile loading is easy on any board from the last several generations. VRM headroom matters for CPU overclocking and heavy all-core workloads, not for enabling a validated RAM profile.
How hot is too hot for VRMs?
Power stages are typically rated to 125–150°C, but you want to stay well below that. Sustained VRM temperatures above 90–100°C under load suggest insufficient airflow or heatsinking; throttling usually begins well before the silicon is at risk. A VRM fan or a repositioned case fan fixes most cases.
Is more phases always better?
No. Twelve true 80A phases outperform twenty-four “doubled” 50A halves in many real-world thermal scenarios, because fewer, larger stages running cooler with better heatsink contact are more efficient. Current-per-stage and heatsink design matter more than the raw number on the box.
Can I add cooling to a budget board instead of buying a better one?
Partially. A $29 auxiliary VRM fan like the Corsair iCUE Link module, or a well-placed 120mm case fan, can let a mid-tier board handle heavier sustained loads than its stock configuration. But if your CPU draws 250W+ sustained, no amount of airflow rescues undersized 50A stages on a flat heatsink — buy the better board.









