
There is a specific, sinking feeling that every PC builder experiences when they reach the final stages of a build, go to slide the glass side panel onto their chassis, and hear a sharp clink. The copper heat pipe tips of a brand-new, dual-tower CPU cooler are protruding just two millimeters too far. Or worse, the front fan of the cooler is sitting cockeyed because it is resting directly on top of high-profile RGB RAM sticks, forcing the fan up and out of the case’s physical boundaries.
When learning how to choose cpu cooler clearance, the most common mistake is relying solely on the “compatibility” list on a retail site. A cooler might technically fit your motherboard socket (like AMD AM5 or Intel LGA 1700), but socket compatibility does not guarantee physical space compatibility. Builders frequently overlook three-dimensional clearance: vertical height clearance from the CPU lid to the side panel, horizontal clearance over the motherboard’s VRM heatsinks, and RAM clearance. To avoid costly return shipping fees and delayed builds, you must treat cooler clearance as a game of millimeters where close enough is never good enough.
As an Amazon Associate we earn from qualifying purchases at no extra cost to you.
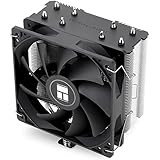
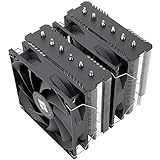


Our Top Picks

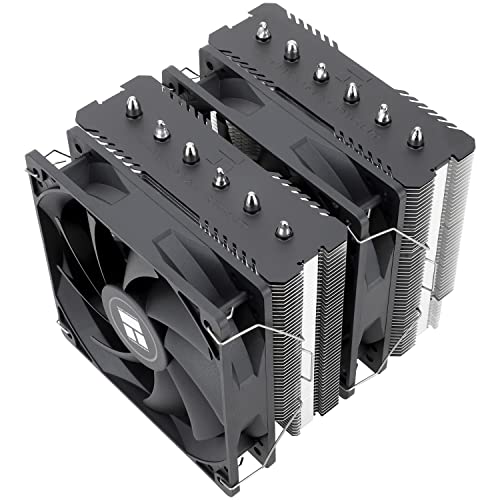


Top 3 picks at a glance
Decide These 3 Things First
Before you begin browsing online catalogs or comparing thermal benchmarks, you must establish the physical boundaries of your system. Every component inside a desktop chassis exists in a delicate spatial ecosystem. Defining these three factors immediately will eliminate 80% of the incompatible coolers on the market:
- Your Case’s Maximum CPU Cooler Height: Every PC case specification sheet lists a maximum CPU cooler clearance limit (typically ranging from 130mm to 180mm). Find this number first. If your case maxes out at 150mm, a 155mm cooler is a non-starter.
- Your RAM Module Height: Standard DDR4 and DDR5 memory modules without heat spreaders are about 31mm tall. High-performance RGB RAM can easily measure 44mm to 51mm in height. This height directly dictates whether you can use a dual-tower air cooler or if you must opt for a slim or low-profile single-tower model.
- Your Motherboard Form Factor & VRM Heatsinks: Mini-ITX boards pack components tightly around the CPU socket. Large, decorative VRM (Voltage Regulator Module) heatsinks on modern motherboards can collide with wide heatsink fins or low-hanging heat pipes, forcing you to look at offset or highly compact cooler designs.
1. Vertical Height Clearance: The Case Boundary
The most critical dimension when learning how to choose cpu cooler clearance is vertical height. This is the distance from the top of the installed CPU (the integrated heat spreader) to the inner surface of the case’s side panel. Standard mid-tower cases usually accommodate coolers up to 160mm or 165mm tall, while compact or budget cases might restrict you to 150mm or less.
If you have a compact case, a cooler like the ID-COOLING SE-903-XT V2, which stands at a modest 135mm tall, fits easily with room to spare. For slightly wider mid-towers, single-tower options like the Thermalright Assassin X120 Refined SE at 148mm tall offer a sweet spot, leaving a comfortable safety margin in almost any standard chassis. However, if you step up to a heavy-duty dual-tower design like the Thermalright Peerless Assassin 120 SE (155mm tall), you must verify that your case supports at least 156mm of clearance—and even more if you have tall RAM, as we will discuss next.
2. RAM Clearance and Fan Shifting
RAM clearance is where most builders get caught off guard. Many modern dual-tower air coolers overhang the motherboard’s RAM slots. To accommodate memory modules underneath, these coolers feature cutouts in the aluminum fins, or they rely on the user sliding the front intake fan upward on its mounting clips.
Consider this scenario: The Thermalright Peerless Assassin 120 SE has a physical heatsink height of 155mm. It provides about 42mm of default clearance for RAM beneath its front fan. If you install premium RGB RAM that is 46mm tall, you must slide the front 120mm fan up by 4mm to clear the memory. This increases the overall height of your cooler assembly from 155mm to 159mm. If your case only has 156mm of clearance, the side panel will no longer close. If you want to avoid this headache entirely, ultra-slim profile coolers like the AMD Wraith Stealth (standing at a tiny 54mm tall) or offset single-tower designs keep the RAM slots completely unobstructed.
3. Construction and Heat Pipe Architecture
The physical construction of the heatsink determines both its cooling capacity and its spatial footprint. Heat pipes are copper tubes filled with a liquid that vaporizes and condenses to transfer heat away from the CPU. The number of heat pipes and how they are bent affects clearance around the CPU socket.
Low-end or ultra-budget coolers may use 3 copper heat pipes (like the ID-COOLING SE-903-XT V2), which keeps the heatsink footprint narrow and prevents interference with motherboard components. Mid-range single towers typically use 4 heat pipes. High-performance models feature 6 or even 8 heat pipes (like the Thermalright Peerless Assassin 120 SE). As the number of heat pipes increases, the copper pipes must bend outward from the baseplate to distribute heat evenly across a larger fin stack. Ensure that these bends do not encroach on the “keep-out zone” specified by motherboard manufacturers, which is the clear area around the socket designed to prevent components from shorting out against metal heatsinks.
4. Fan Size and Noise Comfort
A larger fan can move more air at lower rotational speeds (RPM), resulting in a much quieter system. However, larger fans require more physical clearance. Standard fan sizes for tower coolers are 92mm, 120mm, and 140mm.
A 92mm fan cooler, such as the ID-COOLING SE-903-XT V2, operates at up to 2200 RPM to keep thermals in check, which can produce a higher-pitched hum under load. A 120mm fan cooler, like the Thermalright Assassin X120 Refined SE, can run at a lower 1550 RPM while moving a comparable volume of air, keeping noise levels down to a comfortable 25.6 dBA. If you choose a cooler with 140mm fans, you will enjoy near-silent operation, but the physical height of the cooler will often jump past 165mm, requiring a premium, wide-body PC chassis to contain it.
5. Price Tiers and Thermal Performance
Your budget plays a major role in what clearance constraints you will face. In the cooling market, paying more generally gets you more metal (larger heatsinks) and more fans, which increases the clearance challenges.
- Budget Tier ($10 – $20): Highly compact solutions. Here you find basic down-draft coolers like the AMD Wraith Stealth (around $9) or compact towers like the ID-COOLING SE-903-XT V2 (around $13) and Thermalright Assassin X120 Refined SE ($17.9). These require very little clearance and fit in almost any system.
- Mid-Range Tier ($25 – $50): The sweet spot for performance. Dual-tower designs like the Thermalright Peerless Assassin 120 SE ($34.9) dominate this space. They offer incredible cooling capacity (up to 245W TDP) but require careful planning for RAM and case height clearance.
- Premium Tier ($60 – $100+): Massive single-tower or dual-tower coolers with whisper-quiet 140mm fans, premium metal coatings, and advanced mounting brackets. These demand premium cases with maximum clearance limits of 165mm to 170mm.
6. Socket Support and Mounting Bracket Design
As we look forward into 2026 and beyond, motherboard sockets continue to evolve. A cooler is useless if its mounting hardware cannot secure it firmly to your CPU. The mounting bracket itself can sometimes interfere with components on the backside of the motherboard or hit tall VRM capacitors on the front side.
When choosing a cooler, ensure it includes dedicated mounting kits for your specific socket (such as Intel LGA 1700/1851 or AMD AM4/AM5). Premium mounting kits use thick metal backplates that distribute weight evenly across the motherboard, preventing the PCB from warping over time under the weight of a heavy 700g to 1000g heatsink. Budget options occasionally use plastic push-pins or flimsy metal clips which are harder to align and can slip during installation, potentially damaging nearby motherboard traces.
7. Installation and Tool Access Clearance
An often overlooked aspect of clearance is “human clearance”—the space required for your hands and tools to actually install the cooler inside the chassis. If you are installing a massive dual-tower cooler inside a compact mid-tower case, you may find it nearly impossible to plug in the 8-pin CPU power cable or connect the fan headers once the heatsink is mounted.
Before mounting a large cooler, check if the mounting screws are accessible from the top or if you need a specialized, extra-long screwdriver (which some premium manufacturers include in the box). If space is incredibly tight, it is always best to install your RAM, plug in your upper motherboard power cables, and mount your M.2 SSDs before securing the CPU heatsink to its bracket.
Spec Checklist
Use this quick-reference checklist to map out your clearance requirements based on your budget and performance needs:
| Feature / Spec | Budget Tier | Mid-Range Tier | Premium Tier |
|---|---|---|---|
| Average Cooler Height | 54mm to 135mm | 148mm to 155mm | 155mm to 168mm |
| Typical Heat Pipes | 0 to 3 heat pipes | 4 to 6 heat pipes | 6 to 8 heat pipes |
| RAM Clearance Limit | Infinite (no overhang) | 35mm to 42mm (adjustable) | 44mm to 50mm+ (dedicated cutouts) |
| Fan Size & Max Noise | 92mm / up to 32 dBA | 120mm / up to 26 dBA | 140mm / under 22 dBA |
| Target CPU TDP | 65W to 130W | 150W to 245W | 250W+ |
Red Flags
When shopping for a CPU cooler, keep an eye out for these warning signs that indicate potential clearance or compatibility headaches:
- Unspecified Heatsink Weight: If a manufacturer does not list the weight of a massive dual-tower cooler, be cautious. Heatsinks weighing over 900 grams require robust metal backplates; cheap plastic mounting hardware on heavy coolers can warp your motherboard.
- “Universal” Coolers Missing Socket Brackets: Be wary of listings that claim to fit every socket but do not explicitly list your specific socket (e.g., LGA 1700 or AM5) in the product description. You may end up having to order a separate bracket kit from the manufacturer.
- No RAM Clearance Dimension Listed: If a dual-tower cooler’s spec sheet completely omits the clearance height under the fin stack, it likely has poor RAM compatibility, meaning you will be forced to run a single fan or buy ultra-low-profile memory.
- Fixed, Non-Adjustable Fan Clips: Some budget coolers use rigid plastic shrouds instead of metal wire clips to hold the fans. These shrouds prevent you from sliding the fan upward to clear your RAM, rendering the cooler incompatible with anything other than bare PCB memory sticks.
FAQ
How do I find the maximum CPU cooler height my PC case supports?
You can find this measurement on the official product specification page of your PC case manufacturer, usually listed under “Clearance,” “CPU Cooler Limitation,” or “Physical Dimensions.” It is typically listed in millimeters (e.g., “Max CPU Cooler Height: 160mm”). Always leave a 2mm to 3mm safety buffer to account for motherboard standoff height and CPU socket thickness.
Can I use a cooler if it physically touches my RAM heat spreader?
It is highly recommended to have at least 1mm to 2mm of space between your CPU cooler (or its fan) and your RAM modules. If the cooler puts physical pressure on the RAM, it can bend the memory slot, cause intermittent boot failures, or prevent the RAM from sitting fully in its dual-channel slots. If they touch tightly, slide the fan up slightly or opt for lower-profile RAM.
Do liquid AIO coolers have the same clearance issues as air coolers?
All-In-One (AIO) liquid coolers solve vertical height and RAM clearance issues because the CPU block itself is very low-profile. However, they trade these issues for radiator clearance challenges. With an AIO, you must check if your case has enough clearance at the top or front to fit both the radiator thickness (typically 27mm to 30mm) and the fan thickness (usually 25mm) combined without hitting your motherboard’s upper VRM heatsinks.
Is it safe to run a dual-tower cooler with only the center fan installed?
Yes, most dual-tower coolers can be run in a single-fan configuration (using only the middle fan). This completely eliminates RAM clearance issues because there is no front fan overhanging the memory slots. While this will increase your CPU temperatures by roughly 3 to 5 degrees Celsius under heavy loads, it is an excellent troubleshooting step if you find yourself with unexpected clearance conflicts.









