
Poor cable management behind the motherboard tray is one of the most common build mistakes, and it causes more problems than most people expect. Bundles shoved carelessly behind the board can press against solder points, block airflow between the motherboard and the case’s back panel, and put strain on connector headers when you close the side panel. Even worse, a bulging back panel means the panel doesn’t seat flush, screws strip, and dust filters stop lining up. Done right, cables behind the motherboard tray are invisible, tension-free, and easy to service months later when you upgrade a GPU or swap a cooler. This guide walks you through the full process, from planning your runs to the final zip tie, with realistic time estimates so you know what you’re getting into.
Our Top Picks

What You Need
| Item | Why You Need It | Optional? |
|---|---|---|
| Velcro cable straps (10–20 pack) | Reusable and gentle on sleeved cables; ideal for temporary bundle points behind the tray | No |
| Zip ties (4-inch and 8-inch) | Permanent anchor points on cable cutouts and tie-down loops; trim flush with flush cutters | No |
| Flush cutters or small scissors | Trim zip tie ends so no sharp edges snag cables or fingers | No |
| Phillips #2 screwdriver | Removing the back panel and any stock fan or PSU shroud hardware | No |
| Flashlight or headlamp | The space behind the tray is often 0.8–1.2 inches deep and poorly lit | No |
| Extension cables (24-pin, 8-pin EPS, GPU extensions) | Reach distant routing cutouts without stretching stock cables; sleeved versions improve looks if your case has a window | Yes |
| Rubber grommet kit | Covers sharp cutout edges in older or budget cases that lack factory grommets | Yes |
| Magnetic parts tray or bowl | Keeps small screws from vanishing into the carpet | Yes |
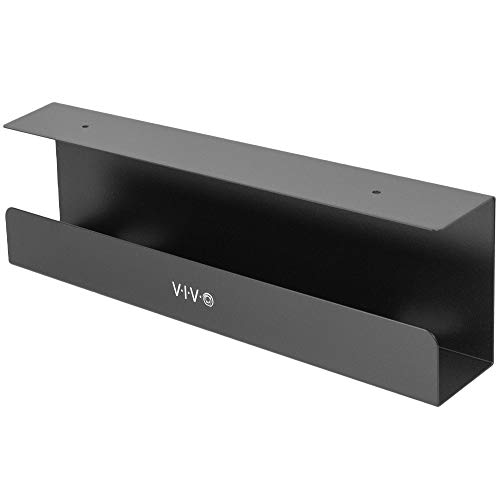
One note on workspace: if you’re building on an open desk rather than inside a case, keep the surrounding area tidy too. A product like the Cotohim Under Desk Cable Management Tray (35.8″×5.6″, fabric-lined, clamp or screw mount, around $33) or the VIVO 17-inch under desk tray (about $20) keeps your power strips and spare cables off the floor so nothing tugs at your work area mid-build — but neither is required for the job itself.
As an Amazon Associate we earn from qualifying purchases at no extra cost to you.

Step-by-Step
1. Unplug everything and remove both side panels (5 minutes)
Shut down the PC, flip the PSU switch off, and unplug the power cord. Hold the power button for five seconds to drain residual charge. Remove the glass or solid front panel and the rear back panel so you can work from both sides. Lay the case on its side with the motherboard tray facing up — gravity becomes your friend when routing.
2. Map your cable runs before you route anything (10 minutes)
Identify every cable that will cross behind the tray: the 24-pin ATX, the 8-pin (4+4) EPS CPU cable, front-panel headers, USB 3.0 header, HD Audio, fan cables, and SATA data/power runs. Hold each cable loosely behind the tray and find its natural path from the PSU shroud to its nearest cutout. Most mid-tower cases have 4–6 cutouts: one top-left for EPS, one left edge for the 24-pin, one or two mid-board for GPU and SATA, and one bottom-right near the front-panel headers. Write the mapping down or snap a phone photo of the headers before disconnecting anything.
3. Route the bulky power cables first (15 minutes)
Start with the 24-pin ATX cable because it’s the thickest, typically 0.4–0.6 inches in diameter with sleeving. Feed it through the left-edge cutout angled upward — never force it through a grommet that’s already crowded. Route the 8-pin EPS next through the top-left cutout. A common trap: the EPS cutout is sometimes placed so far from the header that you need 8–10 extra inches. If the stock cable strains, route it around the top of the tray or plan for an extension rather than pulling the connector sideways, which can crack the header over time.
4. Route and bundle the small cables (10 minutes)
Front-panel headers, USB 3.0, and HD Audio cables are thin and flexible — route them through the bottom-right cutout in a flat bundle rather than twisting them together. Twisted bundles create spring tension that pushes connectors out of their headers. Fan cables should follow the case’s fan channels; connect each fan to the nearest header and tuck the slack into the channel with a single Velcro strap.
5. Secure everything behind the tray (15 minutes)
Anchor each bundle to the case’s built-in tie-down loops or cable channels using zip ties, leaving just enough slack (about half an inch) at each connector so nothing is under tension. Bundle thickness matters: the space behind most trays is under 1.2 inches, so flatten bundles instead of rolling them into tubes. Trim every zip tie flush. Use Velcro straps at any point you expect to open again — GPU power especially, since most people upgrade graphics cards every 2–3 years.
6. Test-fit the back panel, then test power (10 minutes)
Before screwing anything in, hold the back panel in place. It should touch the case frame with no pressure. If it bulges, reopen and flatten the offending bundle — don’t force the panel shut against cables. Once it seats cleanly, reinstall all screws, plug in the PSU, and power on. Enter BIOS briefly to confirm the CPU fan header and board are reading correctly, then enjoy the clean look.
Mistakes to Avoid
Cutting zip ties with dull scissors. A ragged cut leaves a razor edge that slowly chews through insulation. Flush cutters cost under $10 and eliminate this entirely.
Overfilling a single grommet. Running three thick cables through one cutout causes bulging that transfers pressure to the motherboard itself. Spread runs across multiple cutouts when available.
Forgetting the EPS cable until last. It’s the single most common reroute: builders finish everything, then discover the 8-pin CPU cable is six inches short. Route it first.
Blocking fan headers or the CMOS battery. Check that no bundle sits over the battery or makes a header hard to reach — you’ll need access during future troubleshooting.
Sacrificing serviceability for looks. Twenty zip ties look tidy but turn a 10-minute GPU upgrade into an hour of cutting. Velcro at service points, zip ties only at permanent anchors.
How Often
A full re-cable isn’t needed on a schedule, but do a quick check every 6–12 months or whenever you open the case: confirm no bundle has shifted onto a fan, that the back panel still seats flush, and that dust hasn’t matted into the bundles behind the tray. Full re-management is only necessary after a major component change — new motherboard, PSU, or a case swap. If you’re the type who upgrades annually, favor Velcro throughout so every revision takes minutes instead of an afternoon.
When to Call a Pro or Replace
Call a professional builder or local PC shop if you notice burning smells, flickering power, or cables that show melted or cracked insulation behind the tray — those indicate electrical problems beyond cable routing, and continued use risks damage to the board or PSU. Replacement rather than repair makes sense in two cases: if your case has fewer than three cable cutouts and no tie-down points (common in cases under $50, where routing is genuinely fighting the chassis), upgrading to a modern case with a 0.8–1 inch cable channel and rubber grommets will do more than any amount of effort behind the tray. Also replace any cable with visible insulation damage — never tape over it, especially on PSU-side wiring that can carry significant wattage.
FAQ
How much space should be behind the motherboard tray?
Most cases offer 0.8–1.2 inches of depth. If your build is tight, flatten bundles wide and low rather than stacking them, and prioritize keeping the thickest cable — usually the 24-pin — as close to the tray wall as possible.
Zip ties or Velcro straps — which is better?
Use both. Zip ties for permanent anchor points you’ll never touch, Velcro for anything near connectors you may unplug. Velcro is reusable, adjustable, and won’t crush sleeved cables when cinched.
Why won’t my back panel close even after routing?
Something is bulging. Run your hand along the panel edge and feel for resistance — the culprit is usually the 24-pin at the grommet or a fan cable coiled instead of laid flat. Uncoil round bundles into flat ribbons and retry before removing cables entirely.
Do I need extension cables for good cable management?
Not always, but they help in two situations: cases where the EPS or 24-pin routing path is unusually long, and builds with tempered glass side panels where custom-length sleeved extensions ($25–60 for a basic set) make visible runs look intentional. Measure the strained run before buying — most people only need one extension, not a full kit.









