
GPU fans collect dust faster than almost any other component in your gaming PC. They sit low in the case, pull air (and everything floating in it) directly through their blades, and spin tens of thousands of times per minute. If you clean them carelessly — grabbing the blades, spinning them with compressed air, or yanking the card out without grounding yourself — you can crack a blade, damage the bearing, kill a fan header, or worse, fry the card with a static discharge. A replacement cooler fan usually costs $15 to $25, but a dead GPU can cost you $300 to $1,200 or more.
This guide walks you through cleaning your GPU fans the safe way, with realistic time estimates and the exact tools you need. Whether your card is throttling under load, making a rattling noise, or just looks furry with dust, the process below will get it running cool and quiet again without risking your hardware.
As an Amazon Associate we earn from qualifying purchases at no extra cost to you.
Our Top Picks

What You Need
| Item | Why You Need It | Optional? |
|---|---|---|
| Compressed air can (10 oz or larger) or electric blower dryer | Dislodges dust from heatsink fins and fan hubs without contact | No |
| Soft-bristle brush (paintbrush or makeup brush, 1/2 to 1 inch bristles) | Gently sweeps dust off fan blades without scratching them | No |
| Cotton swabs | Cleans tight spots around the fan hub and shroud corners | No |
| Isopropyl alcohol (90% or higher) and lint-free cloths or microfiber towels | Removes stubborn grime and old thermal paste residue | No |
| Phillips screwdriver (#1 or #2, depending on card) | Removes the heatsink or backplate if you want a deep clean or fan replacement | Only for deep cleaning |
| Anti-static wrist strap | Grounds you so static electricity cannot damage the card’s circuitry | Recommended, not required if you touch bare metal first |
| Thermal paste (3.5 g tube, around $8 to $12) | Needed if you remove the heatsink, since the factory paste must be replaced | Only if removing the cooler |
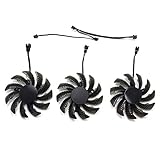
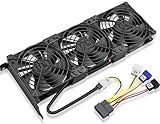
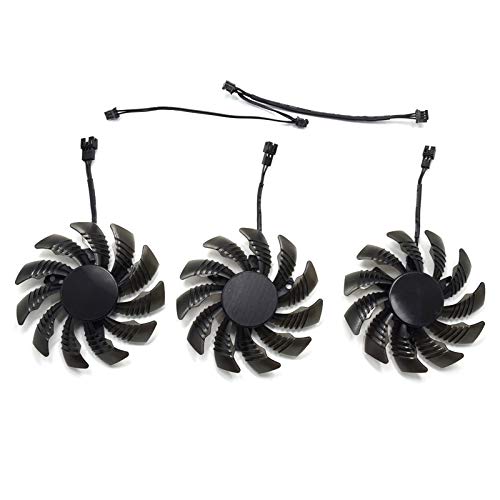
| Replacement fan (e.g., inRobert PLD08010S12H 75mm 3-pin for Gigabyte GTX 970, around $17, or GDSTIME 3x 90mm PCI slot cooler, around $22) | Needed only if a fan is cracked, seized, or rattling beyond repair | Yes — only if damaged |
Step-by-Step
Step 1: Power Down and Prepare Your Workspace (5 minutes)
Shut down your PC fully and flip the power supply switch off. Unplug the power cable, then press the case’s power button for five seconds to drain residual charge. Move to a hard, uncarpeted surface if possible. Touch a bare metal part of your case (or wear your anti-static strap clipped to unpainted metal) before handling the card. Lay out your tools so you are not hunting for a brush with one hand while holding the GPU in the other.
Step 2: Remove the Graphics Card (5 minutes)
Unscrew the bracket screws securing the card to the rear of the case — usually one or two. Press or lift the PCIe slot’s retention latch (its location varies by motherboard; check your manual if you cannot find it). Pull the card straight out with even pressure, then disconnect any PCIe power cables from the card’s edge. Set the card on an anti-static bag or a clean, dry towel — never on carpet.
Step 3: Hold the Fans Still and Blow Out Loose Dust (10 minutes)
This is the step where most people go wrong. Hold the fan blades firmly in place with one finger while you blast with compressed air. If the fans spin freely under air pressure, they can overspeed well beyond their rated RPM and damage the bearing or generate a small voltage in the motor that feeds back into the card. Keep the can upright, use short bursts, and hold it at least 3 inches from the components. Work from the heatsink side first, pushing dust out through the fans, then reverse direction. A full 10 oz can typically covers one card.
Step 4: Brush the Blades and Heatsink Fins (10 minutes)
With the fans held stationary, use your soft brush to sweep each blade from hub to tip. Dust on fan blades is often caked and slightly greasy from airborne oils; the brush loosens it, and a cotton swab lightly dampened with isopropyl alcohol finishes the job. Drag the brush gently along the heatsink fins too — the aluminum fins are thin and bend easily, so brush parallel to them, never across.
Step 5: Clean the Shroud and Backplate (5 minutes)
Wipe the plastic shroud and metal backplate with a lint-free cloth slightly dampened with isopropyl alcohol. Avoid letting liquid pool near the fan bearings or any exposed connectors. Let everything air dry for two to three minutes before reassembly — 90% alcohol evaporates quickly, but you want zero moisture when the card goes back in.
Step 6: Deep Clean or Replace Fans If Needed (30 to 60 minutes)
If a fan still rattles, grinds, or refuses to spin after cleaning, replacement is straightforward on most cards. Remove the screws holding the cooler shroud to the PCB (typically four to eight Phillips screws, often with springs on older cards), note the fan cable routing and connector type, and swap in the new fan. For example, Gigabyte GTX 970 owners commonly use the inRobert PLD08010S12H, a 75mm 3-pin replacement priced around $17 that connects directly to the card’s fan header. If your card uses proprietary fans you cannot source, an external option like the GDSTIME PCI slot bracket cooler with three 90mm fans (around $22) can mount below the card and push air across it — though it will not replace a dead onboard fan on cards that monitor fan RPM. If you removed the heatsink, clean off the old thermal paste with isopropyl alcohol and apply a pea-sized dot of fresh paste to the GPU die before remounting.
Step 7: Reinstall and Test (10 minutes)
Reinsert the card into the PCIe slot until the latch clicks, secure the bracket screws, and reconnect all PCIe power cables — a missing cable is the most common cause of a “no signal” panic afterward. Power on and check that all fans spin. Run a monitoring tool to watch GPU temperature at idle (expect roughly 30 to 45°C) and under a 15-minute load session (most modern cards should stay under about 80°C). Listen for rattling at both low and full fan speed.
Mistakes to Avoid
- Letting compressed air spin the fans freely. This is the number one mistake. Overspeeding can ruin the bearing or generate back-voltage. Always hold the blades still.
- Vacuuming directly over the card. Vacuum nozzles generate static electricity. Use compressed air or a blower instead, and let the dust fall onto a towel.
- Tilting or shaking compressed air cans. This sprays cold propellant onto components, which can cause condensation and frost damage. Keep the can upright.
- Using a wet cloth on the fans or PCB. Moisture and electronics do not mix. Use isopropyl alcohol sparingly on cotton swabs, never a soaked rag.
- Skipping the anti-static precautions. A discharge you cannot even feel can degrade or kill memory chips. Ground yourself first, every time.
- Reusing old thermal paste after removing the heatsink. Factory paste is single-use. Skipping fresh paste can add 10 to 20°C to your load temperatures.
- Reinstalling the card without reconnecting PCIe power. Modern cards will not boot to display without auxiliary power.
How Often
For most gamers, a light external clean — compressed air through the fans and heatsink — every three to four months keeps dust from compacting. If you have pets, smoke indoors, or run your case with mesh filters removed, cut that to every six to eight weeks. A deeper clean with the card removed, including blade-by-blade wiping, is worth doing once a year. As a benchmark heading into 2026, modern high-wattage cards (300W and above) dump more heat and pull more air than older models, so they benefit from the more frequent schedule.
When to Call a Pro or Replace
Call a repair professional if the rattling persists after a fan replacement, if the card shows visible board damage such as burnt components or bulged capacitors, or if the card is still under warranty — opening the cooler can void coverage on some brands, so check your terms first. Most major manufacturers offer three-year warranties, and some have extended them further, which often makes a warranty claim better than DIY repair.
Consider replacing the card entirely if it is more than six years old, no longer drives your monitor’s resolution at acceptable frame rates, or needs repeated repairs. Replacement cooler fans cost $15 to $25, professional cleaning services typically run $50 to $100, and a professional GPU repair can exceed $150 — at that point, the money is better put toward a new card.
FAQ
Can I clean GPU fans without removing the card from the case?
Yes, for routine dusting. Hold the fans still and use compressed air in short bursts, with a towel held nearby to catch falling dust. However, you cannot properly wipe the blades or clean the far side of the heatsink without removing the card, so plan to pull it out at least once a year.
Is compressed air safe for GPU fans?
Yes, as long as you keep the can upright, use short bursts from at least 3 inches away, and physically hold the fan blades so they cannot spin. An electric blower duster (around $30 to $60) is a reusable alternative that avoids propellant and moisture issues entirely.
Why are my GPU fans making a clicking or grinding noise?
Usually it means dust or a stray cable is interfering with the blades, or the fan bearing is worn out. First, power down and check that no wires touch the fans and that dust is not caught in the hub. If the noise continues with nothing obstructing the blades, the bearing is failing and the fan should be replaced — most replacements cost between $15 and $25.
Can I use a hair dryer or household vacuum to clean my GPU?
A hair dryer on the cool, low setting can work as a blower in a pinch, but the hot setting risks damaging components. Never use a household vacuum nozzle directly on the card — vacuum brushes and hoses generate static electricity that can permanently damage the board. Compressed air or a purpose-built electric duster is much safer.









