A beginner-safe gaming PC setup follows a fixed order: clear desk space first, mount case components with a specific torque-free screw pattern, verify every cable and port connection before powering on, then configure XMP/EXPO and fan curves on first boot before touching Windows. Skipping or reordering these steps is where most new builders damage parts or waste hours chasing a “no display” error that was really a loose cable.
As an Amazon Associate we earn from qualifying purchases at no extra cost to you.


Our Top Picks
 CORSAIR 7000D Airflow Full-Tower ATX PC Case7000 Series21.65 x 9.76 x 23.62 Inches41.23 poundsCheck on Amazon
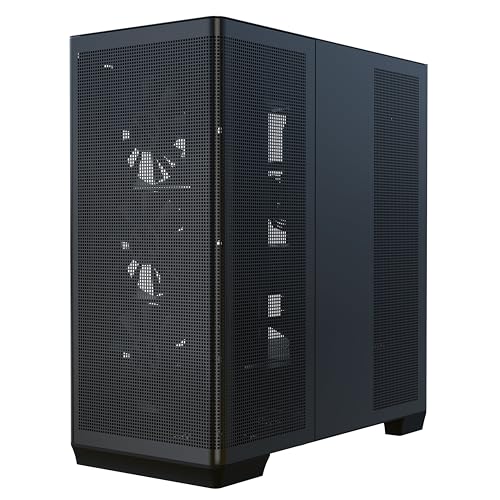


Top 3 picks at a glance
Step 1: Measure Your Desk Footprint Before You Unbox Anything
A 27-inch monitor needs more desk space than beginners expect once you add keyboard and mouse travel. The minimum usable footprint is 100cm wide by 60cm deep. Anything smaller forces you to push the monitor back against the wall, which puts it outside the 50-70cm eye distance range optometrists recommend for that screen size.
| Monitor size | Minimum desk width | Minimum desk depth | Notes |
|---|---|---|---|
| 24-inch | 90cm | 55cm | Tight but workable for a single monitor |
| 27-inch | 100cm | 60cm | Standard recommendation for most beginners |
| 32-inch | 120cm | 65-70cm | Needs extra depth for proper viewing distance |
| Dual 27-inch | 150-160cm | 60cm | Add 10cm if using a monitor arm instead of stands |
Keyboard travel matters more than people think. A full-size keyboard plus a mouse with room to swipe at low DPI needs about 40cm of depth in front of the monitor, separate from the monitor’s own footprint. If your desk is under 60cm deep, your keyboard will overhang the edge or your mouse pad will fight with the monitor stand’s base.
Step 2: Unbox and Lay Out Components in Build Order
Lay components out in the order you’ll install them, not the order they came out of the boxes. This prevents the common mistake of installing the CPU cooler before the motherboard is in the case, which makes cable routing nearly impossible afterward.
- Case, with side panels removed and standoffs checked against your motherboard size (ATX, mATX, or ITX)
- Power supply, placed near the case but not connected to anything yet
- Motherboard, CPU, RAM, and M.2 SSD, ideally installed on the motherboard outside the case first
- CPU cooler, installed after the CPU but before the motherboard goes in the case
- Graphics card, installed last, after the motherboard is seated
Step 3: Mount the Motherboard With a Torque-Free Screw Order
Overtightening or using the wrong screw order is how beginners warp motherboards, which causes intermittent boot failures that are hard to diagnose later. Use a cross pattern, not a sequential one, and only snug the screws, don’t crank them down.
- Place the motherboard on the standoffs and align it visually before touching any screws
- Hand-thread (don’t use a driver yet) the two screws closest to opposite corners, diagonally across from each other
- Hand-thread the remaining diagonal pair the same way
- Finish threading all remaining standoff screws by hand until each sits flush
- Go back with a screwdriver and tighten each screw in the same diagonal cross pattern, applying only light wrist pressure, no more than a quarter-turn past snug
This sequence spreads mounting pressure evenly across the board instead of flexing it toward whichever corner you tightened first. If a screw won’t thread smoothly by hand, stop and recheck standoff alignment rather than forcing it with a driver.
Step 4: Count Cables and Ports Before You Power On
This is the single highest-value check for a first build, because every mistake caught here costs nothing, and every mistake caught after powering on can cost a part. Go through this count physically, pointing at each connector as you confirm it.
| Connection | What to verify | Why it matters |
|---|---|---|
| 24-pin motherboard power | Fully seated, clip audibly clicked | A half-seated 24-pin causes no-power or random reboots |
| CPU power (4+4 or 8-pin) | Correct connector into the CPU socket near the top of the board, not the PCIe slot | Plugging into the wrong socket can prevent boot or in rare cases damage the board |
| GPU power connectors | Count matches GPU spec (6-pin, 8-pin, or 12VHPWR), all fully inserted | Partial seating on 12VHPWR connectors is a known cause of melting at the connector |
| Front panel connectors | Power switch, reset switch, HDD LED, power LED all matched to motherboard labels | Reversed polarity on LEDs is harmless, but a missed power switch pin means no boot button |
| Case fans | Each fan plugged into a labeled motherboard fan header, not left loose | Unplugged fans run silently until thermal throttling starts |
| Front panel USB/audio | USB 3.0 header and audio header both connected if the case has front ports | Easy to forget since they’re tucked behind the motherboard tray |
| Monitor cable | Plugged into the GPU’s output, not the motherboard’s video output | The most common “no display” cause for beginners with a dedicated GPU |
| SATA/M.2 drives | Boot drive has both data and power cable connected if it’s a SATA SSD | M.2 drives only need to be seated and screwed down, no cable needed |
Do this count twice if it’s your first build. The second pass almost always catches something, usually the monitor cable going into the motherboard’s video output instead of the graphics card.
Step 5: First Boot BIOS Settings
Before installing an operating system, enter the BIOS (usually by pressing Delete or F2 during startup) and set these three things. Skipping this step means your RAM and cooling run at conservative defaults that leave real performance on the table.
- Enable XMP (Intel systems) or EXPO (AMD systems): this single setting runs your RAM at its rated speed instead of the slow JEDEC default. Without it, RAM rated for 6000MHz often runs at 2133-3200MHz, which can cost 10-15% in CPU-bound games.
- Set a fan curve: most boards default to a quiet, slow-ramping curve. Set CPU fans to reach 100% by 75-80°C and case fans to ramp noticeably by 60°C, so the system cools proactively instead of reacting after it’s already hot.
- Confirm the boot drive order: set your installation USB drive first for OS install, then switch the boot order back to your main SSD afterward so the system doesn’t try to boot from USB every time.
After confirming these three, check that the BIOS reports your full RAM capacity and the correct CPU model and core count. A mismatch here (RAM showing less than installed, or a CPU core count that looks wrong) means reseating is needed before you go further.
Step 6: Install Windows and Drivers in the Right Order
Install the OS, then chipset drivers, then GPU drivers, in that order. Installing GPU drivers before chipset drivers occasionally causes driver conflicts that show up as stuttering in your first game session, which beginners often misattribute to the GPU itself.
- Install Windows onto the boot drive you confirmed in BIOS
- Install motherboard chipset drivers from the manufacturer’s site, not a disc that shipped years before your purchase
- Install GPU drivers directly from the GPU manufacturer’s driver tool
- Reboot once after both driver sets are installed before launching anything
A Worked Example: Checking Your Power Budget Before First Boot
Beginners often skip confirming PSU wattage against actual component draw, assuming the PSU listed on the spec sheet is automatically enough. A quick worked example for a common 2026 mid-range build:
- CPU under load: roughly 125W for a mid-range 6-8 core gaming CPU
- GPU under load: roughly 220W for a mid-range gaming GPU in the $400-600 class
- Motherboard, RAM, fans, SSD combined: roughly 60-80W
- Running total: approximately 405-425W
Add a 20-30% headroom margin for transient power spikes, which modern GPUs produce in short bursts well above their average draw. That brings the realistic requirement to roughly 500-550W. A 650W unit from a reputable brand gives comfortable headroom for this class of build and room to upgrade the GPU later without a PSU swap.
Final Pre-Power Checklist
| Check | Pass condition |
|---|---|
| Desk footprint | At least 100x60cm clear for a 27-inch monitor setup |
| Motherboard mounting | Screws tightened in diagonal cross pattern, none overtightened |
| Power connectors | 24-pin, CPU power, and all GPU power connectors fully seated |
| Monitor cable | Connected to GPU output, not motherboard output |
| Fans and front panel | All fan headers and front panel pins connected per manual |
| BIOS settings | XMP/EXPO enabled, fan curve set, boot drive confirmed |
Run through this table once before pressing the power button for the first time. If every row passes, the build is ready for its first game launch.
Frequently asked questions
Should the CPU cooler be installed before the motherboard goes into the case?
Yes, install the CPU cooler after installing the CPU but before placing the motherboard in the case. The article recommends installing the CPU, RAM, and M.2 SSD on the motherboard outside the case first. Installing the cooler afterward can make cable routing nearly impossible, so following this order keeps the build easier to manage.
What should I do if a motherboard screw will not thread smoothly by hand?
Stop and recheck the standoff alignment rather than forcing the screw with a driver. The motherboard should be visually aligned on the standoffs first. Hand-thread the screws until they sit flush, then use a screwdriver with only light wrist pressure and no more than a quarter-turn past snug.
Where should I connect the monitor cable when the PC has a dedicated graphics card?
Connect the monitor cable to an output on the graphics card, not to the motherboard’s video output. This is one of the most common causes of a no-display problem for beginners using a dedicated GPU. Checking this connection during the cable count can prevent unnecessary troubleshooting after powering on.
Do M.2 SSDs need both data and power cables?
No, an M.2 SSD only needs to be seated and screwed down. A SATA SSD requires both a data cable and a power cable. During the pre-power check, identify which type of drive is installed and confirm the appropriate connections, since the cabling requirements differ between SATA and M.2 storage.
What should I check if the BIOS reports less RAM or the wrong CPU information?
Reseat the relevant components before continuing. After entering BIOS, confirm the full RAM capacity, the correct CPU model, and the correct core count. If the BIOS shows less memory than installed or reports a CPU core count that looks wrong, the article says this indicates reseating is needed before installing Windows or drivers.
Related guides
- Best Premium Flight Simulator Cockpit Setups for Aviators: 4 Compared (2026)
- Best Network Cabinets for Home Labs and Offices: 4 Compared (2026)
- Best Managed Switches for Gaming and Home Networks: 4 Compared (2026)
- Best Fan Hub Controllers for Cable Management Setups: Compared and Ranked: 8 Compared (2026)