Quick answer: To access the BIOS on a Windows 11 PC, open Settings, go to System, then Recovery, click Restart now next to Advanced startup, and choose Troubleshoot, then Advanced options, then UEFI Firmware Settings, then Restart. If Windows will not load, power the PC off fully, switch it on and tap the BIOS key for your brand (usually Del, F2, F10 or Esc) until the setup screen appears.
Those two routes cover almost every desktop and laptop sold in the last decade. Below you will find every reliable method, a brand-by-brand key table, a one-line command that reboots straight into firmware, and fixes for the most common reason people get stuck: a PC that boots so fast the key press never registers.
Our Top Picks
 Logitech K120 Full Size Wired Keyboard USB Plug-and-Play1-Pack0.92 x 17.7 x 6.1 inches1 PoundsCheck on Amazon
BIOS vs UEFI: What You Are Actually Opening
Almost every Windows 11 machine uses UEFI firmware rather than the old-style BIOS. Windows 11 requires UEFI with Secure Boot capability and TPM 2.0, so if your PC runs Windows 11 officially, it has UEFI. Most people, motherboard makers included, still call the setup screen “the BIOS,” and that is fine. Everything in this guide applies whether your board labels it BIOS, UEFI, Setup Utility or Firmware Settings.
Gamers and PC builders usually head into the BIOS to do one of these jobs:
- Enable XMP or EXPO so RAM runs at its rated speed instead of the slower default.
- Change the boot order to install Windows or boot from a USB drive.
- Turn on virtualization (Intel VT-x or AMD SVM) for emulators, WSL2 or Android apps.
- Check or enable TPM 2.0 and Secure Boot, which some anti-cheat systems and Windows 11 itself require.
- Set fan curves, check CPU temperatures or enable Resizable BAR for a modern GPU.
- Update the firmware itself, often needed before a new CPU will work in an older board.
Method 1: From Windows 11 Settings (Most Reliable)
This is the method to use whenever Windows boots normally. It works on fast-booting NVMe systems where the startup key window is too short to catch.
- Press Windows + I to open Settings.
- Select System, then Recovery.
- Next to Advanced startup, click Restart now, then confirm. Save any open work first.
- The PC restarts into a blue “Choose an option” screen. Select Troubleshoot.
- Select Advanced options.
- Select UEFI Firmware Settings, then click Restart.
The PC reboots directly into the firmware setup screen. The path is the same on Windows 11 24H2 and 25H2. Some laptop makers add their own branding to the recovery screen, but the menu names stay the same.
If UEFI Firmware Settings is missing: the PC is either booting in legacy (CSM) mode or the firmware does not expose that option to Windows. Use the startup key method below instead.
Method 2: Press the BIOS Key at Startup
This is the classic route, and the only one that works when Windows will not start at all.
- Shut the PC down completely. Do not choose Restart; a full shutdown gives you a clean power-on.
- Press the power button.
- Immediately start tapping the BIOS key for your brand about twice per second. Do not hold it down, because some boards ignore a held key.
- Keep tapping until the setup screen appears. If Windows starts loading, wait for it to finish, shut down and try again.
BIOS Keys by Brand
| Brand | Usual BIOS key | Notes |
|---|---|---|
| ASUS (desktops and motherboards) | Del or F2 | ROG and TUF boards use Del; many ASUS laptops use F2 |
| MSI | Del | F11 opens the one-time boot menu |
| Gigabyte / AORUS | Del | F12 opens the boot menu |
| ASRock | Del or F2 | F11 opens the boot menu |
| Acer | F2 or Del | Most Acer laptops use F2 |
| Dell / Alienware | F2 | F12 opens the one-time boot menu |
| HP / OMEN | F10 or Esc | Esc opens a startup menu; then press F10 for BIOS Setup |
| Lenovo / Legion | F2 or F1 | Some laptops have a small Novo button or pinhole that opens a boot menu |
| Microsoft Surface | Hold Volume Up | Hold Volume Up, press and release Power, keep holding until the logo screen |
| Samsung | F2 | Varies by model |
Laptops with a compact keyboard may need the Fn key held together with the function key (for example Fn + F2) if the top row is set to media controls by default.
Method 3: Shift + Restart
This is the quickest shortcut to the same recovery menu used in Method 1, and it works from the sign-in screen even if you cannot log in.
- Open the Start menu (or look at the sign-in screen) and click the power icon.
- Hold Shift and click Restart. Keep holding Shift until the blue menu appears.
- Select Troubleshoot, then Advanced options, then UEFI Firmware Settings, then Restart.
Method 4: One Command That Reboots Straight Into BIOS
For anyone who visits the BIOS often, such as overclockers tuning memory, this is the fastest option. It skips the blue recovery menu entirely.
- Right-click the Start button and choose Terminal (Admin), or search for Command Prompt and choose Run as administrator.
- Type shutdown /r /fw /t 0 and press Enter.
The PC restarts immediately and lands in firmware setup. The /fw switch needs administrator rights and a UEFI system. If you would rather go through the recovery menu, shutdown /r /o /f /t 0 restarts into the Advanced startup screen instead.
Make a Desktop Shortcut
- Right-click an empty part of the desktop and choose New, then Shortcut.
- For the location, enter shutdown /r /fw /t 0.
- Name it something like “Restart to BIOS” and finish.
- Right-click the shortcut, open Properties, click Advanced and tick Run as administrator.
Double-clicking it now restarts the PC straight into the BIOS, so be sure your work is saved first.
Which Method Should You Use?
| Situation | Best method | Why |
|---|---|---|
| Windows boots normally | Settings or Shift + Restart | No timing needed, works on fast boot |
| You enter the BIOS often | shutdown /r /fw /t 0 or a shortcut | One step, no menus |
| Windows will not load | Startup key | Works before Windows starts |
| Windows fails to boot twice in a row | Automatic Repair menu | Windows opens the recovery screen on its own; then go to UEFI Firmware Settings |
| Wireless keyboard not responding at boot | Settings method, or plug in a wired USB keyboard | Some wireless keyboards are not active until Windows loads |
Can’t Get Into the BIOS? Common Fixes
The PC boots too fast
Windows Fast Startup and the firmware’s own Fast Boot setting can shrink the key window to a fraction of a second. Use Method 1 or Method 4 instead. To make the startup key work again, open Control Panel, go to Power Options, select “Choose what the power buttons do,” click “Change settings that are currently unavailable” and untick Turn on fast startup.
The keyboard does nothing at boot
Many wireless and Bluetooth keyboards only start working once Windows loads its drivers. A plain wired USB keyboard plugged into a rear motherboard port is the most dependable option for BIOS work. Avoid front-panel hubs and USB-C adapters while troubleshooting.
Logitech K120 Full Size Wired Keyboard USB Plug-and-Play Windows - Black | Full-size keyboard, spill-resistant, curved space bar, Windows PC and laptops compatible


As an Amazon Associate we earn from qualifying purchases. Product prices and availability are accurate as of the date/time indicated.
The screen stays black until Windows appears
If your monitor is connected to the graphics card but the BIOS is outputting through the motherboard video port, or the monitor takes a few seconds to wake, you can miss the setup screen. Connect the monitor to the graphics card, turn the monitor on before the PC, and try a different cable or input if the problem continues.
You set a BIOS password and forgot it
On a desktop, clearing CMOS resets firmware settings, including the password on most consumer boards. Use the board’s Clear CMOS button or jumper as described in the manual. On laptops, a supervisor password is usually tied to the manufacturer’s support process, so contact the maker with proof of ownership.
What to Do Once You Are Inside
Most modern boards open in a simplified EZ Mode and offer an Advanced Mode, often toggled with F7. Use the arrow keys or mouse to move around, Enter to change a value and Esc to go back. A few safe habits make BIOS changes painless:
- Change one thing at a time. If the PC fails to boot afterwards, you know exactly what caused it.
- Save with F10. On most boards F10 is Save and Exit. Leaving with Esc and choosing “Discard changes” exits without saving.
- Know the reset. “Load Optimized Defaults” (often F5 or F9) restores factory settings if something goes wrong.
- Write down settings before a firmware update. Updating the BIOS usually wipes custom settings like XMP profiles and fan curves.
Updating the BIOS With a USB Drive
Most motherboards update from a built-in flash tool (ASUS EZ Flash, MSI M-Flash, Gigabyte Q-Flash) that reads the firmware file from a USB stick. Download the file only from the motherboard or laptop maker’s support page for your exact model, copy it to a USB drive formatted as FAT32, and run the update with the PC on stable power. Never switch off the PC during a firmware flash. A small, inexpensive USB drive kept just for firmware files and recovery tools is handy to have in any gaming setup.

SANDISK 64GB Ultra Flair, USB-A Flash Drive, Up to 150MB/s Read Speeds | USB Flash Drive, Up to 15x Faster than standard 2.0, Password Protection, Durable, Sleek Metal Casing, USB 3.0, Silver/Black
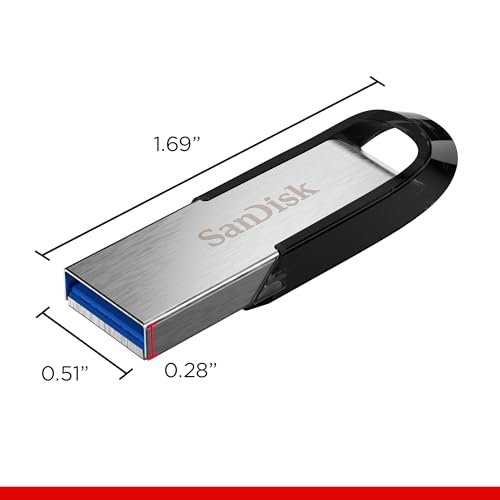
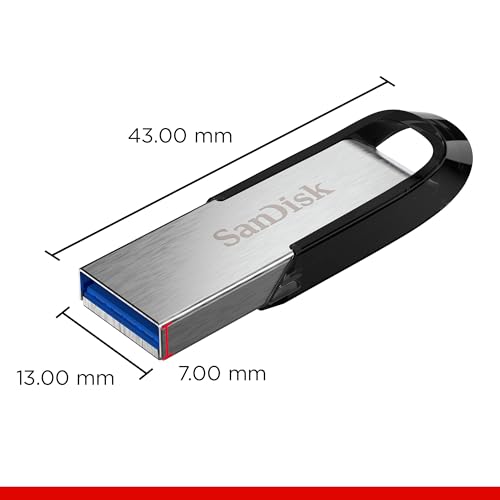


As an Amazon Associate we earn from qualifying purchases. Product prices and availability are accurate as of the date/time indicated.
FAQ
How do I access BIOS on Windows 11 without restarting?
You cannot. The BIOS runs before Windows loads, so every method needs a restart. The Settings and Shift + Restart routes simply schedule that restart for you. If you only need system details like BIOS version, press Windows + R, type msinfo32 and press Enter; it shows BIOS version and mode without a reboot.
What is the BIOS key for Windows 11?
There is no single Windows 11 BIOS key, because the key is set by the PC or motherboard maker, not by Windows. Del and F2 are the most common. HP uses F10 or Esc, Dell uses F2, and Lenovo uses F2 or F1. If none work, use Settings, then System, then Recovery, then Advanced startup.
Why is UEFI Firmware Settings missing from Advanced options?
The option is hidden when the PC boots in legacy BIOS (CSM) mode or when the firmware does not report that capability to Windows. Check System Information (msinfo32): if BIOS Mode says Legacy, use the startup key instead. Converting the drive and switching to UEFI mode is possible, but back up first.
Is it safe to change BIOS settings?
Yes, as long as you change settings you understand and keep a record of what you changed. Enabling XMP, virtualization or Secure Boot is routine. Manual voltage changes carry more risk. If the PC will not boot after a change, loading optimized defaults or clearing CMOS returns everything to factory state.
How do I get into BIOS if my PC won’t boot Windows?
Power the PC off completely, turn it on and tap the BIOS key right away. If Windows fails to start twice in a row, it usually opens Automatic Repair on its own; choose Advanced options, then Troubleshoot, then UEFI Firmware Settings. A wired keyboard on a rear USB port improves your chances.
How do I check my BIOS version in Windows 11?
Press Windows + R, type msinfo32 and press Enter. The “BIOS Version/Date” line shows the version and release date, and “BIOS Mode” shows UEFI or Legacy. Compare the version with the support page for your motherboard or laptop to see whether an update is available.
Does entering the BIOS delete anything?
No. Simply opening the BIOS and leaving without saving changes nothing. Your files, games and Windows install are untouched. Only specific actions like resetting Secure Boot keys, changing storage mode (AHCI or RAID) or wiping a drive from a firmware tool can affect whether Windows starts.
Summary
For a working Windows 11 PC, go through Settings, then System, then Recovery, then Advanced startup, then UEFI Firmware Settings. Power users can run shutdown /r /fw /t 0 as administrator for a one-step reboot into firmware. When Windows will not start, power on and tap Del, F2, F10 or your brand’s key. Keep a wired keyboard and a spare FAT32 USB stick nearby, and BIOS jobs like enabling XMP, turning on virtualization or flashing a firmware update become routine.
Sources
- Microsoft support documentation on Windows recovery options and Advanced startup
- Microsoft Windows 11 system requirements (UEFI, Secure Boot capable, TPM 2.0)
- Motherboard and PC maker support pages from ASUS, MSI, Gigabyte, Dell, HP and Lenovo
Last updated: October 10, 2026