Our Top Picks
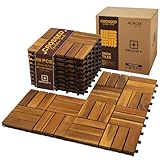
 Majestick Goods 8-Pack Long Slat Acacia Wood Interlocking12 x 12 inches12 x 12 x 0 inches11.6 poundsCheck on Amazon
 Yaheetech 54PCS Deck Tiles Acacia Wood Interlocking Outdoor12″ W × 12″ L × 1″ Thickness11.81 x 11.81 x 0.94 inches38.1 PoundsCheck on Amazon


Top 3 picks at a glance
Best Deck Tiles for Easy Installation
For the easiest DIY installation, choose interlocking polypropylene tiles with a flexible snap-lock base, drainage slots, and a listed coverage area per box; they cut with a fine-tooth saw, need few tools, and can be lifted later. Pick a wood-composite or hardwood tile instead if appearance and underfoot feel matter more than quick cutting and low-maintenance durability.
Compare the main tile types
“Deck tile” can mean several different constructions. The surface material affects weathering and upkeep, while the underside determines how tiles connect and drain. Check both before comparing prices.
As an Amazon Associate we earn from qualifying purchases at no extra cost to you.


| Tile type | Typical connection | DIY cutting | Drainage and durability | Typical material cost |
|---|---|---|---|---|
| Polypropylene grid tile | Flexible tabs or clips that snap together | Usually easy with a fine-tooth hand saw or jigsaw | Open grid drains readily; UV and temperature ratings vary by product | $3–$8 per sq. ft. |
| Wood-composite tile on a plastic base | Interlocking plastic base | Moderate; cut the tile and base carefully | Often has drainage gaps; surface may fade or heat in sun | $5–$12 per sq. ft. |
| Hardwood tile on a plastic base | Interlocking base, sometimes with separate clips | Moderate; hardwood takes a sharper blade | Gaps help drain, but wood typically needs periodic cleaning and oiling | $8–$20+ per sq. ft. |
| Rubber or cushioned tile | Interlocking edges or connectors | Easy to moderate, depending on thickness | Comfortable underfoot, but confirm outdoor UV rating and water flow | $4–$12 per sq. ft. |
These are broad material-price ranges, not quotes; size, finish, region, and package contents change the total. Edging pieces and shipping may be extra.
Which snap-lock system is easiest?
A flexible, integrated snap-lock base is generally the simplest for a first-time installer: align one tile with the next and press the edges together. A rigid base can make a level surface feel solid, but its connectors may be less forgiving if the deck is uneven. Separate clips add another small part to track and can slow down installation around edges.
Before buying, check whether tiles connect on all four sides, whether they can be separated without breaking tabs, and whether the manufacturer sells matching edge or corner pieces. A system that locks in only one direction can make an attractive border or an offset pattern harder to plan.
Choose by your deck and project priorities
| Your situation | Best fit | Trade-off to consider |
|---|---|---|
| You rent or may need access to the surface below | Snap-lock polypropylene tiles | Confirm the layout can be lifted in sections and does not require adhesive. |
| You want a wood look with less routine upkeep | Wood-composite tiles on a draining base | Check heat and fade guidance for a sunny location. |
| You prefer real wood and accept maintenance | Hardwood tiles with replaceable sections | Budget time for cleaning and any finish recommended by the maker. |
| The deck stays wet or sits above a surface that must drain | Open-grid or widely spaced tiles with a stated drainage design | Make sure water can escape at the perimeter rather than pool underneath. |
| You need a soft surface for a balcony or utility area | Outdoor-rated rubber or cushioned tiles | Confirm sunlight resistance, drainage, and whether the texture traps dirt. |
Plan coverage and cuts before ordering
Use the package’s coverage figure rather than assuming every box contains the same number of tiles. For a rectangle, multiply length by width. For an L-shaped area, divide it into rectangles and add the results. Then add a waste allowance: about 5% for a simple rectangle with few obstacles, or 10–15% for many corners, posts, and irregular edges.
Worked example: A balcony measuring 10 ft by 12 ft has 120 sq. ft. of floor area. With 10% extra for cuts, the target is 120 × 1.10 = 132 sq. ft. If each box covers 10 sq. ft., buy 14 boxes (132 ÷ 10 = 13.2, rounded up). At $5–$12 per sq. ft., the tile material for 132 sq. ft. would be roughly $660–$1,584, before any edging, delivery, or tools. If the area has many posts or angled edges, measure a paper layout or full-size outline before finalizing the order.
Keep a spare tile or two if the product may be discontinued; replacing a damaged piece is easier when its connector pattern still matches. Also verify that the advertised coverage accounts for the actual tile dimensions and does not assume a gap between pieces.
Installation: the details that prevent rework
- Check the surface. Deck tiles cover a sound, reasonably level surface; they do not repair loose boards, rot, or a low spot that holds water. Fix those issues first. If the surface is uneven, tiles can rock or connectors can come under strain.
- Plan water flow. Identify the direction water already drains and keep the perimeter open enough for it to escape. Tiles with gaps allow water through, but they cannot correct a deck that slopes toward the building or has blocked drainage.
- Dry-fit a row. Lay several tiles without locking them, starting at a straight edge. Check how the pattern meets walls, doors, and posts. This reveals narrow slivers or awkward cuts before the full floor is connected.
- Connect tiles progressively. Follow the maker’s sequence and press connectors into place without forcing them at an angle. Leave the expansion clearance specified in the instructions, especially beside walls or fixed thresholds; plastic can expand and contract with temperature.
- Cut edges carefully. Measure the piece twice, mark the tile, and cut on a stable surface with eye protection. Use a blade suited to the surface material, and avoid cutting through connectors you still need. For a post or pipe, make a template first rather than repeatedly trimming the tile.
- Test the finished area. Walk the surface and check for rocking, raised edges, loose locks, or spots where water cannot escape. Re-seat or trim tiles as needed, and make sure doors still clear the added height.
What to inspect beyond the product listing
Look for a stated outdoor-use and UV-resistance rating, a recommended temperature range, and a maximum load or intended use. A tile designed for a balcony walkway may not be right beneath heavy equipment or furniture with narrow feet. For wood products, ask what maintenance is expected; for composite, check cleaning instructions and any warning about hot surfaces. Confirm that the backing will not trap debris against a surface that needs periodic inspection.
Easy installation comes from matching the connector, cuttability, and drainage design to the actual deck—not from a low piece price alone. For a quick, reversible project, an open-grid snap-lock tile is usually the practical starting point. For a more natural finish, compare composite and hardwood options while allowing extra time for cuts and care.
Frequently asked questions
Can I install deck tiles over loose or rotting boards?
No; fix loose boards, rot, and low spots that hold water before installing tiles. Deck tiles cover a sound, reasonably level surface but do not repair underlying problems. An uneven surface can make tiles rock or put strain on their connectors.
How can I estimate how many boxes to order?
Measure the floor area, add a waste allowance, then divide by the coverage per box and round up. For a simple rectangle, multiply length by width; for an L-shaped area, add the areas of its rectangles. Allow about 5% extra for a simple layout or 10–15% for many corners, posts, or irregular edges.
Will deck tiles fix drainage problems on my deck?
No; drainage gaps let water pass through, but tiles cannot correct a deck that slopes toward the building or has blocked drainage. Check the existing water-flow direction and keep the perimeter open enough for water to escape. Also confirm that water will not pool underneath.
Can I use deck tiles around a post or pipe?
Yes, but plan the cut before connecting the full floor. Dry-fit a row to see how the pattern meets posts and other edges, then make a template for a post or pipe rather than repeatedly trimming the tile. Cut on a stable surface and avoid connectors you still need.
What should I check before using tiles beneath heavy furniture?
Check the product’s maximum load or intended use before placing it beneath heavy furniture or equipment. A tile made for a balcony walkway may not suit furniture with narrow feet. Also review outdoor-use and UV-resistance information, the temperature range, and any surface-care guidance.