
As an Amazon Associate we earn from qualifying purchases at no extra cost to you.


Benchmarking your PC sounds simple: run a test, read a number, done. But a botched benchmark can cost you real money and months of frustration. If you test with background apps eating CPU cycles, thermals throttling your GPU, or mismatched settings between runs, you’ll draw conclusions that are flat-out wrong. People return perfectly good hardware based on a bad score, spend hundreds of dollars “upgrading” a bottleneck they never actually had, or tune their system chasing numbers that don’t reflect real gaming or content-creation performance. Worse, unverified benchmark results give you no baseline — so when performance degrades six months later from dust, driver bloat, or failing storage, you can’t prove it or diagnose it.
This guide walks you through benchmarking your PC properly, from preparing a clean test environment to interpreting results with honest margins of error. Whether you’re validating a new build, comparing against published reviews, or diagnosing a slowdown, the process below takes roughly 60 to 90 minutes for a full pass.
Our Top Picks

What You Need
| Item | Why | Optional? |
|---|---|---|
| Benchmark software (3DMark, Cinebench 2024, CrystalDiskMark) | Provides standardized, repeatable tests for GPU, CPU, and storage. Free versions cover most needs; 3DMark Advanced runs about $34. | No |
| Hardware monitoring tool (HWiNFO64, MSI Afterburner + RivaTuner) | Logs clocks, temperatures, and power draw so you can spot throttling that skews scores. Free. | No |
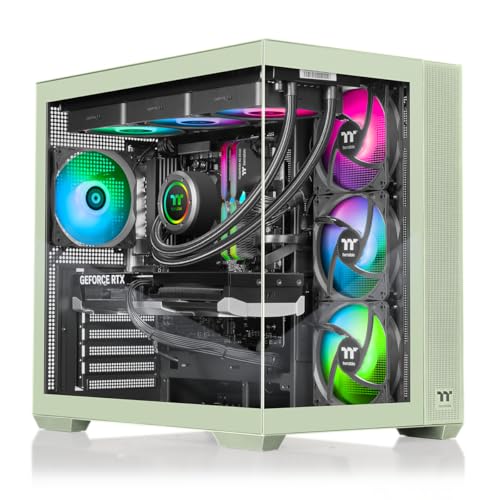
| Thermaltake LCGS View 9870M-380 Gaming Desktop (Ryzen 7 9800X3D, RTX 5070, 32GB DDR5-6000, 2TB NVMe) | If you’re building or buying a test-rig-class machine rather than benchmarking an existing PC, a prebuilt with a 9800X3D and RTX 5070 gives you a stable, well-cooled reference platform at around $2,600. | Yes — only if you need a new baseline system |
| G.SKILL Trident Z5 RGB DDR5 64GB (2x32GB) 6400MT/s CL32 | Memory speed and capacity directly affect benchmark consistency. 64GB at CL32 eliminates RAM as a variable in heavy multitasking and content-creation tests; runs about $1,600, though 32GB kits often suffice for gaming-only testing. | Yes — only if your current RAM is a bottleneck or mismatched pair |
| UPS (uninterruptible power supply), 850VA or higher | Prevents power dips mid-run from invalidating long benchmark passes. Decent units run $90–$150. | Yes |
| Notebook or spreadsheet for logging results | Scores mean nothing without context: dates, driver versions, ambient temperature, and settings all get recorded. | No |
Step-by-Step
1. Define what you’re testing (5 minutes)
Decide your goal before launching anything. Comparing your PC to a published review? You need the same software versions and test settings the reviewer used. Diagnosing a slowdown? You need before/after runs on identical conditions. Validating a new build? Run a broad suite — CPU, GPU, memory, and storage. Writing down your goal keeps you from wasting an hour on tests that don’t answer your question.
2. Update and stabilize the system (15 minutes)
Install the latest GPU driver (a clean install via the vendor’s utility is best), chipset drivers, and Windows updates, then reboot. Check that your BIOS is reasonably current, but avoid updating it right before benchmarking — new BIOS versions can change memory training and boost behavior, making your results incomparable to older runs. Note every driver and BIOS version in your log.
3. Clear the test environment (10 minutes)
Close every background application you can: browsers, launchers (Steam, Epic), cloud sync (OneDrive, Dropbox), RGB control suites, and Discord. Disable Windows Search indexing temporarily and pause Windows Update. Set your Windows power plan to High Performance or Best Performance. Turn off any overclocks — XMP/EXPO memory profiles and GPU factory boosts are fine because they’re stock configuration, but manual CPU or GPU overclocks should be reverted so your results reflect the hardware as specified. Confirm your room temperature is reasonable; a 78°F room versus a 68°F room can shift thermal-limited scores by a few percent.
4. Let the machine reach thermal steady state (10 minutes)
Run a light load — a game menu, a 10-minute video encode — for several minutes before testing. Cold benchmarks flatter some hardware and penalize others. For GPU tests especially, run one warm-up pass of your actual benchmark and discard the result before recording real runs.
5. Run the CPU benchmark (15 minutes)
Use Cinebench 2024 for a well-regarded, comparable CPU test. Run the multi-core test at least three times and record each score; a healthy system shows runs within 1–2% of each other. Watch HWiNFO64 during the runs: if your CPU hits its thermal limit (often 95°C on modern Ryzen and Intel parts) and clocks drop below base specifications, you have a cooling problem that invalidates comparisons to published results. Record peak temperature, peak clock speed, and peak package power alongside each score.
6. Run the GPU benchmark (20 minutes)
3DMark’s Time Spy and Steel Nomad are the standard synthetic choices, and 3DMark’s built-in in-game-style tests work well too. Run each test three times. Variance across runs should be under 3%. Log your GPU’s peak temperature (85°C or below is comfortable for most modern cards), hotspot temperature, and sustained clock speed. If your first run scores noticeably higher than runs two and three, your card is thermal throttling — clean your fans and heatsinks and test again.
7. Run memory and storage tests (10 minutes)
For RAM, AIDA64’s cache and memory benchmark gives you read/write/latency numbers — latency in the 60–80 nanosecond range is typical for well-tuned DDR5. For storage, CrystalDiskMark’s default 1GiB test gives sequential and random read/write figures; a healthy PCIe 4.0 NVMe drive typically posts sequential reads somewhere in the 5,000–7,000 MB/s range, but check your drive’s specification rather than assuming. Run each three times and average.
8. Repeat, average, and record (10 minutes)
Take the median of your three runs for each test — not the best run, which flatters your hardware and won’t be reproducible. Record scores alongside system details: CPU and GPU model, RAM capacity and speed, driver versions, ambient temperature, and the date. This log becomes your baseline for future comparisons.
9. Compare honestly (5 minutes)
When comparing to published reviews, expect your synthetic scores to land within roughly 5% of a same-hardware reference build. Differences inside that margin are noise — cooling, silicon lottery, and background variance explain them. Only conclude that something is wrong when you’re 10% or more below reference, and even then, verify with a second full pass before acting.
Mistakes to Avoid
- Benchmarking on a fresh boot. Windows Update, background indexing, and telemetry tasks all fire in the first 10–15 minutes after boot and will drag scores down unpredictably. Warm up first.
- Cherry-picking your best run. Report medians. Your best-of-five score tells you nothing about real-world performance.
- Ignoring thermals. A throttled CPU or GPU produces a legitimate-looking but misleading score. Always log temperatures and clocks alongside results.
- Changing multiple variables at once. If you upgrade RAM and reinstall your GPU driver between tests, you can’t attribute the score change to either. Change one thing per comparison.
- Comparing scores across benchmark versions. Cinebench R23 and Cinebench 2024 scores are not interchangeable, and 3DMark updates occasionally rescale results. Match versions exactly.
- Trusting synthetic scores alone for gaming. A strong 3DMark result doesn’t guarantee good frame pacing. For gaming conclusions, use built-in game benchmarks or a frame-time capture tool.
- Benchmarking a dusty, clogged system. Cleaning fans and heatsinks before testing takes ten minutes and can recover several percent of lost performance.
How Often
Benchmark your full system two to four times per year as a health check, using identical tests and settings so results are comparable over time. Run a targeted benchmark after every major change: new GPU or CPU, driver overhaul, BIOS update, cooling service, or a fresh Windows install. If you suspect a problem — stuttering, throttling, sudden slowdowns — benchmark immediately and compare against your logged baseline. Frequent benchmarking serves no purpose and adds background tool overhead; two to four full passes a year plus event-driven runs is the sweet spot.
When to Call a Pro or Replace
Call a professional if your benchmarks show thermal throttling you can’t resolve with cleaning and repasting, scores 15%+ below reference hardware that persist after driver and BIOS updates, or crashes during benchmark runs — those point to failing hardware, inadequate cooling design, or power delivery problems that benefit from an experienced technician. Data-recovery-adjacent storage benchmark failures (drives dropping to single-digit MB/s sequential speeds or disappearing from CrystalDiskMark) warrant immediate professional attention and a backup before any further testing.
Consider replacement rather than repair when your baseline benchmarks show the platform itself is the bottleneck for your workload — for example, an older four-to-eight-core CPU paired with a modern GPU, or a system limited to DDR4 memory that can’t be upgraded further. In those cases, a modern prebuilt like the Thermaltake LCGS View 9870M-380 — pairing the Ryzen 7 9800X3D with an RTX 5070, 32GB of DDR5-6000, and a 2TB NVMe drive for around $2,600 — delivers a clean, warrantied baseline that benchmarks consistently, and if you build or upgrade your own memory, a matched 64GB kit like the G.SKILL Trident Z5 RGB DDR5-6400 CL32 set removes memory as a variable for content-creation workloads.
FAQ
How long should a full PC benchmark take?
Plan on 60 to 90 minutes including warm-up, three runs per test, and logging. Rushing it by running single passes and skipping warm-up produces results you can’t reproduce or trust.
Are free benchmark tools good enough?
Yes, for most people. Cinebench 2024, CrystalDiskMark, HWiNFO64, and 3DMark Basic are all free and produce reliable, comparable results. Paid tiers mainly add custom tests, longer stress loops, and result-upload features that enthusiasts and reviewers need.
Why do my scores differ from online reviews of the same hardware?
Small differences up to 5% are normal — cooling, ambient temperature, silicon variance, and background software all contribute. Larger gaps usually mean thermal throttling, power limits, or different driver and BIOS versions. Check your logged clocks and temperatures against the review’s before concluding anything.
Should I benchmark with XMP or EXPO memory profiles enabled?
Yes. XMP and EXPO are the manufacturer’s rated memory speeds, and virtually every published review runs with them enabled. Benchmarking with memory at default JEDEC speeds will understate your system’s performance by 5–15% in memory-sensitive workloads and make comparisons meaningless.









