
Step into the world of game streaming, and you will quickly realize that the tech landscape is crowded with confusing marketing jargon. Search for a capture card, and you will be met with hundreds of options ranging from generic $20 dongles to premium $200 desktop units. Many first-time streamers make the costly mistake of buying the first device that boasts “4K” on the packaging, only to discover that while it accepts a 4K input, it only outputs a heavily compressed, blurry 1080p stream at 30 frames per second (FPS).
When you are building a clean, functional home studio or gaming desk setup, your capture card is the literal bridge between your console (or gaming PC) and your broadcasting software. Choosing the wrong one can introduce distracting audio desyncs, muddy colors, or unplayable input lag that ruins your gaming experience. To build a setup that looks professional and runs reliably, you need to look past the marketing buzzwords and evaluate the physical and technical specifications that actually affect your daily workflow.
As an Amazon Associate we earn from qualifying purchases at no extra cost to you.
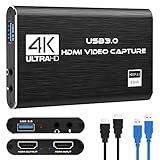


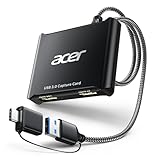
Our Top Picks


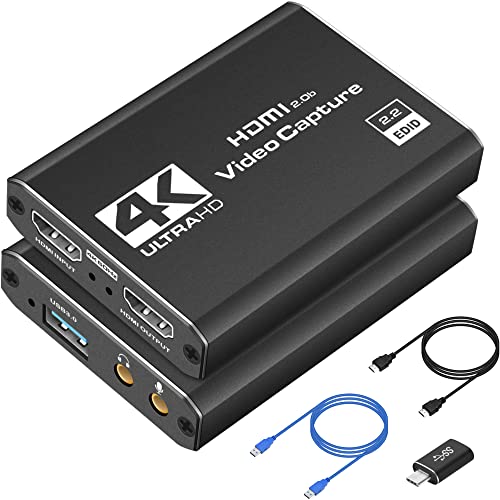

Top 3 picks at a glance
Decide These 3 Things First
Before diving into individual product specifications, you must define the boundaries of your current streaming ecosystem. Answering these three questions first will immediately eliminate 80% of the options on the market, saving you hours of research.
- What is your source device and your target stream resolution? If you are streaming Nintendo Switch gameplay, your console maxes out at 1080p at 60Hz. A basic, budget-friendly capture card will handle this easily. However, if you are playing on a PlayStation 5 or Xbox Series X, you likely want to play in 4K with HDR enabled, even if your stream output to Twitch or YouTube is limited to 1080p at 60FPS. You will need a card with high-end “passthrough” capabilities to avoid downgrading your own gaming experience.
- Do you require portability or a permanent desk integration? External USB capture cards are highly portable and plug-and-play, making them ideal for laptop users or multi-use workspaces. Internal PCIe capture cards require a vacant expansion slot on your desktop PC’s motherboard, but they offer unmatched stability, lower latency, and free up precious desk space and USB ports.
- How do you plan to route your audio? Some setups require capturing game audio, a party chat microphone, and a physical headset simultaneously. If you use a complex audio mixer, a simple USB dongle might complicate your routing. Look for capture cards that feature physical 3.5mm analog audio input/output ports directly on the chassis to simplify your cable management.
Size, Weight, and Desk Footprint
From a home-office design perspective, physical footprint and cable management are just as important as technical performance. Capture cards generally fall into three physical categories:
- USB Dongles (Ultra-Portable): These devices resemble oversized flash drives, typically measuring around 2.8 x 1.1 x 0.4 inches and weighing less than 1 ounce. They plug directly into a USB port or utilize a short, integrated cable. While they keep your desk completely free of bulk, they can block adjacent USB ports on tight laptop chassis.
- External Desktop Boxes: These mid-sized units sit flat on your desk, measuring roughly 4.4 x 2.5 x 0.8 inches and weighing between 4 and 6 ounces. Because they require both an HDMI input cable, an HDMI output cable, and a USB host cable, they can quickly create a “cable octopus” on your desktop. You will need to allocate space behind your monitor or use cable routing clips to manage the tension of these stiff HDMI cables so they do not pull the lightweight capture card off your desk.
- Internal PCIe Cards: Installed directly inside a desktop PC case, these cards measure about 4.7 x 4.2 x 0.7 inches and weigh around 5 ounces. They add zero clutter to your desktop, drawing power directly from the motherboard’s PCIe slot and keeping all HDMI cabling neatly tucked behind your PC tower.
Material Quality and Thermal Management
Video encoding is a processor-intensive task that generates a surprising amount of heat. Cheap, entry-level capture cards ($20 to $30) are almost exclusively housed in lightweight ABS plastic casings. Under continuous use during a three-hour stream, these plastic shells trap heat, causing internal chip temperatures to spike. This thermal buildup can lead to frame drops, screen tearing, or sudden device disconnection mid-stream.
Premium capture cards utilize anodized aluminum alloy housings. Metal casings act as giant passive heatsinks, drawing heat away from the internal encoding chip and dissipating it into the surrounding air. A high-quality metal capture card may feel warm to the touch (frequently reaching external temperatures of 105°F to 115°F), but this is a sign that the thermal management system is working correctly to protect the delicate internal circuitry. If you plan to run marathon streaming sessions, prioritizing a metal enclosure with physical cooling vents is essential for long-term reliability.
Interface Bandwidth and Connection Type
The speed of the connection between your capture card and your streaming computer determines the image quality and latency of your stream preview. This is where many budget manufacturers use misleading labeling.
The gold standard for external cards is a true USB 3.0 (or USB 3.2 Gen 1) connection, which provides a data transfer bandwidth of 5 Gbps. This massive pipeline allows the card to send uncompressed, raw video data directly to your computer with minimal delay.
In contrast, budget cards often use a USB 2.0 interface (limited to 480 Mbps) but use a physical USB 3.0 blue connector to trick buyers. Because USB 2.0 cannot handle raw 1080p60 video data, these cards must heavily compress the video feed using MJPEG compression before sending it to your PC. This results in noticeable color compression artifacts, blurry text in fast-moving games, and an audio/video lag of 150 milliseconds to 300 milliseconds, making real-time interaction or playing via the preview window impossible.
Performance, Latency, and Passthrough Capabilities
To stream console games without lag, you must understand the difference between capture resolution and passthrough resolution.
The “passthrough” loop sends the video signal from your console, through the capture card, and directly to your gaming monitor with zero added latency. This allows you to play your game in real-time on your primary screen. Meanwhile, the “capture” side of the card compresses the video and sends it to your PC to be broadcasted.
If you are planning your home studio setup to last through 2026 and beyond, future-proofing your passthrough capability is critical. Look for these specific performance thresholds:
- Standard Passthrough: 4K at 60Hz. This is the baseline for modern consoles, allowing you to enjoy crisp visuals on your 4K monitor while streaming at 1080p60.
- High-Refresh Passthrough: 1080p at 120Hz/240Hz or 1440p at 120Hz. Crucial for competitive first-person shooters where high frame rates are more important than raw resolution.
- Variable Refresh Rate (VRR) & HDR10 Passthrough: Premium cards allow your monitor to utilize screen-tear-preventing technologies like G-Sync or FreeSync while preserving rich high-dynamic-range colors. Lower-end cards will force you to disable these features in your console settings.
Price Tiers and Value Propositions
The capture card market is divided into three distinct price tiers, each serving a different type of content creator:
- The Entry-Level Tier ($20 – $35): These are generic, highly compact USB dongles. They are excellent for connecting a DSLR camera to use as a high-end webcam, or for streaming low-intensity games from a Nintendo Switch. They rarely offer HDMI passthrough, meaning you must play your game directly inside your streaming software’s preview window.
- The Mid-Range Tier ($35 – $100): In this bracket, you will find reputable brands offering dedicated desktop capture boxes with dedicated 4K60 passthrough and 1080p60 capture. These units feature sturdy metal builds, basic software support, and low latency, making them the sweet spot for the vast majority of console streamers.
- The Premium Tier ($100 – $250+): This category includes industry-standard internal PCIe cards and advanced external units. They offer high-end features like 4K60 HDR capture, 120Hz high-frame-rate passthrough, VRR support, multi-device feeds, and robust custom software suites that integrate seamlessly with professional broadcast tools like OBS Studio and Streamlabs.
Setup, Software, and Compatibility
A capture card is only as good as its compatibility with your operating system and broadcasting software. Modern high-quality cards are UVC (USB Video Class) compliant. This means they require no proprietary drivers to function; your computer will recognize the card instantly as a standard webcam when you plug it in, whether you are running Windows, macOS, or Linux.
While driverless plug-and-play setup is highly convenient, premium manufacturers provide optional companion software. These utility applications allow you to adjust internal settings on the card itself, such as color space parameters, audio gain levels, EDID handshaking profiles (which prevent your console from defaulting to the wrong resolution), and firmware updates to resolve compatibility issues with newly released game consoles.
Spec Checklist
Use this quick-reference matrix to see how the three main tiers of capture cards compare across critical performance metrics.
| Specification Feature | Budget Tier ($20 – $35) | Mid-Range Tier ($35 – $100) | Premium Tier ($100 – $250+) |
|---|---|---|---|
| Max Capture Resolution | 1080p at 30FPS (or 720p at 60FPS) | 1080p at 60FPS | 4K at 30FPS / 1080p at 120FPS |
| Max Passthrough Resolution | None (or basic 1080p60) | 4K at 60FPS | 4K at 60FPS HDR / 1440p at 120FPS VRR |
| Interface Connection | USB 2.0 (often disguised as USB 3.0) | USB 3.0 (5 Gbps Type-A/Type-C) | USB 3.2 Gen 1 or PCIe Gen 3 x4 |
| Average Latency | 120ms to 250ms | 50ms to 80ms | Less than 30ms (virtually instant) |
| Chassis Material | ABS Plastic | Mixed Plastic & Aluminum | Full Anodized Aluminum / Metal Shielding |
| Warranty Coverage | 30-Day Return Window Only | 1-Year Manufacturer Warranty | 2-Year Limited Warranty with Tech Support |
Red Flags to Avoid When Shopping
Because the online marketplace is flooded with white-label, generic electronics, keep an eye out for these common warning signs when reading product descriptions:
- “4K Capture” listed on a $25 device: Always read the fine print. This almost always means the card accepts a 4K *input* signal from your console, but downscales it to a highly compressed 1080p 30FPS output for your stream. True 4K capture requires massive processing power and bandwidth that cannot be manufactured at this price point.
- No mention of “Passthrough” or “Loop-Out”: If a card only has one HDMI port (Input) and no HDMI port labeled “Output” (or “Out”), you will be forced to play your game by looking at your computer’s streaming preview window. The inherent latency will make fast-paced games unplayable.
- Unlabeled USB cables: If the listing images show a blue USB port but the actual cable included in the box is thin, cheap, and lacks the proper USB SS (SuperSpeed) logo molded into the connector, the manufacturer is likely using a cheap USB 2.0 chip inside.
FAQ
Do I need a capture card if I only stream directly from my PlayStation 5 or Xbox Series X?
No, both modern consoles have built-in streaming apps that broadcast directly to Twitch or YouTube. However, these built-in tools offer very limited customization. If you want to use professional overlays, custom alerts, a high-quality DSLR camera, transitions, and sophisticated audio mixing software like OBS Studio, you must route your console’s video feed through a capture card to a computer.
Can I use a cheap $25 capture card to connect my mirrorless camera as a webcam?
Yes, this is actually one of the best use cases for budget capture cards. Because a camera feed is generally a static image (you sitting at your desk) and does not require ultra-high-speed reaction times, the slight latency and compression of a budget USB dongle are perfectly acceptable. Just ensure your camera supports a “clean HDMI output” (meaning it can send video without camera UI overlay menus showing up on screen).
Why does my capture card get extremely hot during use? Is it dangerous?
If your capture card has a metal aluminum housing, it is designed to get warm or hot to the touch. The metal chassis acts as a passive heatsink, pulling damaging heat away from the internal processing chips. However, if a cheap plastic capture card becomes too hot to comfortably hold, or smells of warm plastic, it is likely overheating due to poor thermal design. This can lead to safety hazards or sudden device failure.
How do I fix audio desync issues when using a capture card in OBS?
Audio desync occurs because video processing takes slightly longer than audio processing, causing your voice or game audio to hit the stream before the video frame matches. To fix this in OBS, go to the Advanced Audio Properties menu and add a small “Sync Offset” (measured in milliseconds) to your microphone or desktop audio device. Usually, a delay of 50ms to 150ms will perfectly align your audio with the capture card’s video feed.









