
Most people buy a case backwards. They fall in love with a glass front panel, a clean look, or a panoramic dual-chamber design, then discover their 350-watt GPU is thermal throttling six weeks later. Or they buy the “airflow” case with mesh everywhere and wonder why it’s still loud — because airflow isn’t just about holes in the panel. It’s about whether air can actually get in, move across your hot components, and leave without fighting a wall of obstructions.
The other common mistake: assuming more fans automatically means better cooling. A case with six weak, badly positioned fans can lose to a case with three well-placed 140mm fans and a genuinely open front. Fan quality, static pressure, intake area, and GPU clearance matter more than raw fan count. And the biggest GPU-related mistake of all is buying a case where the card sits an inch from the tempered glass side panel with no room for a proper bottom intake — then blaming the card.
As an Amazon Associate we earn from qualifying purchases at no extra cost to you.



This guide walks through what actually determines how well a case handles a hot graphics card, with concrete numbers to check before you spend anything.
Our Top Picks



Top 3 picks at a glance
Decide These 3 Things First
Before comparing any case, answer these. They eliminate half the market immediately.
1. How much heat are you actually moving? Check your GPU’s total board power, not marketing names. A card drawing 220–250W is manageable in almost any mid-tower. A 320–450W flagship needs serious intake and a case that doesn’t strangle it. Add your CPU: a 65W chip adds little, but a 250W+ CPU on a 360mm radiator changes your airflow budget completely.
2. What’s your GPU’s physical size? Modern cards commonly run 300–360mm long and 3–4 slots thick (roughly 60–75mm). Measure your card or the card you plan to buy, then add at least 30mm of clearance beyond the manufacturer’s listed max GPU length. A “supports 400mm GPUs” spec means nothing if the fans sit 5mm from the shroud.
3. What’s your real budget, including fans? Many cases ship with one to three fans. Budget another $20–60 for extra quality fans if a case only includes two. A $70 case plus $40 of fans can outperform a $120 case left stock.
Size: Mid-Tower Is the Sweet Spot, But Check Internal Volume
For a hot GPU, you want a mid-tower with enough internal width and fan mounting options. Look for cases in the 420–520mm tall × 210–250mm wide × 450–520mm deep range — roughly 40–70 liters of volume. Too narrow and the GPU sits against the PSU shroud with no intake beneath it.
Key internal dimensions to verify:
- GPU clearance: at least 355mm for modern cards; 380mm+ gives breathing room for cable management and future upgrades.
- GPU-to-bottom-fan distance: ideally 25mm or more so a bottom intake can feed the card directly.
- Side clearance: if the GPU sits less than 25mm from the glass, expect warmer side-panel intake (or none at all).
- CPU cooler height: 160–170mm minimum if you’re air cooling a hot CPU.
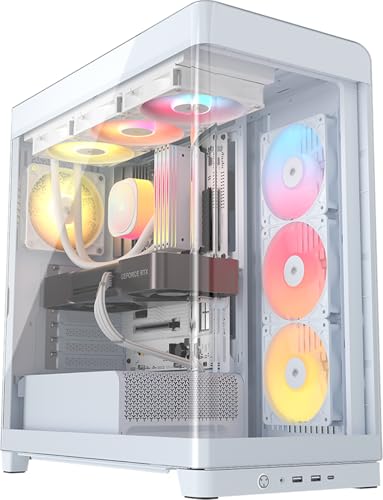
Compact mid-towers like the NZXT H5 Flow (around $70) work well for cards up to roughly 320W because the mesh front supplies unobstructed intake. Larger panoramic cases like the Corsair Frame 4500X RS (~$120) add room for 360mm radiators and extra bottom fans, which matters once you cross 350W.
Material: Steel Thickness and Panel Quality
Nearly every case in this category is SPCC steel with tempered glass, but quality varies. Check:
- Steel thickness: 0.8–1.0mm is standard on decent cases; anything under 0.6mm flexes, rattles, and transmits fan vibration.
- Tempered glass thickness: 4mm is the norm. Avoid acrylic panels — they scratch, yellow, and transmit more fan noise.
- Mesh gauge: front intake mesh should be fine enough to block dust but coarse enough to pass air. Quad-fine mesh (roughly 0.5mm openings) is the current standard on airflow-focused cases.
Weight is a rough proxy: a well-built mid-tower with glass panels runs 18–26 lbs. Ultra-light cases under 14 lbs usually mean thin steel somewhere.
Construction: Where the Air Actually Goes
This is the factor that separates real airflow cases from mesh-washed marketing. Evaluate:
- Front intake area: the front panel should be at least 70% open mesh. Solid or heavily framed fronts choke intake regardless of fan spec.
- Bottom intake: a hot GPU benefits enormously from two or three 120mm bottom fans blowing straight up into the card. Check for a vented PSU shroud with fan mounts, ideally positioned under the GPU’s length.
- Unobstructed exhaust: rear 120mm exhaust plus top radiator/fan mounts. You want 3+ top mount positions for a 360mm radiator option.
- Cable management depth: 20mm+ behind the motherboard tray, with ties and channels, so cables don’t block the front intake path.
- Dust filtration: magnetic or slide-out filters on front, top, and especially bottom intake — dust-clogged mesh can cut airflow by a third within months.
Triple-chamber designs like the Corsair Air 5400 RS and Air 5400 LX ($229–265) move the PSU and cables into a separate chamber, which removes a major airflow obstruction behind the motherboard and keeps cables out of the GPU’s intake path entirely. That architecture genuinely helps hot builds — you’re paying for the layout, not just the look.
Fan Performance: What to Look For on the Box
Fans move the air; the case just shapes it. For GPU cooling specifically:
- Intake fans need static pressure: look for 1.5mmH₂O or higher rated static pressure, since mesh and radiator fins resist airflow.
- Airflow (CFM): 50–70 CFM per 120mm fan is typical for good quality fans; three good intakes at 60 CFM each beats six cheap 30 CFM fans.
- Size: 140mm intakes move more air at lower RPM (quieter) than 120mm where mounts allow.
- Included fans: three pre-installed fans (like the Frame 4500X RS) is a good baseline for a hot-GPU build: two front/bottom intake, one rear exhaust.
- PWM and daisy-chaining: PWM control plus a fan hub or daisy-chain connectors makes tuning noise curves far easier.
A sensible layout for a 300–450W GPU: two to three front or bottom intakes at 120–140mm, one rear exhaust, and top exhaust fans or a radiator. Positive pressure (slightly more intake than exhaust) also keeps dust out of unfiltered openings.
Price Tiers: What Each Level Buys You
- Budget ($60–90): Solid mesh-front mid-towers with one to three fans, 355–380mm GPU clearance. You handle fan upgrades yourself. The NZXT H5 Flow at around $69 is the archetype — compact, genuinely open front, good thermal performance for the money.
- Mid-range ($100–180): Three or more decent fans included, 360mm radiator support, better cable management, GPU anti-sag brackets, and features like reverse-connector motherboard compatibility (as on the around $120 Frame 4500X RS). This is the value sweet spot for hot GPUs.
- Premium ($200–350): Triple-chamber or dual-chamber panoramic layouts, premium fans throughout, tool-less panels, better build quality, and dramatically cleaner cable isolation. The Air 5400 RS ($229) and LX (around $260) fit here — worth it if you want showpiece looks without sacrificing airflow, but not necessary for pure thermals.
Warranty and Brand Support
Cases rarely fail, but fans, hubs, and RGB controllers do. Look for a 2–5 year warranty on the case and any pre-installed fans or controllers — major brands (NZXT, Corsair, and comparable manufacturers) typically offer at least two years, with some fans and power supplies covered longer. Check whether the manufacturer sells replacement panels, filters, and fan hubs separately; a cracked glass panel shouldn’t total a $230 case. Also confirm support for future standards: reverse-connection motherboard compatibility and back-connect cutouts extend a case’s useful life into 2026 and beyond.
Delivery and Assembly Considerations
Cases are heavy and glass is fragile. Factor in:
- Shipping weight: 22–32 lbs boxed for mid-towers; check the seller’s packaging reputation, since transit damage to glass panels is the most common complaint.
- Assembly time: a standard mid-tower takes 45–90 minutes to build in; triple-chamber panoramic cases take longer (2+ hours) due to cable routing across chambers.
- Tool-less features: thumbscrews, tool-less glass removal, and push-pin SSD trays save real time. Hinged or lift-off panels matter if you’ll upgrade frequently.
- Return window: confirm you can return within 30 days in original packaging — GPU clearance surprises are best discovered early.
Spec Checklist
| Spec | Budget ($60–90) | Mid ($100–180) | Premium ($200–350) |
|---|---|---|---|
| Included fans | 1–2 | 3–4 | 4–6 |
| GPU clearance | 330–365mm | 355–400mm | 380–450mm |
| Front intake | Mesh, 2×120mm mounts | Mesh, 3×120/2×140mm | Mesh, 3×140mm + bottom mounts |
| Radiator support | 240mm top | 360mm top | 360mm top + 360mm side/bottom |
| Radiator support | 240mm top | 360mm top | 360mm top + 360mm side/bottom |
| Dust filters | Front/bottom | Front/top/bottom | Full coverage, tool-less |
| Cable management depth | 15–20mm | 20–25mm | 25mm+ or separate chamber |
| Steel thickness | 0.6–0.8mm | 0.8mm | 0.8–1.0mm |
| Extras | — | Anti-sag bracket, ARGB, hub | Panoramic glass, tool-less panels, premium fans |
Red Flags
- “Airflow” case with a solid or tinted-glass front. Aesthetics disguised as performance; intake will be starved.
- GPU clearance listed with no bottom fan mounts. Long cards need intake underneath, not just front fans blowing past.
- Fewer than two intake fans included and proprietary fan sizes. Proprietary formats lock you into expensive replacements.
- No dust filters on bottom intake. The bottom is where a GPU’s air comes from; unfiltered, it’s a dust chute.
- Under 15mm of cable management depth. You’ll end up with a cable wall blocking your intake.
- Claims of specific temperature numbers without methodology. No manufacturer publishes comparable lab data; treat figures like “5°C cooler” as marketing.
- Acrylic side panels. Scratches within months and dulls permanently.
FAQ
Do mesh front panels really make that much difference for GPU temps?
Yes — an open mesh front removes the single biggest obstruction between outside air and your intake fans. Cases with genuinely open fronts consistently outperform otherwise similar cases with solid or glass fronts, because intake fans don’t have to pull air through narrow side gaps.
Is liquid cooling my GPU necessary if it runs hot?
Not necessarily. A 350W air-cooled card in a well-ventilated case with two or three pressure-optimized intakes and a bottom feed usually stays within spec. Liquid cooling helps noise and sustained boost clocks, but a badly chosen case will hurt an AIO-cooled build too — radiators also need airflow.
How many fans do I need for a hot GPU?
Minimum three total for cards up to ~300W: two intakes, one exhaust. For 350W+ cards, aim for four or five: three intakes (front or front plus bottom), one rear exhaust, and top exhaust or a radiator. Positive pressure — slightly more intake than exhaust — keeps dust down.
Are panoramic dual- or triple-chamber cases worse for cooling?
Not inherently. Modern triple-chamber designs like the Air 5400 series isolate the PSU and cables in their own chamber, which can actually improve airflow around the GPU by clearing the motherboard bay. The trade-off is price and size — you’re paying $200+ for architecture that also serves aesthetics, when a $70–120 conventional airflow case can cool a hot GPU just as well.









