Connecting RGB fans to your motherboard sounds intimidating, but it breaks down into two jobs: getting power and control signals to the fans, then telling your software what to do with them. By the end of this guide, your fans will spin, light up, and respond to whatever colors or effects you set in your motherboard’s RGB utility. Whether you’re running a single 120 mm front intake or six fans on a hub, the process below covers both 4-pin PWM (12 V RGB) and 5 V ARGB setups, including the hub route most modern builds use.
Before touching anything, plan about 20 to 45 minutes depending on whether you need to route cables through a finished build. You’ll need your case open, good lighting, and your motherboard manual nearby (or a PDF of it on your phone) so you can locate the fan headers and RGB headers, which vary by board.
Before You Start
RGB fans use two separate connections: one for power and fan speed (the PWM cable), one for lighting (the RGB or ARGB cable). Mixing these up is the single most common mistake, so know what you’re holding before you plug anything in. The table below covers everything you need.
| What you need | Why | Optional? |
|---|---|---|
| RGB or ARGB fans (5 V, 3-pin ARGB preferred for modern builds) | Addressable fans allow per-LED control; 12 V 4-pin RGB fans only support whole-strip colors | No |
| Motherboard with a 5 V 3-pin ARGB header (often labeled ARGB, ADD_HEADER, or JRAINBOW) and at least one PWM fan header (CPU_FAN, SYS_FAN, CHA_FAN) | These headers supply power and let software control lighting and fan curves | No |
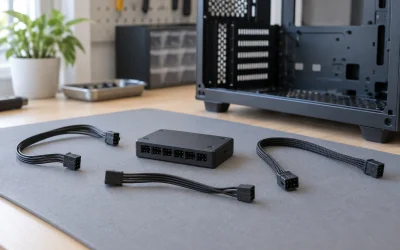
| Fan/ARGB hub (e.g., the one included with many cases or fan kits) | Lets you daisy-chain multiple fans into one header when you have more fans than headers | Recommended if you have 3+ fans |
| Motherboard manual (printed or PDF from the manufacturer’s support page) | Header locations and pin layouts differ between boards; guessing risks damage | No |
| RGB control software: Armoury Crate (ASUS), MSI Center, Gigabyte Control Center, or ASRock Polychrome Sync | This is where you set colors, effects, and sync behavior | No |
| Phillips #2 screwdriver | For mounting fans to the case or radiator | No |
| Velcro ties or zip ties | Cable routing keeps airflow clean and prevents cables snagging fan blades | Yes |
| Flashlight or headlamp | Headers are often tucked behind the motherboard tray or near the bottom edge of the board | Yes |
One safety note before you begin: 5 V ARGB and 12 V RGB connectors are not interchangeable. Plugging a 5 V strip or fan into a 12 V header can burn out the LEDs instantly. Always match the connector shape and voltage marking — 5 V ARGB uses a 3-pin connector with a keyed notch and often reads “5V-D-G” or “+5V-D-GND”; 12 V RGB uses a 4-pin connector labeled “12V-G-R-B”.
Step-by-Step
Step 1: Identify Your Fan Cables and Headers (5 minutes)
Each RGB fan has a thin 3-pin or 4-pin fan cable (power and speed) and a wider 3-pin ARGB cable (lighting). Some fans combine both into a single cable with two connectors at the end. Locate on your motherboard: the CPU_FAN header (top edge, near the CPU socket) and one or more SYS_FAN or CHA_FAN headers (usually along the right edge or bottom). Then find the ARGB header — commonly labeled ARGB_GEN2, ADD_HEADER, JRAINBOW2, or RGB_HEADER2 — and confirm from the manual whether it’s 5 V. If your board has no ARGB header, see the FAQ below for controller alternatives.
Step 2: Power Off and Ground Yourself (2 minutes)
Shut down Windows fully, flip the PSU’s rear rocker switch to off (0), and press the case power button for five seconds to drain residual charge. Touch the bare metal of the case to discharge static. Do not work inside the case with only the monitor asleep — the board may still be powered.
Step 3: Connect the Fan Power Cables (10 minutes)
Mount your fans in the case first, then run the fan cables to the headers. Connect the CPU cooler’s fan to CPU_FAN (many boards refuse to boot or throw a “CPU Fan Error” without it). Connect case fans to SYS_FAN1, CHA_FAN1, and so on. If you’re using a hub, plug all fan cables into the hub, then run the hub’s single output cable to a SYS_FAN header. Cables are keyed — if one resists, don’t force it; flip it or check the manual. Gently tug each connector to confirm it’s fully seated.
Step 4: Connect the ARGB Lighting Cables (5–10 minutes)
Run each fan’s 3-pin ARGB cable to the motherboard’s ARGB header, or daisy-chain them: fan one’s “out” port to fan two’s “in” port, and the first fan’s input cable to the motherboard header. Most ARGB headers and fan chains handle up to roughly 60 to 80 LEDs total; check your manual’s amperage rating (typically 3 A maximum) and stay under it. The connector only fits one way thanks to the keyed notch — align the arrow or +5 V marking on the connector with the pin labeled 5 V.
Step 5: First Boot and BIOS Check (5 minutes)
Flip the PSU back on and boot into BIOS/UEFI (tap Delete or F2 during startup, depending on your board). Look for the hardware monitor or Q-Fan / Smart Fan section — you should see RPM readings on every header you used, typically between 600 and 2,000 RPM depending on the fan. If a header reads 0 RPM, power down and reseat that cable. While you’re here, confirm the board doesn’t show any fan errors.
Step 6: Install RGB Software and Set Colors (10–15 minutes)
In Windows, install your board’s utility suite: ASUS boards use Armoury Crate (install via the Armoury Crate utility from the support page for your exact model), MSI uses MSI Center with the Mystic Light component, Gigabyte uses Gigabyte Control Center with RGB Fusion, and ASRock uses Polychrome Sync. Then set your lighting:
• Armoury Crate: open the Aura Sync tab, select your motherboard, click the header entry for your fans, then choose Static, Breathing, Rainbow, or Music effects, adjust the color palette, and set Speed to taste.
• MSI Center: open Feature Sets, add Mystic Light, click the motherboard icon, select the ARGB header, then pick an effect and adjust Color and Speed sliders.
• Gigabyte Control Center: open RGB Fusion, click the header strip corresponding to your fans, select an effect, and drag the color wheel.
Test responsiveness by switching between Static (single color) and Rainbow. If Rainbow animates smoothly across the fan blades, addressable control is working — each LED is being driven individually.
Step 7: Configure Fan Curves (5 minutes)
Back in BIOS (or the fan software), set custom curves so fans ramp with temperature. In BIOS, select each header, change the mode from Auto or DC to PWM if your fans are 4-pin, then edit the curve: a common quiet setup is roughly 40% duty at 40 °C rising to 80% at 80 °C. Apply, exit, and listen — fans should idle quietly and spin up under load.
Verify It Worked
Run through this checklist:
• All fans spin freely at boot with no grinding or clicking noises.
• BIOS reports sensible RPM values (usually 600–2,000 RPM) for every connected header.
• Lighting appears on all fans, and effects animate — especially important for ARGB, where a “Rainbow” effect should flow across LEDs rather than showing a single flat color (a flat color suggests the data wire isn’t connected properly).
• Colors change immediately when you switch effects in software, confirming software-to-header control.
• No fan-speed or CPU-fan errors appear at boot.
Mistakes to Avoid
Plugging a 5 V fan into a 12 V header
What causes it: 4-pin 12 V RGB headers and 3-pin 5 V ARGB headers sit near each other on many boards, and older RGB fans use 4-pin connectors that can physically reach a 12 V header.
How to check: Compare the label on the connector (+5V-D-G vs 12V-G-R-B) against the silkscreen printing next to the header and your manual’s pinout diagram.
What to do: If you plugged in while the system was off, just move the connector to the correct header. If LEDs lit briefly and now stay dark on that fan, the LEDs may be damaged — test the fan on another known-good ARGB device chain to confirm before replacing it.
How to undo: Power off, unplug, and reconnect to the matching header. There’s no software fix for fried LEDs.
CPU Fan Error at boot
What causes it: The CPU_FAN header is empty because you put case fans on SYS_FAN headers and routed the cooler elsewhere, or the cooler’s tachometer wire isn’t seated.
How to check: The boot screen or BIOS shows “CPU Fan Error” or the header reads 0 RPM.
What to do: Power off and connect your CPU cooler’s fan cable to CPU_FAN specifically. If you use an AIO pump instead, set that header’s monitor type to ignore/AIO pump in BIOS or lower the RPM warning threshold to 0.
How to undo: Return the header setting to Auto after the hardware is corrected.
Fans light up but software can’t control them
What causes it: A second RGB application is fighting for control, or the standalone controller the fans shipped with is still plugged into SATA power, overriding the motherboard header.
How to check: Close your RGB software and reopen it; check Task Manager’s Startup tab for duplicate utilities (e.g., both iCUE and Armoury Crate running).
What to do: Uninstall or disable all but one RGB utility, disconnect any included controller from power if you’re routing fans to the motherboard, and reboot.
How to undo: Reinstall the other utility if you decide to switch control back.
Lighting flickers or drops out on long chains
What causes it: Too many LEDs on one header or a marginal data connection mid-chain.
How to check: Watch the chain while switching effects — flickering past a specific fan points to that link; overall dimming points to overload.
What to do: Split the chain across two ARGB headers, reduce total LEDs below the header’s amperage rating, and reseat every connector along the chain.
How to undo: Return connectors to their previous arrangement only after testing confirms the fix.
FAQ
Can I connect RGB fans to a motherboard without ARGB headers?
Yes. Use the standalone controller included with most RGB fan kits — it connects to a SATA power cable and a USB 2.0 internal header (or a remote in budget kits). USB-header controllers usually integrate with software via a plugin, so you still get per-effect control. Alternatively, an internal ARGB controller box works entirely offline with buttons on the case.
What’s the difference between RGB and ARGB fans?
RGB (12 V, 4-pin) fans light all LEDs the same color at once. ARGB (5 V, 3-pin) fans are addressable — software can set each LED individually, which is what makes comet trails, wave, and gradient effects possible. ARGB is the standard for anything built recently, including most 2026-era fan kits.
How many RGB fans can I connect to one header?
It depends on LED count and the header’s amperage rating — commonly 3 A on a 5 V ARGB header, or 15 W. A typical ARGB fan uses 0.2 to 0.5 A, so six fans (roughly 2–3 A total) is usually safe, but always add up the per-fan draw in the fan spec sheet and stay under the header’s limit. Exceeding it causes dimming, flicker, or header damage.
Why is one of my RGB fans a different color than the rest?
On ARGB fans, this usually means the data (D) wire on that fan’s connector is loose or the fan’s daisy-chain input is plugged into an output port. Power down, reseat the chain in the correct direction (motherboard → fan 1 input → fan 1 output → fan 2 input), and reboot. If the fan shows only one fixed color across all LEDs, it may be a non-addressable RGB fan mixed into an ARGB chain — that combination won’t sync correctly.