Installing a CPU cooler correctly is one of the most important steps in a PC build or upgrade. A secure, properly connected cooler keeps processor temperatures under control, prevents thermal throttling, and helps your system run quietly under gaming or productivity loads. This guide explains how to install CPU cooler step by step, whether you are fitting a standard air cooler, a large tower cooler, or an all-in-one (AIO) liquid cooler.
Before starting, confirm that the cooler supports your CPU socket, fits your case’s CPU-cooler-height or radiator-clearance limits, and does not interfere with tall RAM modules. You should also have your motherboard manual available, especially for bracket orientation and header locations. The process below applies to most consumer desktop platforms in 2026, but mounting hardware and BIOS labels can vary slightly by manufacturer.
Before You Start
| What you need | Why | Optional? |
|---|---|---|
| Compatible CPU cooler and mounting kit | Provides the correct brackets, standoffs, screws, and backplate for your CPU socket. | No |
| Phillips #2 screwdriver | Used for cooler mounting screws, radiator screws, and case-panel screws. | No |
| Thermal paste | Transfers heat between the CPU heat spreader and cooler cold plate. | Only if paste is not pre-applied |
| 90% or higher isopropyl alcohol and lint-free cloth | Removes old thermal paste from the CPU and cooler base. | Recommended |
| Motherboard and cooler manuals | Confirms socket hardware, header locations, and mounting direction. | No |
| Anti-static wrist strap | Reduces the risk of electrostatic discharge while handling components. | Optional |
| Small flashlight | Makes it easier to align screws and inspect motherboard headers inside a case. | Optional |
Shut down the PC, switch the power supply’s rear rocker switch to O, and unplug the power cord. Hold the case power button for 5 to 10 seconds to discharge residual power. Place the system on a stable, non-carpeted surface. If you are building outside the case, install the CPU before installing the cooler.
Step-by-Step
1. Confirm socket and case compatibility — 5 minutes
Check the CPU socket listed in your motherboard documentation and compare it with the cooler’s supported-socket list. Common desktop sockets use different mounting hardware, so do not assume that a bracket from another build will fit. For air coolers, compare the cooler’s height with the case specification labeled “Maximum CPU Cooler Height.” For AIO coolers, check radiator support under “Radiator Compatibility,” including radiator length and thickness.
Also inspect RAM clearance. A front fan on a tower cooler may overlap the first memory slot. If necessary, move that fan slightly upward, provided the final cooler height still fits beneath the case side panel.
2. Remove the old cooler and clean the CPU — 10 to 20 minutes
If replacing an existing cooler, disconnect its fan cable from the motherboard header first. The header is usually labeled CPU_FAN, CPU_OPT, AIO_PUMP, or PUMP_FAN. Remove the cooler’s mounting screws gradually in an X pattern: loosen each screw two or three turns, then move diagonally to the next one.
After all screws are loose, gently twist the cooler left and right to break the thermal-paste seal. Do not pull straight upward with force; old paste can hold the cooler firmly to the CPU. Lift it away once it rotates freely.
Apply a small amount of isopropyl alcohol to a lint-free cloth and wipe old paste from the CPU’s metal heat spreader. Clean the cooler base as well if you plan to reuse it. Wait until both surfaces are completely dry before applying new paste.
3. Install the correct backplate, standoffs, and brackets — 10 minutes
Lay the motherboard flat if possible. Many cases have a motherboard-tray cutout behind the CPU socket, allowing access to the backplate without removing the board. Follow the cooler manual’s socket-specific diagram carefully: use only the standoffs and holes intended for your platform.
Hold the backplate against the rear of the motherboard, then install the standoffs from the front. Finger-tighten standoffs first. If the manual permits a screwdriver or socket tool, use it only for the final small turn; overtightening can damage threads or flex the motherboard.
Attach the mounting bars with their raised ends or threaded posts oriented exactly as shown in the cooler instructions. Before continuing, place the cooler over the CPU without removing protective film or applying paste. This dry fit confirms that screw posts line up and that the cooler will not hit RAM, heatsinks, or the case panel.
4. Apply thermal paste and prepare the cooler — 5 minutes
If the cooler has a factory-applied thermal-paste pad, leave it intact and do not add more paste. If it does not, place a pea-sized dot of paste in the center of the CPU heat spreader. For most mainstream desktop CPUs, a dot roughly 4 to 5 mm wide is sufficient. Very large workstation processors may need a larger dot or a thin X pattern, but use the cooler or CPU manufacturer’s guidance for those platforms.
Remove the clear plastic protective film from the cooler’s cold plate immediately before mounting it. Check the surface after peeling: a forgotten film will severely reduce heat transfer. Avoid touching the cleaned CPU surface or cold plate with your fingers.
5. Mount an air cooler evenly — 10 to 15 minutes
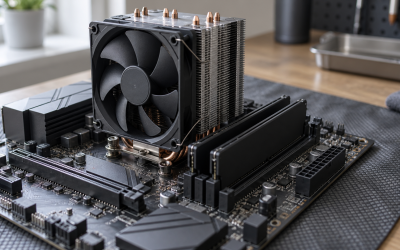
For a tower air cooler, remove the center fan first if it blocks access to the mounting screws. Lower the heatsink straight onto the CPU, aligning its screws or spring-loaded posts with the mounting bars. Keep the heatsink as level as possible so the paste spreads evenly.
Start every screw by hand. Then tighten them in a diagonal X pattern: top-left, bottom-right, top-right, bottom-left. Turn each screw two to three times per pass until all springs are compressed or the screws reach their built-in stops. Do not tighten one corner fully before starting the others.
Reinstall the fan with the airflow arrow pointing toward the rear exhaust of the case in a typical front-to-back layout. Fan-frame arrows indicate airflow direction and blade rotation. Route the fan cable behind the heatsink or through a nearby cable opening where possible.
6. Install and orient an AIO radiator, if applicable — 15 to 25 minutes
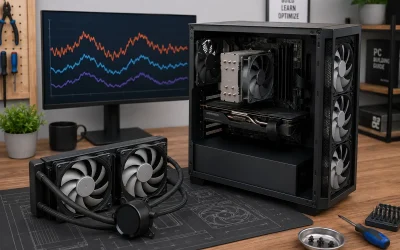
For an AIO, install the radiator and fans before mounting the pump block if that gives you better access. In most gaming cases, a top-mounted radiator configured as exhaust is straightforward: fans pull air through the radiator and push it out through the top panel. Secure radiator screws only into the radiator’s fan mounting channels. Never use screws longer than the AIO manufacturer specifies, because overly long screws can damage the radiator fins or coolant channels.
For a front-mounted radiator, position it with the tube connections lower than the top of the radiator when the case layout allows. This helps keep air away from the pump. Mount the pump block using the same diagonal, gradual-tightening pattern used for an air cooler. Do not sharply bend, twist, or stretch the tubes.
7. Connect fan, pump, RGB, and USB cables — 10 minutes
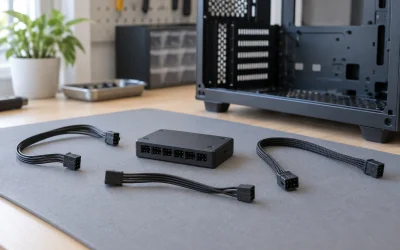
Connect the primary air-cooler fan to CPU_FAN. If your cooler includes a second fan, connect it to CPU_OPT or use the supplied Y-splitter so both fans are controlled together from CPU_FAN.
For most AIOs, connect the pump cable to AIO_PUMP or PUMP_FAN. If your motherboard lacks those headers, use CPU_FAN for the pump only if the AIO manual specifically permits it, then connect radiator fans through the included controller or another fan header. Connect 3-pin 5 V ARGB plugs only to headers labeled ARGB, D_LED, or ADD_GEN2. Never connect a 3-pin 5 V ARGB plug to a 4-pin 12 V RGB header.
If the AIO has an internal USB cable, connect it to a motherboard header labeled USB 2.0, F_USB, or JUSB. This enables monitoring or lighting control in the cooler’s software.
8. Set cooling control in BIOS/UEFI — 5 to 10 minutes
Reconnect power, turn on the system, and immediately press Delete or F2 repeatedly to enter BIOS/UEFI. Typical menu paths include Monitor > Q-Fan Configuration, Hardware Monitor > Fan Control, or Smart Fan 6.
Verify that CPU_FAN reports a speed rather than “0 RPM” or “N/A.” Set the header mode to PWM for 4-pin fans and DC for 3-pin fans. For AIO pump headers, select Full Speed, 100%, or the cooler maker’s recommended fixed speed. Save settings with F10, choose Yes, and allow the system to restart.
Verify It Worked
Open the BIOS/UEFI hardware-monitor page again after a few minutes and confirm that the CPU temperature is stable rather than rising continuously. Then boot into Windows and open Settings > System > Power & battery to confirm the system remains responsive without unexpected shutdowns.
For a practical check, run a normal game, compile, render, or other workload you already use for 10 to 15 minutes. Listen for fan rattling, grinding, cable contact, or pump noise. After shutting down, inspect the cooler mounting area for a tilted heatsink, loose fan clips, or—on an AIO—any sign of moisture around fittings and radiator connections.
Mistakes to Avoid
Leaving the cold-plate protective film installed
What causes it: The clear film is easy to miss, especially on a new air cooler or AIO pump block. How to check: Remove the cooler and inspect the cold plate for plastic, printed warnings, or an untouched paste pad. What to do: Peel off the film, clean both surfaces with isopropyl alcohol, apply fresh paste, and remount the cooler. How to undo: There is no setting to reverse this; the correction is a complete remount with new paste.
Overtightening or unevenly tightening mounting screws
What causes it: Tightening one screw fully before the others puts uneven pressure on the CPU and motherboard. How to check: Look for a visibly tilted cooler, uneven screw depth, or motherboard flex around the socket. What to do: Loosen all screws slightly, level the cooler, then tighten in small diagonal passes. How to undo: If a screw is overtightened, back it out gradually; do not force stripped threads.
Connecting the cooler to the wrong fan header
What causes it: Plugging a CPU fan into a case-fan header can trigger a CPU fan error or prevent proper temperature-based control. How to check: Enter BIOS/UEFI and review Monitor > Fan Control or the equivalent hardware-monitor screen. What to do: Move the primary cooler fan to CPU_FAN and the AIO pump to AIO_PUMP or PUMP_FAN. How to undo: Power off the PC and move the connectors back; do not reconnect fan headers while the system is powered.
Using too much thermal paste
What causes it: A large blob can spill over the CPU edges and make cleanup difficult. How to check: Paste squeezed far beyond the heat spreader after mounting indicates excessive application. What to do: Remove the cooler, clean both surfaces, and reapply a 4 to 5 mm center dot. How to undo: Clean away excess paste with isopropyl alcohol and a lint-free cloth before remounting.
FAQ
Do I need thermal paste if my CPU cooler has paste already applied?
No. A pre-applied thermal-paste pad is ready to use once the protective cover is removed. Adding extra paste can create an unnecessarily thick layer. If you remove the cooler after it has contacted the CPU, clean both surfaces and apply fresh paste before reinstalling it.
Should an AIO pump run at 100%?
Usually, yes. Many AIO manufacturers recommend a constant pump speed through the AIO_PUMP or PUMP_FAN header, while radiator fans follow a temperature curve. Check the cooler manual first, then set the pump header in BIOS/UEFI to Full Speed, 100%, or the specified fixed-duty setting.
What if the PC says “CPU Fan Error” after installation?
What causes it: The motherboard does not detect a speed signal on CPU_FAN. How to check: Open BIOS/UEFI and inspect the CPU_FAN RPM reading. What to do: Connect a radiator fan or the primary air-cooler fan to CPU_FAN, then save with F10. How to undo: If your AIO documentation requires a different wiring layout, restore its original cable arrangement and adjust the BIOS CPU fan monitoring option only as instructed by the manufacturer.
Can I reuse thermal paste after removing the cooler?
It is best not to. Once the cooler lifts away, the paste layer can trap air pockets and spread unevenly when remounted. Clean the CPU and cooler base, then apply fresh paste. A small tube is inexpensive compared with the time required to troubleshoot unstable temperatures later.