
An all-in-one (AIO) cooler keeps your gaming PC quiet and cool, but only if you maintain it. Skip maintenance and dust chokes the radiator fins, fan bearings wear out, and thermal paste dries into a crust. The result is predictable: CPU temps creep from a healthy 65-75°C under load to 90°C+, the fans scream at full speed, games stutter from thermal throttling, and the pump works harder until it fails. In the worst case, dried coolant or a loose fitting can lead to air bubbles, noisy gurgling, and a slow leak that threatens your GPU and motherboard. A simple 15-minute routine every few weeks prevents most of those problems and can add years to both your cooler and your CPU’s life.
As we head through 2026, most modern 360mm AIOs are built to last 4 to 6 years with basic care, but that lifespan assumes you keep airflow clear, software updated, and mounting pressure correct. This guide shows you exactly how to do that without draining the loop or disassembling the cooler.
As an Amazon Associate we earn from qualifying purchases at no extra cost to you.
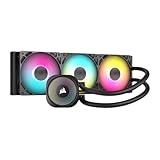
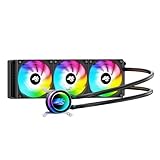
Our Top Picks

What You Need
| Item | Why | Optional? |
|---|---|---|
| Compressed air can or electric air duster (30-70 PSI) | Blows dust from radiator fins and fan blades without contact | No |
| Soft microfiber cloths and cotton swabs | Wipes fan blades, radiator frame, and tubing safely | No |
| Small soft-bristle brush | Loosens caked dust between dense radiator fins (typically 20-22 FPI) | No |
| Isopropyl alcohol 90%+ and thermal paste (3-4g syringe) | Cleans and replaces dried paste during annual repaste | No, but only needed 1-2 times per year |
| Phillips-head screwdriver | Tightens radiator and fan screws to prevent vibration | No |
| PC monitoring software (BIOS, HWInfo, or iCUE/SignalRGB) | Checks coolant temp, pump RPM (2000-3000 RPM typical), and fan RPM | No |
| Replacement 120mm fans (if needed) – 120 x 120 x 25mm, 0.15-0.30A, 60-80 CFM | Swaps out a failing or rattling fan without replacing the whole AIO | Yes |
| Cable ties and fan splitter/hub | Manages daisy-chain ARGB and PWM cables for clean airflow | Yes |
Step-by-Step
Step 1: Power Down and Prep Your Workspace (5 minutes)
Shut down Windows, flip the power supply switch to off, and unplug the power cable. Press the case power button for 3 seconds to discharge residual power. Move the PC to a well-ventilated area with good light, ideally on a desk or table, not carpet. Ground yourself with an anti-static wrist strap or by touching the bare metal of the case. Lay down a microfiber cloth to catch dust. If your case has a tempered glass side panel (weighs 2-4 pounds), remove it carefully and set it on a soft surface.
Step 2: Check Baseline Temperatures and Noise (5 minutes)
Before you clean, note your current performance so you can see improvement. Boot into your monitoring software and record idle CPU temp, load temp during a game or Cinebench run, coolant temperature if your AIO reports it, and pump and fan speeds. A healthy 360mm AIO at idle should keep a modern Intel LGA 1851/1700 or AMD AM5 CPU at 30-40°C with coolant 5-10°C above ambient. Listen for grinding, ticking, or loud gurgling from the pump block on the CPU. Those sounds often mean air bubbles or bearing wear.
Step 3: Dust the Radiator and Fans Thoroughly (10-15 minutes)
Most 360mm radiators measure about 394 x 120 x 27 mm and mount at the top or front of the case. Hold fans in place with one finger so they do not spin freely while you blow air. Use short bursts of compressed air from inside to outside, pushing dust out of the case. For a top-mounted radiator, blow from the bottom side of the rad outward through the top grille. Follow with the soft brush to dislodge dust packed between fins, then another pass of air. Wipe each of the three 120mm fan blades with a dry microfiber cloth, then use a cotton swab for the hub and leading edges. Do not use a vacuum directly on components, as it can create static. Clean dust filters at the same time with warm water, dry completely before reinstalling.
Step 4: Inspect Tubing, Fittings, and Mounting (5 minutes)
With the dust cleared, visually inspect the two rubber or braided tubes running from the pump block to the radiator. Look for kinks, sharp bends under 45 degrees, rubbing against sharp edges, or white crust near fittings that could indicate a slow seep. Gently ensure the radiator screws (usually 8 screws for a 360mm) and the pump block thumbscrews are snug. They should be firm but not over-tightened; over-torque can warp the cold plate. Check that the pump power header is fully seated on the CPU_FAN or AIO_PUMP header and that ARGB and PWM daisy-chain cables are not pulling on the pump. If you have a model like the CORSAIR Nautilus 360 RS ARGB Liquid CPU Cooler with its direct motherboard connection and daisy-chain design, confirm the single cable block is seated and not strained.
Step 5: Optimize Fan and Pump Curves (5-10 minutes)
Boot back into BIOS or your fan control software. Set the pump to run at a steady 70-100% speed (usually 2200-2800 RPM) for consistent flow; AIO pumps are designed for constant speed, not variable ramping. Create a fan curve based on coolant temperature if available, or CPU package temperature if not. A good starting curve is 30% fan speed (600-800 RPM) below 40°C, 50% at 60°C, and 80-100% (1500-2100 RPM) above 75°C. This keeps noise low at idle (under 35 dB) while providing headroom under load. Save the profile and test with a 10-minute game session. Fans should ramp smoothly, not pulse up and down every few seconds.
Step 6: Deep Clean and Repaste Annually (30-45 minutes)
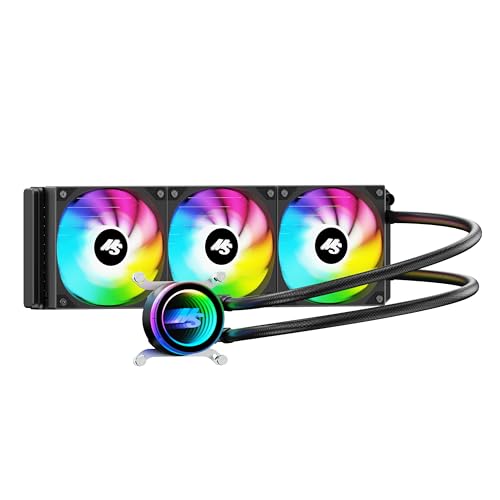
Once every 12 months, or if load temps have risen 10-15°C higher than when the cooler was new, repaste the CPU. Power down and unplug as before. Remove the pump block by unscrewing the four mounting screws in a diagonal pattern. Twist the block gently to break the paste seal, then lift straight up. Use isopropyl alcohol and a lint-free cloth to remove old paste from both the CPU heatspreader and the copper cold plate until both are mirror clean. Apply a pea-sized dot (about 3-4mm) of fresh paste to the center of the CPU. Do not spread it manually; mounting pressure will spread it evenly. Reseat the pump block, tightening screws in an X pattern a half-turn at a time for even pressure. Reconnect power and check temps again. This is also a good time to consider value options if you are building new; units like the Minorsonic AIO CPU Cooler 360mm with its high-speed ceramic bearing pump and three-phase motor, typically priced in the $45-$60 range compared to premium $90-$120 models, show how entry-level AIOs now include features that make maintenance easier.
Mistakes to Avoid
Do not lay your case on its side with the radiator below the pump for long periods and then power it on. Air naturally collects at the highest point in the loop, and if the pump is the highest point it will ingest air, causing noise and premature wear. Keep the radiator’s top edge slightly above the pump block whenever possible.
Never let fans spin freely while blasting them with compressed air. Uncontrolled spinning can generate back-voltage and damage the fan motor or motherboard header, and it stresses the bearing. Always hold the fan hub.
Avoid using a wet cloth, household cleaners, or excessive liquid near the radiator or pump. Even a small drip can reach the PCB under the pump cap. Isopropyl alcohol should only be used on the cold plate and CPU when repasting, with the system fully powered off.
Do not ignore a slow, persistent rise in noise or temperature. If pump RPM reports 0, or stays stuck at a low number while temps climb, or if you hear constant bubbling after tilting the case gently, do not just raise fan speed to compensate. That masks a flow problem that will get worse.
Finally, do not over-tighten mounting hardware. Most AIO brackets need only finger-tight plus a quarter turn with a screwdriver. Cranking down can crack the motherboard socket frame or create uneven contact, which actually raises temperatures.
How Often
For a gaming PC that runs 2-4 hours per day, follow this schedule. Every 3-4 weeks, clean dust filters and do a quick radiator and fan dusting. This takes 10 minutes and prevents the fine dust layer that can reduce airflow by 20-30%. Every 3 months, do a full inspection: check temps, listen to the pump, verify tubing and mounting, and update fan curves if your room temperature has changed seasonally. Every 12 months, repaste the CPU and do a deep clean including behind the radiator and cable management. If you have pets, smoke indoors, or keep the PC on carpet, halve those intervals. A PC in a dusty environment can collect 5-10 grams of dust on a 360mm radiator in just a month, enough to raise load temps by 5-8°C.
When to Call a Pro or Replace
AIOs are sealed units and are not meant to be refilled at home. Call a professional or consider replacement if you see any of these signs: visible coolant leak or sticky residue at fittings, coolant level so low you hear constant sloshing, pump that no longer reports RPM or reports erratically despite correct header connection, or CPU temps that stay above 90°C under moderate load even after cleaning and repasting. Most manufacturers rate pump life at 50,000-70,000 hours, which translates to about 5-7 years of heavy gaming use. If your unit is approaching that age and performance is declining, replacement is more cost-effective than repair. When replacing, match radiator size to your case support: a 360mm needs about 400mm of clearance and three 120mm fan mounts, while a 240mm (277 x 120 x 27 mm) fits smaller mid-towers. Keep your old mounting hardware until the new cooler is confirmed compatible with your socket.
FAQ
How do I know if my AIO pump is failing?
Check three indicators. First, software readings: pump RPM should be steady between 2000 and 3000 RPM. If it drops to zero, fluctuates wildly, or shows N/A, the pump may have lost power or seized. Second, temperatures: idle temps 20°C higher than normal or rapid spikes to 95-100°C within seconds of load indicate little or no coolant flow. Third, sound and feel: gently touch the pump block while running; you should feel a faint vibration. No vibration plus silence, or loud grinding, suggests failure.
Should the radiator be mounted on top or front?
Both work if the pump is not the highest point. Top mount with tubes down or front mount with tubes at the bottom is ideal because air collects at the top of the radiator away from the pump. A front mount with tubes at the top can trap air near the tube inlet and cause noise. For 360mm coolers, top mount is usually preferred for exhausting heat directly out of the case, keeping GPU temps 2-4°C lower compared to front intake in most mid-tower layouts.
Do I need to refill or bleed my AIO?
No, consumer AIOs are sealed and maintenance-free for coolant. You should not open the loop. A small amount of air is normal from factory and will settle at the top of the radiator. If you hear occasional air bubbles after moving the PC, gently tilt the case 20-30 degrees side to side while the pump is running to help bubbles migrate to the radiator. Persistent, loud gurgling that does not resolve after a few minutes indicates excess air from permeation over years, which is a sign to replace the unit.
How much thermal paste should I use when maintaining the cooler?
Use a single pea-sized dot about 4-5mm in diameter, roughly 0.1g, in the center of the CPU heatspreader. For larger CPUs with a bigger integrated heat spreader, such as AMD AM5 or Intel LGA 1851, a small X or five-dot pattern totaling the same amount also works. Too much paste will squeeze out around the edges and make a mess, while too little leaves air gaps. After remounting, check that paste has spread to within 1-2mm of the heatspreader edge without overflowing.









