Getting the best Realtek audio settings for gaming headsets is less about turning on every enhancement and more about preserving clear positional cues. Competitive games benefit from a clean stereo signal, a sensible sample rate, stable volume, and minimal processing between the game and your headset. Single-player games can tolerate more bass and virtualization, but too much enhancement can blur footsteps, reloads, dialogue, and directional effects.
For most wired 3.5 mm gaming headsets connected to a motherboard audio jack, start with stereo, 24-bit/48 kHz output, Windows spatial audio off, and Realtek effects disabled. That setup avoids double processing and matches the audio format used by many games, streaming apps, and voice-chat tools. In 2026, the exact Realtek Audio Console layout still varies by motherboard manufacturer and driver package, but the core settings and Windows paths are broadly consistent.
As an Amazon Associate we earn from qualifying purchases at no extra cost to you.



Our Top Picks
 Razer BlackShark V2 X Gaming Headset: 7.1 Surround3.5 mm7.6 x 6.76 x 3.86 inches0.5 PoundsCheck on Amazon
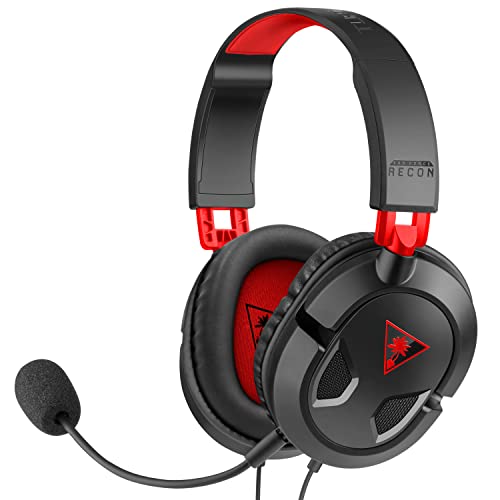 Turtle Beach Recon 50 Wired Multiplatform Gaming HeadsetStandard7.32 x 6.06 x 3.22 inches0.46 PoundsCheck on Amazon

Top 3 picks at a glance
Quick Recommended Settings
| Setting | Recommended value | Why |
|---|---|---|
| Speaker/headphone configuration | Stereo | Most gaming headsets have two physical drivers; stereo preserves the game’s intended positional mix. |
| Default format | 24-bit, 48000 Hz | Provides ample output headroom and matches common game and video audio rates. |
| Windows Spatial Sound | Off, unless the game specifically uses Windows Sonic or Dolby Atmos | Prevents conflicting virtual surround processing. |
| Realtek equalizer | Off or Flat | Leaves directional details and the headset’s intended tuning intact. |
| Loudness Equalization | Off for competitive play | Avoids compression that can reduce distance and impact cues. |
| Realtek surround/virtualization | Off | Use only one surround system at a time, preferably the game’s own option. |
| Headphone volume | Windows 70–90%; adjust in-game volume separately | Leaves room to balance games, chat, and alerts without clipping or extreme amplification. |
| Microphone format | 16-bit, 48000 Hz or 24-bit, 48000 Hz | Works reliably with games, Discord, recording software, and voice chat. |
Setting-by-Setting
Set Headphones to Stereo
Exact value: Stereo; do not select 5.1 or 7.1 for a normal analog headset.
What causes it: Windows or a motherboard driver can expose surround speaker modes even when the connected device is a two-channel headset. This can make rear or side sounds appear quieter, misplaced, or missing.
How to check: Go to Settings > System > Sound > More sound settings. Select Speakers or Headphones (Realtek(R) Audio), click Configure, and inspect the selected channel layout.
What to do: Choose Stereo, click Next, and complete the configuration. In Realtek Audio Console, open Device advanced settings or Speakers and select Headphones when prompted after plugging into the front-panel or rear green jack.
How to undo: Return to the same Configure window and choose 5.1 or 7.1 only if you are using actual multi-speaker hardware.
Use 24-bit, 48 kHz Output
Exact value: 24 bit, 48000 Hz (Studio Quality). If that option is unavailable or unstable, use 16 bit, 48000 Hz (DVD Quality).
What causes it: Mismatched or unusually high sample-rate settings can trigger unnecessary resampling, compatibility problems in older games, or audio-device resets after launching an application.
How to check: Open Settings > System > Sound > More sound settings, double-click your Realtek playback device, then open the Advanced tab. Review the Default Format drop-down menu.
What to do: Select 24-bit/48 kHz, click Apply, then use the Test button. If a game has its own audio output selector, set it to the same Realtek playback device rather than “Default” while troubleshooting.
How to undo: Select your previous format and click Apply. If crackling begins after changing formats, revert to 16-bit/48 kHz before reinstalling drivers.
Disable Conflicting Spatial Audio
Exact value: Spatial sound: Off for most games. Enable one spatial option only when a game explicitly supports it and you prefer its result.
What causes it: Layering Windows Sonic, Dolby Atmos for Headphones, DTS Headphone:X, Realtek virtual surround, and an in-game headphone surround mode can produce phasey audio, weak center dialogue, and vague footsteps.
How to check: Go to Settings > System > Sound, select the Realtek output device, and find Spatial sound. Also inspect the game’s audio menu for “Headphones,” “3D Audio,” “HRTF,” “Binaural,” or “Surround” settings.
What to do: Turn Windows spatial sound off, disable Realtek Virtual Surround if present, and use the game’s dedicated Headphones or HRTF mode. For games that specifically recommend Dolby Atmos or Windows Sonic, leave the game in its recommended output mode and enable only that one Windows spatial layer.
How to undo: Re-enable the spatial format from the same Sound page and disable the game’s competing headphone-surround option.
Keep Realtek Effects Flat
Exact value: Equalizer Off or Flat; Environment None; Bass Boost Off; Voice Clarity Off initially.
What causes it: Driver enhancements can be enabled by a motherboard preset, a “Gaming” profile, or a previous tuning attempt. Bass-heavy profiles often mask low-level movement and weapon handling sounds.
How to check: Open Realtek Audio Console from the Start menu. Select your output device and look under Sound Effects, Equalizer, Environment, or Enhancements. Names differ between ASUS, MSI, Gigabyte, ASRock, Dell, HP, and Lenovo driver packages.
What to do: Choose Flat or reset the profile. If the headset is painfully sharp, make only a small correction: reduce the 8 kHz or 16 kHz band by 1–2 dB if your console exposes manual bands. Avoid large boosts.
How to undo: Use Reset, select the prior preset, or set every adjusted equalizer band back to 0 dB.
Leave Loudness Equalization Off for Competitive Games
Exact value: Loudness Equalization: Off.
What causes it: This Windows enhancement compresses dynamic range. It can make quiet audio easier to hear at low volume, but it also reduces the contrast between close explosions, distant gunfire, and subtle movement.
How to check: Open More sound settings, double-click the Realtek playback device, and check the Enhancements tab. Some drivers move this control to Realtek Audio Console > Sound Effects.
What to do: Clear the Loudness Equalization box, click Apply, and test in a familiar game area. Use the game’s master volume and effects volume instead of compression to improve audibility.
How to undo: Recheck Loudness Equalization if you play late at night, have significant hearing difficulty, or mainly want more even volume in cinematic games.
Set Microphone Gain Conservatively
Exact value: Microphone level 80–100; Microphone Boost: +0.0 dB to start. Use +10.0 dB only if your voice is genuinely too quiet.
What causes it: High microphone boost amplifies keyboard noise, fan noise, cable interference, and room echo along with your voice.
How to check: Go to Settings > System > Sound > Input, select the Realtek microphone, and use Start test. For the classic controls, open More sound settings > Recording > Microphone > Levels.
What to do: Start at level 90 with +0.0 dB boost. Record a short test while typing and speaking normally. Raise the level first; add boost only when level 100 is insufficient. Disable Realtek Noise Suppression if it makes speech sound metallic, then use your chat app’s noise filter if needed.
How to undo: Restore the previous Levels values or re-enable the noise-processing feature you preferred.
By Hardware Tier
Low Tier: Basic Motherboard Audio and Entry-Level Analog Headsets
Use the rear motherboard green audio jack rather than a poorly shielded case front-panel jack when possible. Set stereo, 16-bit/48 kHz or 24-bit/48 kHz, all enhancements off, and Windows spatial sound off. If you hear a buzz that changes when moving the mouse or loading a game, the likely cause is electrical interference. Check by plugging the headset into the rear jack and comparing it with the front jack. Move the connection to the rear, reseat the headset plug fully, and separate the cable from power adapters. Undo by reconnecting to the front panel if its convenience outweighs the noise difference.
Mid Tier: Quality Wired Gaming Headsets and Modern Integrated Audio
Use 24-bit/48 kHz stereo, flat EQ, and the game’s own HRTF or headphone mode. If your motherboard software offers impedance detection, select the detected headphone type rather than forcing an amplifier preset. The cause of distortion at high volume is often an aggressive gain mode, not a lack of volume. Check by lowering Windows volume to 60% and listening for whether distortion disappears. Use the normal or medium gain option in Realtek Audio Console, then raise in-game volume modestly. Undo by restoring high gain only for high-impedance headphones that remain too quiet at normal gain.
High Tier: High-Impedance Headphones, External DACs, and USB Headsets
If you use an external USB DAC/amp or a USB gaming headset, do not route audio through Realtek at all. Select the external device under Settings > System > Sound > Output and configure its own software. The cause of inconsistent settings is usually adjusting the inactive Realtek device. Check the active output shown in the Windows volume flyout by pressing Win+A and selecting the audio output button. Configure the device actually listed there. To undo, switch output back to Speakers (Realtek(R) Audio) and reconnect the analog headset.
Common Mistakes
Using multiple surround modes: The cause is overlapping Windows, Realtek, game, and headset-software processing. Check every audio menu before testing positional audio. Turn off all but one spatial system, preferably the game’s headphone/HRTF mode. Undo by enabling a single alternative system for comparison.
Installing generic drivers over motherboard-tuned drivers: The cause is using a driver package that lacks your PC maker’s jack detection, effects, or codec configuration. Check Device Manager > Sound, video and game controllers > Realtek(R) Audio > Properties > Driver. Install the audio driver supplied on your motherboard or PC manufacturer’s support page, then restart. Undo through Settings > Apps > Installed apps or Device Manager’s Roll Back Driver option if the newer package causes problems.
Using the wrong jack: The cause is connecting a headset microphone plug to line-in, or using a four-pole headset with separate headphone and microphone ports without an adapter. Check the port icons and Realtek’s connector popup. Use a CTIA headset splitter for separate green headphone and pink microphone jacks. Undo by reconnecting the original cable arrangement.
Chasing maximum loudness: The cause is raising Windows, game, amplifier, and enhancement levels simultaneously. Check for distortion during bass-heavy scenes and loud voice chat. Lower Windows output to 70–90%, disable boosts, and balance individual app levels in Settings > System > Sound > Volume mixer. Undo by gradually raising one control at a time.
FAQ
Should I enable Realtek 7.1 surround for a gaming headset?
Usually no. Set the Realtek device to stereo and use a game’s headphone or HRTF option when available. Enable virtual 7.1 only as a single, deliberate alternative if you prefer it after testing in the same game and map.
Is 24-bit/96 kHz better than 24-bit/48 kHz for gaming?
Not usually. 24-bit/48 kHz is the practical default for compatibility and avoids unnecessary conversion in games and video playback. Use 96 kHz only if a specific application requires it and you have confirmed it does not introduce instability.
Why does my Realtek headset microphone sound quiet?
The usual cause is a low microphone level, incorrect jack assignment, or a headset splitter mismatch. Check More sound settings > Recording > Microphone > Levels, set level to 90–100, and begin with +0.0 dB boost. Verify that the plug is in the microphone input or connected through a proper CTIA splitter.
Where are Realtek Audio Console settings stored?
Most settings are stored in the Windows registry and driver configuration rather than a simple user-editable profile file. Realtek Audio Console itself is typically installed as a Microsoft Store app, while the driver files are commonly under C:\Windows\System32\DriverStore\FileRepository\. Do not manually delete DriverStore folders; use the console’s Reset option, reinstall the manufacturer driver, or roll back the driver through Device Manager instead.