Building a new gaming PC is only half the job. The default BIOS configuration your motherboard ships with is designed for maximum compatibility, not maximum gaming performance. Out of the box, your expensive DDR5 kit will run at JEDEC baseline speeds, your CPU may not boost correctly, and latency-sensitive features like Resizable BAR will be disabled. Prioritizing the right settings in the first 15 minutes after POST unlocks the performance you already paid for, improves stability, and sets a clean baseline for any future overclocking. As of early 2026, both AMD and Intel platforms share the same core optimization principles, even though the menu names differ between ASUS, MSI, Gigabyte, and ASRock.
The goal is not to tweak everything. Focus on memory, CPU power management, PCIe and storage configuration, and boot security in that order. Get those four areas right and you will avoid 90% of stuttering, long boot times, and compatibility headaches that plague new builds.
As an Amazon Associate we earn from qualifying purchases at no extra cost to you.


Our Top Picks
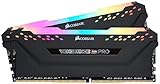
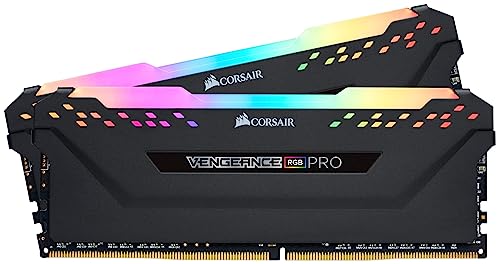
 CORSAIR Vengeance RGB DDR5 RAM 32GB32GB (2 x 16GB)5.43 x 0.27 x 1.77 inches0.11 PoundsCheck on Amazon
 CORSAIR Vengeance LPX DDR4 RAM 32GB2 count (pack of 1)5.32 x 0.28 x 1.32 Inches0 PoundsCheck on Amazon
Top 3 picks at a glance
Quick Recommended Settings
| Setting | Recommended value | Why |
|---|---|---|
| XMP / EXPO / A-XMP | Enabled – Select Profile 1 | Runs RAM at its advertised speed and timings instead of 4800 MT/s default |
| Resizable BAR / Smart Access Memory | Enabled | Allows CPU to access full GPU VRAM, reduces overhead in modern games |
| Precision Boost Overdrive / Intel Turbo Boost | Enabled (Auto) | Maintains correct boost clocks without manual overclocking |
| CPU Cooler / Power Limits (PBO Limits / PL1/PL2) | Set to cooler type or motherboard limits | Prevents thermal throttling while respecting cooler capability |
| Secure Boot | Enabled (Windows UEFI Mode) | Required for Windows 11 and anti-cheat compatibility |
| Boot Mode | UEFI Only, CSM Disabled | Faster boot and required for Resizable BAR and Secure Boot |
| XHCI Hand-off / USB Legacy | Enabled / Auto | Ensures USB devices function correctly in modern OS |
| Above 4G Decoding | Enabled | Prerequisite for Resizable BAR |
| Fan Control (Q-Fan / Smart Fan 6) | Set custom curve: 30% at 40C, 70% at 70C, 100% at 85C | Balances noise and cooling under gaming loads |
| Integrated Graphics (iGPU) | Disabled if using discrete GPU | Frees resources and avoids driver conflicts |
| Storage Mode | AHCI / NVMe RAID disabled unless you have array | Ensures maximum NVMe performance and compatibility |
| ERP Ready / Deep Sleep | Disabled | Prevents USB power issues and slow wake times |
Setting-by-Setting
1. Memory Profile: EXPO / XMP / A-XMP
What causes it: DDR5 defaults to 4800 MT/s at JEDEC timings for maximum compatibility. Without loading the memory profile stored on the RAM stick itself, you leave frequency, primary timings, and voltage at conservative defaults.
How to check: Enter BIOS by tapping Delete or F2 during POST. On ASUS go to Main or Ai Tweaker, on MSI go to OC, on Gigabyte go to Tweaker. Look at Memory Frequency and DRAM Status on the main screen. In Windows, check Task Manager > Performance > Memory or use CPU-Z > Memory tab. If your 6000 MT/s kit shows as 4800 MT/s, the profile is not active.
What to do: Set Ai Overclock Tuner / DRAM Profile to EXPO I or XMP I. For DDR5-6000 CL30 kits on AM5, select EXPO Profile 1. For Intel Z790/B760 with DDR5-6400, select XMP Profile 1. Keep DRAM Voltage on Auto unless the profile sets it to 1.35V-1.43V as specified. Press F10 to Save and Exit, then re-enter BIOS to confirm frequency has changed. For stability, leave Memory Context Restore on Auto for AM5.
How to undo: Return to the same menu and set the profile to Disabled or Auto. This will revert to 4800 MT/s. Save and exit.
2. Resizable BAR and Above 4G Decoding
What causes it: Resizable BAR is disabled by default on most boards because it requires pure UEFI boot without CSM. When disabled, the CPU can only access VRAM in 256 MB blocks.
How to check: In BIOS, go to Settings > Advanced > PCI Subsystem Settings (MSI) or Advanced > PCI Subsystem Settings (ASUS) or Settings > IO Ports (Gigabyte). Look for Resizable BAR and Above 4G Decoding. In Windows, open NVIDIA Control Panel > System Information or GPU-Z and check Resizable BAR status.
What to do: First set Boot > CSM / Compatibility Support Module to Disabled and Boot Mode to UEFI. Then set Above 4G Decoding to Enabled, and Resizable BAR to Enabled or Auto. On MSI you must enable Above 4G Decoding first, then Resizable BAR appears. Save and exit.
How to undo: Set Resizable BAR back to Disabled. You can leave Above 4G Decoding Enabled as it has no downside, or disable it if you need to re-enable CSM for a legacy device.
3. CPU Boost and Power Limits
What causes it: Motherboards may set conservative power limits (PL1/PL2 for Intel, PPT/TDC/EDC for AMD) or leave Precision Boost Overdrive on strict defaults, which can limit sustained boost under gaming loads, especially with a 360mm AIO that can handle more.
How to check: In BIOS, go to Advanced > AMD CBS > Precision Boost Overdrive (AMD) or OC > CPU Cooler Tuning / CPU Power Management (Intel). Check what PPT Limit or Long Duration Power Limit is set to. Use HWINFO64 sensors during a Cinebench or gaming load to see if CPU Package Power hits the limit and clocks drop.
What to do: For AMD Ryzen 7000/9000: Set Precision Boost Overdrive to Enabled or Advanced > PBO Limits to Motherboard. Set PBO Scalar to Auto. For Intel 14th/15th Gen: Under OC > CPU Cooler Tuning select your cooler type (Tower Air Cooler, 240/360 AIO) to automatically raise PL1/PL2 to the cooler-rated wattage, typically 253W for K-series. Leave Intel Turbo Boost Technology and Enhanced Turbo to Enabled/Auto. Ensure CPU C-States are Enabled for idle efficiency.
How to undo: Set PBO to Disabled or Auto, and CPU Cooler Tuning back to Boxed Cooler or Intel Default Settings. This restores stock 65W-125W defaults.
4. Secure Boot and TPM 2.0
What causes it: Windows 11 requires UEFI Secure Boot and TPM 2.0. New builds often have TPM (fTPM on AMD, PTT on Intel) disabled and Secure Boot in Setup Mode, causing Windows installation warnings and anti-cheat errors in Valorant, FaceIt, and Battlefield.
How to check: In BIOS, go to Boot > Secure Boot or Settings > Security > Trusted Computing. Check if Secure Boot State shows User or Setup, and TPM Device shows Active. In Windows, run msinfo32.exe and look for Secure Boot State and check tpm.msc.
What to do: Enable Settings > Security > Trusted Computing > Security Device Support to Enabled, and AMD fTPM switch / Intel PTT to Enabled. Then go to Boot > Secure Boot > Set Secure Boot to Enabled, Mode to Standard, and if needed select Restore Factory Keys or Enroll All Factory Default Keys. Keep OS Type to Windows UEFI Mode. Save and exit.
How to undo: Set Secure Boot to Disabled and Security Device Support to Disabled. Note that disabling TPM after Windows is installed may require BitLocker recovery key if encryption is active.
5. Storage and PCIe Configuration
What causes it: M.2 slots may default to PCIe 3.0 or share bandwidth with SATA ports, and SATA mode may be set to RAID when you have a single NVMe drive, which can hide the drive during OS install.
How to check: Go to Settings > Advanced > NVMe Configuration or Onboard Devices. Check PCIe Link Speed for your primary M.2_1 slot. During Windows install, if the drive does not appear, storage mode is likely wrong.
What to do: Set PCIEX16_1 Link Speed to Auto or Gen4/Gen5 depending on your GPU and board support. Set M.2_1 Configuration to PCIe 4.0 x4 or Auto. Set SATA Mode to AHCI unless you are running two or more NVMe drives in RAID. Disable NVMe RAID mode if not used. For boards with PCIe bifurcation, leave at Auto.
How to undo: Set all PCIe speeds back to Auto and SATA mode back to default shown on the manual’s optimized defaults.
6. Fan Curves and Thermal Management
What causes it: Default fan curves are often too aggressive at idle (loud) or too slow under load (thermal throttling). PWM vs DC mismatch can cause fans to run at full speed constantly.
How to check: Go to Monitor > Q-Fan Configuration (ASUS), Hardware Monitor (MSI), or Smart Fan 6 (Gigabyte). Check if fans show N/A or 0 RPM due to wrong header. Press F6 on most boards to open the graphical fan control.
What to do: Set each header to PWM if using 4-pin fans, or DC if using 3-pin. Create a stepped curve: 30% up to 40C, 50% at 60C, 70% at 70C, 100% at 85C for CPU fan. For case fans, base off Chipset or Motherboard temperature. Enable Smart Fan Mode or Q-Fan Control to Enabled. Set AIO Pump header to Full Speed or Manual at 80-100% constant if using an AIO.
How to undo: Press the Load Defaults or Default button inside Q-Fan/Smart Fan 6 to restore the preset Standard curve.
By Hardware Tier
Not every setting matters equally for every build. Prioritize based on your hardware to avoid wasted effort and instability.
Low Tier: Ryzen 5 5600 / Intel i3-14100F / RX 7600 / RTX 4060 / 16GB DDR4
On budget AM4 or Intel B660/B760 DDR4 builds, the biggest gain is memory. Enable XMP Profile 1 to get from 2133/3200 MT/s to 3200-3600 MT/s where most budget kits are rated. Do not attempt manual memory overclocking. Keep Resizable BAR enabled, but keep PBO / Power Limits on Auto and Intel Default Settings. The stock cooler and power delivery on budget boards do not benefit from unlocked limits and will only run hotter. Disable iGPU if you have an F-series Intel CPU to slightly reduce boot time. Leave PCIe at Auto and use a single AHCI NVMe drive. Your focus is stability and fast boot: UEFI only, Secure Boot enabled, XMP on, fan curve quiet.
Mid Tier: Ryzen 7 7700 / 7800X3D / Intel i5-14600K / RTX 4070 Super / RX 7800 XT / 32GB DDR5-6000
This is the sweet spot where BIOS tuning pays the most. Enable EXPO/XMP for DDR5-6000 CL30, which is the ideal fabric-to-memory ratio for AM5. Enable Resizable BAR + Above 4G Decoding and confirm CSM is disabled. For the 7800X3D, set Precision Boost Overdrive to Enabled and set Curve Optimizer to Auto – do not set all-core negative offsets unless you stress test properly. For i5-14600K, select CPU Cooler Tuning to 240 AIO or Tower Air Cooler as appropriate and ensure Intel Adaptive Boost is Enabled. Set NVMe slot to Gen4 x4 for your primary drive. Create a balanced custom fan curve so the system stays quiet during esports titles but ramps under AAA loads. Enable TPM/fTPM and Secure Boot for Windows 11.
High Tier: Ryzen 9 9950X3D / Intel i9-14900KS / RTX 5080/5090 / 64GB DDR5-6400+
High-end boards (X670E, X870E, Z790) expose more options but require more discipline. Enable EXPO/XMP Profile 1, but if your kit is DDR5-6400 or higher, check the motherboard QVL at \BIOS\ and ensure you update BIOS to the latest non-beta via USB BIOS Flashback before enabling. For Ryzen 9000, enable Precision Boost Overdrive Advanced and set PBO Limits to Motherboard – your 360mm AIO can sustain higher PPT. For Intel i9, be explicit: set PL1 to 253W and PL2 to 253W or Unlimited with proper cooling, and ensure BIOS Load-Line Calibration (LLC) stays on Auto for gaming. Enable Resizable BAR, set PCIe X16 to Gen5 Auto if you have a Gen5 GPU, and ensure M.2_1 is not sharing lanes with the GPU slot – check the manual lane table at Settings\Advanced\Onboard Devices Configuration. Disable Spread Spectrum for cleaner clocks if present, and set ERP to Disabled to avoid power delivery quirks with high-wattage GPUs. Save your profile to a USB drive via Tool > User Profiles > Save to USB before tweaking further.
Common Mistakes
Enabling XMP/EXPO and Resizable BAR on top of CSM Legacy Boot: CSM forces Legacy ROMs and blocks UEFI features. Many users enable XMP and Resizable BAR but forget CSM is still Enabled, so Resizable BAR silently stays disabled. Always disable CSM first, set boot to UEFI, then enable Above 4G Decoding and Resizable BAR.
Setting RAM voltage manually to the wrong value: Manually setting DRAM Voltage to 1.25V for a kit that needs 1.40V causes random crashes. Leave DRAM Voltage on Auto when you enable XMP/EXPO. The profile sets it correctly. Only override if the board sets it higher than the spec printed on the RAM label.
Over-unlocking power limits on budget cooling: Selecting Water Cooler or Unlimited PL1/PL2 on a stock Intel air cooler or a budget mATX board will cause instant 100C thermal throttling and may degrade longevity. Match the Cooler Tuning setting to the actual cooler installed.
Forgetting to save a profile before experimenting: New builders tweak fan curves and memory timings without saving. If the board fails to POST, you will have to clear CMOS with the jumper or button on the rear I/O. Always go to Tool > Overclocking Profiles or Save User Defaults and save to Profile 1 before changing anything. If you fail to POST, power off, short the CLRTC pins or hold the Clear CMOS button for 10 seconds, then Load Optimized Defaults.
Disabling TPM after Windows 11 is installed with BitLocker on: Disabling fTPM/PTT after encrypting the OS drive will lock you out at the BitLocker recovery screen. Suspend BitLocker first in Windows under Control Panel > System and Security > BitLocker Drive Encryption > Suspend protection before changing TPM settings.
FAQ
Do I need to update BIOS on a new motherboard?
What causes it: Older BIOS versions may not support your new CPU, memory kit, or have AGESA/microcode fixes for stability, especially on AM5 and Intel 14th Gen boards.
How to check: In BIOS Main screen, note BIOS Version and Date. Compare to the latest version on your motherboard’s support page. If your CPU is not posting at all, check the board’s CPU Support List – it will list the minimum BIOS needed.
What to do: If an update is needed, download the BIOS file to a FAT32 USB drive, rename per manufacturer instructions (e.g., ASUS requires BIOSRenamer.exe), and use USB BIOS Flashback or Tool > EZ Flash / M-Flash in the BIOS. Use the rear USB port marked BIOS. Do not power off during flashing. After update, Load Optimized Defaults, then re-apply your settings.
How to undo: You cannot easily downgrade on many boards without Flashback. Save your old BIOS to the same USB via the BIOS Tool if the board allows BIOS Backup before updating.
Why does my RAM show the wrong speed after enabling XMP?
What causes it: The board may have fallen back to JEDEC after a failed memory training, or you are looking at the wrong field. Some BIOS show both configured speed and actual speed.
How to check: Check Main > DRAM Frequency. If it still says 4800 MT/s, training failed. Check if DRAM Status shows your kit’s name. In Windows, use Task Manager > Memory speed – note that DDR stands for Double Data Rate, so CPU-Z shows half the effective rate (3000 MHz = 6000 MT/s).
What to do: Set Memory Frequency to Auto after enabling XMP/EXPO, ensure DRAM Voltage is Auto, and set Memory Training or MRC Fast Boot to Disabled for the first boot so it re-trains. Increase DRAM Voltage by 0.02V only if the board allows safe increments within 1.35V-1.45V for DDR5. Try the secondary EXPO II profile which uses looser timings.
How to undo: Set XMP/EXPO to Disabled. The memory will return to 4800 MT/s JEDEC and POST reliably.
Should I enable overclocking features like PBO or MultiCore Enhancement?
What causes it: Auto-overclocking features like MultiCore Enhancement (MCE) or ASUS AI Overclock push all cores to maximum boost simultaneously, increasing voltage and heat for minimal gaming gain.
How to check: Look in OC > CPU Features or Ai Tweaker > MultiCore Enhancement. If it says Enabled – Remove All Limits, MCE is on. Check HWINFO64 CPU Voltage under load – if it stays above 1.40V sustained, an aggressive auto-OC is active.
What to do: For gaming, leave MCE to Disabled or Auto – Enforce All Limits, and set Precision Boost Overdrive to Enabled rather than Manual with aggressive Curve Optimizer. Let the CPU’s stock algorithm boost single cores high while keeping thermals in check. Only enable manual PBO with Curve Optimizer if you can stability test with CoreCycler or OCCT for hours.
How to undo: Set MultiCore Enhancement to Disabled and PBO to Auto/Disabled. The CPU will use factory power limits and voltages.
How do I reset BIOS if the PC will not boot after a setting change?
What causes it: An unstable memory timing, incorrect PCIe setting, or disabled iGPU with no discrete GPU signal can cause a no-POST black screen.
How to check: If fans spin but there is no display and the motherboard Q-LED stays on DRAM or CPU, or shows Q-Code 00, Ad, or 55, the BIOS setting failed to train.
What to do: First try Safe Boot: hold power button until it shuts off, then power on and spam Delete. If you still have no display, clear CMOS. Method 1: Power off and unplug PSU, press the Clear CMOS button on rear I/O for 10 seconds. Method 2: Short the CLRTC or JBAT1 pins with a screwdriver for 10 seconds per your manual’s layout near the battery. Method 3: Remove the CR2032 battery for 5 minutes. After clearing, BIOS will load Optimized Defaults. Re-enter and re-apply only XMP/EXPO and boot settings.
How to undo: Clearing CMOS is the undo itself. To avoid repeating it, save a known-good profile to USB via Tool > Save User Profile after each stable change so you can load it quickly.