HDR can transform a gaming monitor from merely bright to genuinely cinematic, but only if it is configured correctly. Out of the box, most monitors ship with settings tuned for a bright retail floor, not a dim room, and Windows itself adds another layer of configuration that many gamers never touch. The result is the familiar complaint that “HDR looks worse than SDR” — usually a configuration problem, not a hardware one. This guide walks through every setting that matters, in the order you should tackle them, from the Windows side to the monitor’s OSD and in-game options. Prioritize this sequence: get the Windows HDR toggle and color profile right first, then the monitor’s picture mode and brightness, then per-game calibration. Skipping steps in that order is why most HDR setups disappoint.
Our Top Picks
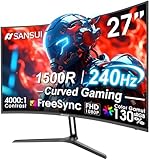
 SANSUI 27 Inch Curved 240Hz Gaming Monitor FHD27.017.66 x 24.13 x 17.84 inches7.26 PoundsCheck on Amazon
 AOC 27" Gaming Monitor QHD 260Hz Overclocked IPS27" 240Hz IPS7.46 x 24.17 x 17.7 InchesCheck on Amazon
 ASUS TUF Gaming VG27AQ3A 27 Inch 1440p 180Hz14.4" x 24.2" x 2.1"24.2 x 8.4 x 17.9 Inches10.1 poundsCheck on Amazon


Top 3 picks at a glance
Quick Recommended Settings
| Setting | Recommended value | Why |
|---|---|---|
| Windows HDR | On (Settings > System > Display > HDR) | Nothing else works unless Windows is outputting an HDR signal. |
| SDR content brightness slider | Around 30–45 | Prevents desktop and SDR games from looking washed out when HDR is enabled. |
| Monitor picture mode | Game HDR / HDR Custom (avoid Vivid) | Vivid modes crush contrast and oversaturate; Game modes usually preserve EOTF accuracy. |
| Local dimming | High (FALD) or Auto (mini-LED) | Without it, black levels rise dramatically and HDR’s contrast advantage disappears. |
| Brightness / backlight | Max, or the highest you find comfortable | HDR impact scales with peak luminance; 400 nits barely qualifies, 600+ makes a real difference. |
| Black equalizer / shadow boost | Off or 0 | Lifts shadows and destroys HDR’s dark-scene contrast. |
| Color gamut | Auto / Native / Wide | Forces the panel to display its full color volume instead of clipping to sRGB. |
| In-game HDR brightness calibration | Set so the sun/logo is barely visible | Matches the game’s tone mapping to your monitor’s actual capabilities. |
Setting-by-Setting
Windows HDR toggle and color profile
The exact value: HDR On, with the “Use HDR” and, if available, “Auto HDR” toggles enabled. You will find this under Settings > System > Display > HDR (or “Use HDR”). The trade-off: enabling HDR changes the display’s calibration for the entire desktop, and SDR content can look dim or desaturated until you adjust the SDR content brightness slider on the same page. If your desktop looks wrong after toggling HDR, that slider is the culprit — most people are best served somewhere between 30 and 45 out of 100. Windows 11 users should also check the “HDR certification” or display capabilities section to confirm Windows has detected the panel as HDR-capable; if the toggle is greyed out, your cable or GPU output is the problem, not the setting.
HDMI bandwidth and cable
The exact value: full HDMI 2.1 bandwidth (48 Gbps) if your monitor supports it, or DisplayPort 1.4 with DSC. The trade-off: choosing “Compatibility” modes in your monitor’s OSD (often listed under Input Settings as HDMI 2.0 vs HDMI 2.1, or “HDMI Ultra HD Deep Color” on some brands) guarantees stability on older cables but caps you at 4K60 with chroma compression or blocks 10-bit output entirely. Check your current output with a GPU utility — NVIDIA users can open the NVIDIA Control Panel > Change Resolution and confirm the output color depth reads 10-bpc or 12-bpc with RGB output color format. If it reads 8-bpc in HDR mode, your cable or port setting is throttling bandwidth. AMD users can verify the equivalent in AMD Software: Adrenalin Edition under Display settings.
Monitor picture mode
The exact value: the mode named “Game HDR,” “HDR Gaming,” “HDR Custom,” or “HDR User” — exact naming varies by brand (LG uses “Game,” Samsung uses “Game” or “Dynamic,” ASUS often has an “HDR Gaming” mode). The trade-off: factory “Vivid” or “Dynamic” HDR modes boost saturation and sharpening to look impressive in a store but deviate heavily from the PQ curve (SMPTE ST 2084), which is the standard HDR games are mastered against. Accurate EOTF tracking means shadows and highlights appear at the brightness the developer intended. The cost is that accurate modes can initially seem flat if you are used to oversaturated processing — give your eyes a week to adapt before judging.
Local dimming
The exact value: High (or “Auto” on mini-LED monitors that lock the level in game modes). The trade-off: local dimming is the single biggest contributor to HDR image quality on LED-backlit panels, letting bright highlights sit against genuinely dark surroundings. The cost is blooming — halos around bright objects against black — and, on aggressive implementations, slight dimming of subtitles or HUD elements. On edge-lit panels with few zones, the trade is often not worth it and can cause visible light stepping; on mini-LED panels with hundreds or thousands of zones, always leave it on. OLED owners have no local dimming setting because every pixel emits its own light — this is why OLEDs deliver the cleanest HDR presentation.
Peak brightness and ABL
The exact value: backlight/brightness at 100 for LED panels; on OLEDs, use the manufacturer’s HDR game mode rather than full-screen brightness settings, since ABL (automatic brightness limiting) governs sustained luminance. The trade-off: maximum brightness maximizes highlight impact but can be fatiguing in dark rooms and can trigger more aggressive ABL on OLEDs during bright full-screen scenes. If a bright scene visibly dims as content changes, that is ABL working — it is normal and not fixable, only manageable by capping OLED pixel brightness a notch lower.
In-game calibration screens
The exact value: on each game’s HDR calibration screen, adjust sliders so the reference image is *just barely* visible at its extreme — for example, in games that show a sun or logo, raise brightness until the logo appears, then back off until it almost disappears. The trade-off: setting in-game paper white and peak brightness too high blows out highlights and grays the shadows; too low makes the image muddy. These calibrations are per-game and take about ninety seconds each. Skip them and the game’s tone mapper will guess — usually badly.
By Hardware Tier
Entry level (DisplayHDR 400, edge-lit, ~250–400 nits)
Be honest with yourself here: a 400-nit edge-lit panel technically supports HDR but cannot display much of it. Use HDR only in games that handle tone mapping well, and prioritize turning local dimming on (if the panel has it at all), gamma to 2.2 or “Auto,” and black equalizer off. Expect a modest improvement over SDR rather than a transformation. Consider running some competitive titles in SDR regardless, since a washed-out HDR image can cost you shadow detail in multiplayer.
Mid range (DisplayHDR 600, FALD or entry mini-LED, ~600 nits)
This is where HDR starts paying for itself. Set local dimming to High, brightness to max, and verify 10-bit output in your GPU control panel. Use each game’s calibration screen religiously. If your monitor offers a “Black Equalizer” or “Shadow Boost,” keep it at 0 in HDR — you have enough contrast performance that you no longer need artificial shadow lifting.
High end (mini-LED 1000+ zones, QD-OLED/WOLED, DisplayHDR 1000/True Black)
Enable every bandwidth option: HDMI 2.1 full, 4K at your panel’s refresh rate, 10- or 12-bit where offered. On OLEDs, use the dedicated HDR game picture mode and leave peak luminance settings on the manufacturer’s default rather than forcing maximum, which reduces ABL aggression during bright scenes. On mini-LED, experiment with local dimming Low vs High in dark scenes — some implementations show fewer artifacts at Low in near-black content, at the cost of slightly elevated blacks. Consider running games in a dedicated HDR mode only where supported natively; Auto HDR can approximate the experience for DX11/DX12 titles but is a bridge, not a substitute.
Common Mistakes
Leaving HDR on the monitor but off in Windows (or vice versa). What causes it: many monitors auto-switch modes, and Windows can revert the toggle after driver updates. How to check: Settings > System > Display — the HDR section should say “On” while a game runs. What to do: re-enable the toggle, and enable “Auto HDR” so games that lack native support still benefit. How to undo: simply toggle HDR off again if you prefer SDR for a session; the setting is reversible instantly with Win+Alt+B (the HDR toggle shortcut in the Xbox Game Bar).
As an Amazon Associate we earn from qualifying purchases at no extra cost to you.


Using a Vivid or Dynamic HDR picture mode. What causes it: these modes look punchiest in a quick glance. How to check: your monitor’s OSD picture mode listing. What to do: switch to a Game or Custom HDR mode, then verify the EOTF if your OSD exposes it. How to undo: switch back at any time; picture modes are non-destructive presets.
Black equalizer or shadow boost left over from competitive SDR play. What causes it: habits carried over from SDR profiles stored separately from HDR profiles. How to check: open the OSD while in HDR and look at the Black Equalizer / Shadow Boost value. What to do: set it to 0 in your HDR profile. How to undo: raise it again if you go back to SDR competitive play; SDR and HDR profiles usually save independently.
Wrong cable or port limiting bandwidth. What causes it: older High Speed HDMI cables or compatibility port modes. How to check: GPU control panel showing 8-bpc output in HDR, or the monitor OSD flagging a non-full-bandwidth connection. What to do: use the cable bundled with the monitor, or an Ultra High Speed certified HDMI cable, and select the full-bandwidth port option in the OSD. How to undo: revert the port mode to Compatibility if you encounter instability with a marginal cable.
Forgetting per-game calibration. What causes it: assuming one global HDR setup covers everything. How to check: if highlights are blown out or the image is murky in a specific title only, its calibration was skipped or wrong. What to do: run that game’s HDR calibration sliders per the guidance above. How to undo: reset the game’s display settings to default and recalibrate.
FAQ
Should I leave HDR on all the time on Windows?
On Windows 11 with a good HDR display, yes — leave it on permanently and tune the SDR content brightness slider so desktop use stays comfortable. On weaker HDR panels, toggling HDR per game with Win+Alt+B is often the better experience, since desktop and SDR games can look worse in HDR mode.
Is Auto HDR as good as native HDR?
No. Auto HDR adds highlight expansion to DX11 and DX12 games that were never mastered for HDR, and it does a respectable job, but it cannot recover color volume or contrast the developer never encoded. Treat it as a bonus, and prefer a game’s native HDR path whenever one exists.
Why do my HDR games look washed out?
Nearly always one of four things: an inappropriate picture mode (Vivid/Dynamic), the SDR content brightness slider set too high, local dimming disabled, or in-game paper white set far above what the panel can sustain. Work through the table at the top of this guide in order and the issue usually resolves.
Does HDR cost frames?
Enabling HDR itself has a negligible performance cost — the framebuffer format changes, but the workload difference is small enough that you will not meaningfully notice it. Some games apply extra post-processing in HDR, which can cost a frame or two in edge cases, but the drop is far smaller than resolution or ray-tracing changes. Do not disable HDR for performance reasons on any modern system.