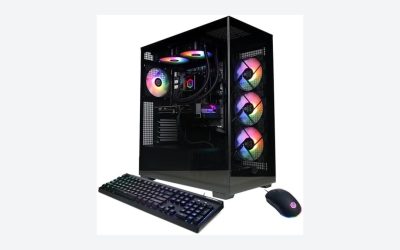
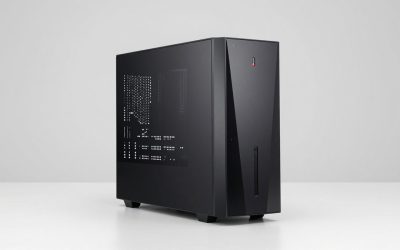
When assembling a new desktop computer, it is easy to get swept up in the high-stakes world of graphics cards, processors, and RAM. Most buyers spend hours debating clock speeds and core counts, only to treat the computer chassis as an afterthought—a simple metal box meant to hold the “real” components. This is one of the most expensive mistakes a builder can make.
Choosing the wrong computer case can lead to severe thermal throttling, components that physically do not fit, cut fingers from sharp, cheap metal edges, and a desktop setup that looks cluttered and uninspired. Some buyers buy a striking, highly specialized chassis like a pink panoramic tower only to realize it lacks the clearance for their massive triple-fan graphics card. Others get confused by search terms altogether, accidentally looking at polycarbonate (PC) protective shells meant for mobile devices or tablets when they actually need a heavy-duty steel tower for a workstation.
As an Amazon Associate we earn from qualifying purchases at no extra cost to you.


Your computer case is not just a container; it is the structural foundation, the cooling engine, and the visual centerpiece of your workspace. This guide will cut through the marketing jargon to show you exactly what to look for when buying a PC case so you can buy with confidence.
Our Top Picks
 Vetroo AL900 Pink ATX Computer PC Case with10 x 120 mm fans16.7 x 11.2 x 15.7 Inches14.08 poundsCheck on Amazon


Top 3 picks at a glance
Decide These 3 Things First
Before you start browsing aesthetic styles or color schemes, you must lock down three fundamental parameters. Making these decisions first will instantly filter out hundreds of incompatible options and save you hours of frustration.
- Your Motherboard Form Factor: Motherboards come in standardized sizes: Mini-ITX (6.7 x 6.7 inches), Micro-ATX (9.6 x 9.6 inches), and ATX (12 x 9.6 inches). A case must match or exceed your motherboard size. While you can install a tiny Mini-ITX board inside a massive ATX tower, you cannot squeeze a standard ATX motherboard into a compact Micro-ATX enclosure.
- Desk Placement and Footprint: Where will this computer live? If it is going on top of a heavy-duty wooden desk, you can opt for a dual-chamber panoramic glass case that shows off your components. If it is sitting on a dedicated floor stand or inside a desk cubby, front-to-back airflow is your primary concern, and side-panel glass becomes less important. Measure your available physical space, leaving at least 4 to 6 inches of clearance on all sides for exhaust.
- Your Cooling Strategy: Are you planning to use a traditional, tall CPU air cooler, or a liquid All-in-One (AIO) cooler? Liquid coolers require specific radiator mounting points (typically 240mm, 280mm, or 360mm in length). If you choose a large 360mm liquid cooler, you must verify the case has the physical length and depth to support that radiator size at the top or front panel without colliding with your RAM or motherboard heatsinks.
Case Size and Motherboard Compatibility
PC cases are generally categorized into four main sizes, though physical dimensions can vary slightly by manufacturer:
- Full-Tower (Large): Typically standing over 22 inches tall and 8 to 10 inches wide. These are designed for dual-system builds, massive custom liquid-cooling loops, or workstation motherboards (E-ATX). They are heavy, often weighing over 30 pounds empty, and take up significant desk real estate.
- Mid-Tower (Standard): The sweet spot for 90% of builders. These usually measure roughly 18 to 20 inches tall, 8 to 9 inches wide, and 18 inches deep. They comfortably fit standard ATX motherboards, large graphics cards, and multiple cooling fans without dominating your entire work surface.
- Micro-ATX (Compact): Slightly shorter than mid-towers, usually 14 to 16 inches tall. They offer a smaller footprint but limit you to Micro-ATX or Mini-ITX motherboards, which typically have fewer PCIe expansion slots.
- Mini-ITX / Small Form Factor (SFF): Ultra-compact enclosures under 14 inches in any direction, often measured in total volume (typically under 20 liters). SFF builds require highly specialized, expensive components and meticulous cable routing.
When evaluating size, look specifically at GPU clearance. Modern high-end graphics cards can easily exceed 13 inches (330mm) in length and 3 slots in thickness. Ensure the chassis lists a maximum GPU clearance of at least 340mm if you plan to install a high-performance card.
Materials, Construction, and Build Quality
The structural integrity of your case dictates how quiet your system will run and how long it will last. Cheap cases use thin, bendable steel sheets that warp under pressure and rattle when system fans spin up to high speeds.
Look for cases constructed from SECC or SGCC steel with a thickness of at least 0.6mm to 0.8mm. Heavy steel dampens fan vibrations and provides a rigid frame that won’t sag under the weight of heavy components. Premium cases may feature anodized aluminum panels, which are lightweight and offer a sleek, modern aesthetic but command a higher price tag.
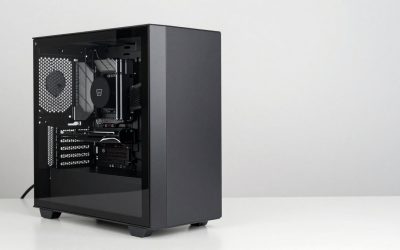
When it comes to side panels, choose tempered glass over acrylic (plastic). Acrylic scratches incredibly easily—even a gentle wipe with a microfiber cloth can leave permanent swirl marks. Tempered glass (ideally 4mm thick) offers crystal-clear visibility, resists scratches, and dampens high-frequency fan noise much better than plastic.
Note on material terminology: When shopping, ensure you are looking at actual computer chassis. In online marketplaces, searches for “PC case” often return results for hard polycarbonate (PC) protective covers for phones or tablets, such as a transparent clear phonecase or a protective tablet folio with an auto wake/sleep function. These accessories use “PC” to refer to the chemical compound polycarbonate, whereas a computer builder needs a physical steel and glass desktop enclosure.
Airflow, Ventilation, and Thermal Performance
A computer case is not just a static furniture piece; it is an active thermodynamic system. If your case cannot exhaust hot air efficiently, your expensive CPU and GPU will overheat and throttle down their speeds to save themselves from damage.
For optimal thermal performance, prioritize a mesh front panel over a solid plastic or glass front panel. Mesh allows the intake fans to pull in cool ambient air with minimal resistance. If you choose a panoramic glass case, ensure it utilizes a dual-chamber design or features dedicated bottom-to-top vertical airflow paths with plenty of fan mounts.
Look for a case that supports at least three 120mm or 140mm fans in the front, two or three on the top, and one in the rear. Larger 140mm fans are highly recommended because they can move the same volume of air (measured in Cubic Feet per Minute, or CFM) at lower rotational speeds (RPM) than 120mm fans, resulting in a much quieter workspace.
Additionally, check for high-quality, removable dust filters on all intake zones (front, bottom PSU intake, and top). Magnetic dust filters are incredibly easy to peel off, rinse under a faucet, dry, and snap back into place, keeping your internal components free of dust buildup.
Ease of Assembly and Cable Management
A beautiful PC build can be ruined by a tangled mess of black and yellow power cables pressed against the side glass. More importantly, poor cable management restricts airflow. A well-designed case makes cable routing effortless.
When evaluating a case’s interior layout, look for the following mechanical features:
- Routing Space: Look for at least 0.8 inches (20mm) to 1.0 inch (25mm) of physical clearance behind the motherboard tray to tuck away bulky power supply cables.
- Rubber Grommets: These flexible rubber inserts line the routing holes, hiding the messy cable clutter in the back chamber from the clean view in the front chamber.
- Built-In Cable Channels and Tie-Down Points: Look for pre-installed hook-and-loop (Velcro) straps or dedicated plastic channels along the main routing paths to secure thick power cables easily.
- Power Supply Shroud: A metal compartment at the bottom of the case that completely hides the power supply unit (PSU) and its excess, unused cables.
Price Tiers: What Actually Matters at Each Level
The PC case market is highly competitive, meaning you do not need to spend a fortune to get a high-quality enclosure. Looking ahead to hardware designs in 2026, we see premium features like panoramic glass and toolless panels trickling down to more affordable price brackets.
- Budget ($40 to $80): In this range, focus on functionality over flashy extras. You will find solid steel frames, basic mesh fronts, and acrylic or entry-level tempered glass. A prime example is the Vetroo AL900 Pink ATX Computer PC Case, which sits right at the top of this budget tier at around $79. It offers a premium 270-degree full-view tempered glass look and dual-chamber design at a highly accessible price point, proving you don’t need a premium budget for striking aesthetics.
- Mid-Range ($80 to $150): This is the sweet spot for most home office and gaming builds. Here, you get thicker 0.8mm steel, high-quality 4mm tempered glass panels with toolless quick-release latches, premium rubber grommets for cable routing, integrated fan controllers, and front-panel USB-C ports.
- Premium ($150 to $300+): At this level, you are paying for thick anodized aluminum panels, modular internal layouts that let you invert the motherboard, dual-chamber designs with massive cooling potential, integrated LCD screens, and pristine acoustic dampening materials.
Warranty, Support, and Delivery Considerations
Because PC cases contain delicate tempered glass panels and pre-installed electronic front-panel ports, how they are packaged and supported is critical.
A quality manufacturer will offer a minimum 2-year warranty covering the front I/O ports, pre-installed fans, and any internal LED lighting controllers. Avoid generic, unbranded cases that offer no warranty, as a failing front-panel power button or shorted USB port can render the entire build useless.
When ordering online, pay close attention to the shipping weight. A mid-tower case typically has a shipping weight of 18 to 25 pounds, while full towers can exceed 35 pounds. Ensure the listing confirms the use of thick, molded polyethylene foam packaging rather than cheap, brittle styrofoam, which often crumbles in transit and leads to shattered glass panels upon arrival.
Spec Checklist
Use this quick reference table to compare what features you should expect at different price points when shopping for a desktop chassis:
| Feature/Specification | Budget ($40 – $80) | Mid-Range ($80 – $150) | Premium ($150 – $300+) |
|---|---|---|---|
| Chassis Material | 0.5mm to 0.6mm SPCC Steel / Plastic | 0.7mm to 0.8mm SECC Steel | Thick SECC Steel / Anodized Aluminum |
| Side Panel Type | Acrylic or basic Tempered Glass (screws) | Toolless Quick-Release Tempered Glass (4mm) | Dual Tempered Glass / Curved Glass panels |
| Cable Management Space | 15mm to 18mm (Tight fit) | 20mm to 25mm with rubber grommets | 25mm+ with hidden cable doors & tracks |
| Front Panel I/O Ports | USB 2.0 / USB 3.0 Type-A | USB 3.0 Type-A + USB-C (10Gbps) | Multiple USB-C (20Gbps) / Audio DAC jacks |
| Included Fans | 1 to 2 basic 120mm fans (non-PWM) | 2 to 4 high-quality 140mm PWM or ARGB fans | Premium magnetic daisy-chain PWM fans |
| Dust Filtration | Basic mesh slip-in filters | Full-coverage magnetic or slide-out filters | Ultra-fine nylon micro-mesh pull-out trays |
Red Flags to Avoid When Shopping
When comparing cases online, look out for these warning signs that indicate a poorly designed product:
- Solid Glass Front Panels with No Side Vents: Some cases try to look sleek by placing a solid sheet of glass directly in front of the intake fans, leaving only a tiny 0.5-inch gap for air. This suffocates your components, creating a literal oven.
- “Break-Away” PCIe Expansion Slots: Cheap cases use stamped metal slots on the back that you have to physically bend and snap off to install a graphics card. These leave sharp metal edges that can cut cables (or your hands) and cannot be reattached if you change your hardware layout. Look for reusable slots held in place with thumb screws.
- No USB-C Port on the Front I/O: If a case lacks a front-panel USB-C port, you will have to reach around to the back of your motherboard every time you want to plug in a modern external drive or charge a device.
- Proprietary Fan Connectors: Some cheap pre-installed fans use non-standard 5-pin or 6-pin connectors that only plug into a proprietary, cheap control box included with the case. If that box breaks, you cannot easily replace the fans or control their speeds through your motherboard software.
FAQ
Does a PC case affect actual system performance?
Yes, significantly. While a case does not process data, its design directly impacts system temperatures. If a case has poor ventilation, heat builds up inside, causing your CPU and graphics card to automatically lower their clock speeds (a process called thermal throttling) to prevent permanent hardware damage. A well-ventilated case keeps your components running at their maximum potential speeds.
What is the difference between a computer PC case and a polycarbonate (PC) protective case?
This is a common point of confusion when shopping online. A computer “PC case” is a metal and glass structural tower designed to hold motherboard components, power supplies, and storage drives for a desktop computer. A polycarbonate “PC protective case” (such as a slim clear phonecase or a tablet cover with auto wake/sleep functions) is a small, flexible plastic sleeve designed to protect mobile screens and chassis from drops.
Do PC cases come with a power supply included?
Generally, no. In the modern custom-building market, quality cases do not include a power supply unit (PSU). This allows builders to choose a PSU that matches their specific power draw requirements (typically ranging from 650W to 1000W+). Any case that comes with a pre-installed power supply at a very low price point should be avoided, as those packed-in power supplies are often low-quality units that risk failing and damaging your expensive components.
How many fans should a standard mid-tower case have?
For a reliable, balanced-pressure setup, you should have at least three fans: two intake fans at the front pulling cool air in, and one exhaust fan at the rear pushing hot air out. If you are running high-performance gaming or editing hardware, upgrading to a setup with three front intake fans, two top exhaust fans, and one rear exhaust fan will provide optimal thermal performance while keeping noise levels minimal.
Related guides
- Best Gaming PC for Overwatch 2: Ten Prebuilts Matched to Your Monitor (2026)
- Best Gaming PC for Baldur’s Gate 3: Matching CPU, VRAM and Storage to the Game (2026)
- Best Gaming PC for Apex Legends: Which Listings Fit a High-Refresh Setup (2026)
- Best RTX 3060 Gaming PCs: Eight Prebuilt Listings Compared by CPU, RAM and Cooling (2026)