Our Top Picks
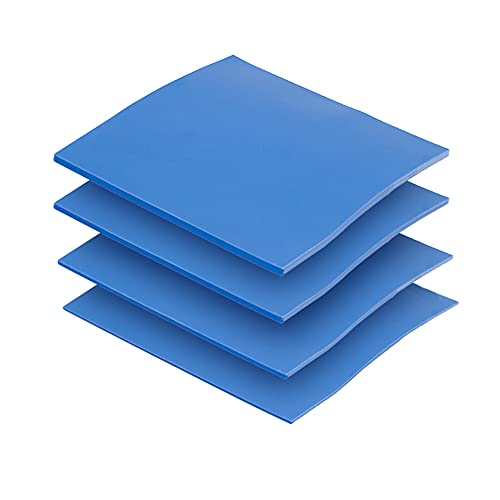
 ARCTIC TP-3: Premium Performance Thermal Pad120 x 20 x 1,0 mm (4 Pieces)4.7 x 0.8 x 0 inches0 PoundsCheck on Amazon
 Thermal Grizzly PhaseSheet PTM 50x40 mm Phase-Change Thermal50x40mm2 x 1.6 x 0 inchesCheck on Amazon

Top 3 picks at a glance
The Short Answer
There is no single “one-size-fits-all” dimension for graphics card thermal pads. Because graphics processing units (GPUs) feature components of varying heights—such as memory chips, voltage regulator modules (VRMs), and inductors—a single GPU board will almost always require multiple thermal pad thicknesses simultaneously. Typically, GPU thermal pads range in thickness from 0.5 mm to 3.0 mm.
To replace your pads, you must match the exact thickness of your card’s original manufacturer specifications, often requiring you to buy a variety pack or multiple sheets of different thicknesses. In terms of flat dimensions (length and width), most users purchase large sheets like 100 x 100 mm (approx. 4 x 4 inches) or long strips like 120 x 20 mm and manually cut them down to match the exact footprint of the silicon components. Depending on the brand and thermal conductivity rating, a pack of quality thermal pads generally costs between around $8 and around $15.
As an Amazon Associate we earn from qualifying purchases at no extra cost to you.


Standard Sizes
Thermal pads are manufactured in precise metric thicknesses because computer hardware engineering relies on millimeter-level tolerances. Using the wrong thickness by even 0.5 mm can cause your GPU to overheat or fail. The table below outlines the standard metric sizes available on the market, their approximate imperial conversions, and their most common applications inside a graphics card chassis.
| Pad Thickness (Metric) | Pad Thickness (Imperial) | Common Sheet Dimensions | Typical GPU Component Application |
|---|---|---|---|
| 0.5 mm | 0.020 inches | 100 x 100 mm / 20 x 67 mm | Low-profile VRMs, memory chokes, and tight-tolerance laptop GPU heatsinks |
| 1.0 mm | 0.039 inches | 120 x 20 mm / 100 x 100 mm | Standard GDDR6 VRAM chips, primary VRM MOSFETs |
| 1.5 mm | 0.059 inches | 120 x 20 mm / 50 x 40 mm | High-clearance VRAM (GDDR6X), backplate-to-PCB heat bridging |
| 2.0 mm | 0.079 inches | 100 x 100 mm / 20 x 67 mm | Thicker gaps on custom non-reference coolers, active backplate cooling |
| 2.5 mm | 0.098 inches | 100 x 100 mm / 20 x 67 mm | Specialized clearance zones on triple-fan aftermarket shrouds |
| 3.0 mm | 0.118 inches | 100 x 100 mm / 20 x 67 mm | Passive backplates with wide physical air gaps, heavy industrial GPU enclosures |
How to Measure Your Space
Because graphics card manufacturers rarely print thermal pad dimensions in their user manuals, you will need to measure the clearances yourself during a teardown. Follow these steps to find the exact dimensions required for your specific graphics card model:
- Disassemble the GPU Shroud: Carefully unscrew the backplate and main heatsink assembly from the PCB. Unplug any fan or RGB headers. Keep the screws organized, as they vary in length.
- Clean and Expose the Components: Gently peel away the old, greasy thermal pads. Use 90% or higher isopropyl alcohol and a lint-free microfiber cloth to clean the oily residue off the VRAM chips, VRMs, and the copper contact plates of the heatsink.
- Perform the “Solder or Modeling Clay” Test: If the old pads are too squished or torn to measure with a caliper, place a small bead of soft modeling clay or a tiny loop of soft solder wire onto the target chip. Reassemble the heatsink fully and tighten the screws to normal operating pressure.
- Disassemble and Measure: Take the heatsink back off. The modeling clay or solder will have flattened to the exact thickness of the gap. Use a digital vernier caliper to measure the thickness of the flattened clay or solder. This is the exact pad thickness you need.
- Measure the Surface Area: Use a standard metric ruler to measure the length and width of the VRAM chips (typically 14 x 12 mm for individual GDDR6 modules) and the VRM strips. Write down these dimensions so you know how to cut your new thermal sheets.
By Room or Use Case
When organizing your home office workstation or gaming setup, treating your GPU’s internal layout as a collection of specialized thermal zones helps prevent hardware degradation. Each component “zone” serves a different purpose and demands unique pad dimensions.
VRAM (Video RAM) Cooling
The high-speed memory chips surrounding the central GPU core generate intense heat, especially under heavy rendering or gaming workloads. VRAM chips require high-performance thermal pads, typically 1.0 mm to 2.0 mm thick. Because VRAM is highly sensitive to temperature spikes, choosing a pad with high thermal conductivity—such as 6.0 W/mK (watts per meter-kelvin)—is crucial. A multi-pack sheet like the OwlTree 100x100mm set allows you to cut exact 14 x 12 mm rectangles to cover each memory module perfectly.
VRM (Voltage Regulator Module) and MOSFET Protection
The VRMs manage the raw electrical power delivered to your graphics card, often handling power draws ranging from 200 to over 450 watts. These components line up in long, narrow rows. To cool them, you need narrow thermal strips rather than individual squares. Long pre-cut strips, such as the ARCTIC TP-3 (120 x 20 x 1.0 mm), are ideal here. You can lay down a single continuous strip over the entire row of MOSFETs. Thicknesses for VRMs generally range from 1.0 mm to 1.5 mm.
GPU Backplate Heat Dissipation
Many modern graphics cards feature a metal backplate that acts as a passive heatsink. Because the gap between the rear of the circuit board (PCB) and the metal backplate is relatively wide, this zone requires much thicker, denser pads—usually 2.0 mm to 3.0 mm. Since this area does not require micro-precision contact, you can use budget-friendly, highly pliable pads like the HASAYAKI 30-pack, which provides multiple 2.0 mm and 3.0 mm options to bridge these wide structural gaps without putting undue stress on the solder joints.
GPU Direct Die Core Alternatives
The main processing silicon (the GPU core die) should never be cooled with standard thermal pads because the gap between the die and the copper heatsink is virtually microscopic. Standard thermal paste is the default choice. However, if you are looking for advanced phase-change materials that act like dry pads during installation but melt into a thin liquid metal-like layer under heat, products like the Thermal Grizzly PhaseSheet PTM (50 x 40 mm) are designed specifically for this direct-die application. These phase-change sheets are incredibly thin (often around 0.2 mm) and provide maximum thermal transfer directly to the primary cooler.
Common Sizing Mistakes
- Using Pads That Are Too Thick: If you install a 2.0 mm pad where a 1.0 mm pad is required, the extra height will prevent the main heatsink from making contact with the primary GPU core. This results in immediate thermal throttling and automatic system shutdown within seconds of booting.
- Using Pads That Are Too Thin: If you select a 0.5 mm pad when a 1.5 mm pad is needed, the pad will not touch the metal heatsink at all. Without physical contact, the heat cannot escape, leading to silent VRAM overheating, artifacting, and eventual permanent hardware damage.
- Neglecting Pad Hardness/Compressibility: Harder, high-performance pads (often with high W/mK ratings) do not compress easily. If your measurements are slightly off, a stiff pad will warp the PCB when you tighten the shroud screws. Softer, highly compressible silicone pads are much more forgiving of minor measurement errors.
- Ignoring the Protective Plastic Film: Almost all thermal pads ship with clear protective plastic liners on both sides. Forgetting to peel these liners off before installation is a common mistake that turns an efficient thermal conductor into a heat-trapping barrier.
FAQ
Can I stack multiple thin thermal pads to reach a specific thickness?
While it is physically possible to stack two 1.0 mm pads to create a 2.0 mm barrier, it is highly discouraged. Stacking pads traps microscopic air bubbles between the layers. Air is an incredibly poor thermal conductor, meaning a stacked pad will perform significantly worse than a single, solid pad of the correct thickness.
How do I know if I installed the wrong thermal pad size?
You can identify sizing errors by monitoring your system’s sensor temperatures using diagnostic software. If your GPU core temperature instantly skyrockets to 90°C or higher while the memory stays cool, your pads are too thick, preventing the heatsink from contacting the core. If your core is cool but your memory junction temperatures exceed 105°C, your memory pads are too thin and are failing to make contact.
Does thermal pad hardness or softness affect sizing decisions?
Yes, compressibility plays a massive role in sizing. If you are using an incredibly soft, plush pad (like the clay-like ARCTIC TP-3), you can safely round up your measurement by 0.5 mm (e.g., using a 1.5 mm pad in a 1.2 mm gap) because the material will easily compress without warping your card. If you are using dense, rigid high-performance pads, your measurements must be exact.
How often should I replace the thermal pads in my GPU?
As we head toward 2026, the thermal demands of high-performance workstation and gaming GPUs continue to rise, making regular maintenance essential. Generally, high-quality silicone thermal pads last between 3 and 5 years. You should replace them sooner if you notice your memory temperatures creeping upward under normal workloads, or if you disassemble your cooling shroud and notice the existing pads have dried out, cracked, or begun leaking silicone oil onto the PCB.
Related guides
- Best Gaming PC for Overwatch 2: Ten Prebuilts Matched to Your Monitor (2026)
- Best Gaming PC for Baldur’s Gate 3: Matching CPU, VRAM and Storage to the Game (2026)
- Best Gaming PC for Apex Legends: Which Listings Fit a High-Refresh Setup (2026)
- Best RTX 3060 Gaming PCs: Eight Prebuilt Listings Compared by CPU, RAM and Cooling (2026)