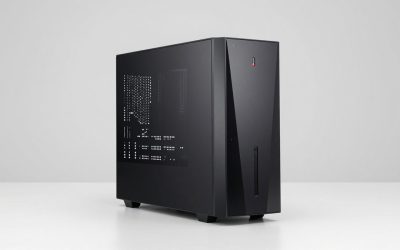
When building or upgrading a custom gaming PC, it is easy to get swept up in the glitz of graphics cards, liquid coolers, and RGB lighting. But if you want a system that runs cool, stays stable under heavy loads, and lasts for years, you need to look closely at the most overlooked component on your motherboard: the Voltage Regulator Module (VRM). Think of the VRM as the electrical plumbing of your system. It takes high-voltage power from your power supply and steps it down to the precise, low-voltage power your CPU needs to run.
Many first-time builders make critical mistakes here. They buy a top-tier processor and pair it with a bottom-barrel motherboard, only to experience random crashes, thermal throttling, and stuttering frame rates. Another common trap is falling for pure marketing math—assuming that a board with “18 power phases” is automatically superior to one with “12 power phases,” without looking at the quality of those phases. To help you navigate the jargon, we have put together this comprehensive guide on what to look for in a gaming motherboard vrm so you can make an informed, long-term investment.
As an Amazon Associate we earn from qualifying purchases at no extra cost to you.


Our Top Picks
 MSI MAG X870 Tomahawk WiFi Gaming Motherboard13.4"L x 10.9"W x 3"H13.46 x 10.55 x 2.76 Inches4 PoundsCheck on Amazon
 ASUS TUF Gaming B550-PLUS WiFi II AMD AM4B550-Plus|M.2x2|D4|WiFi610.75 x 2.75 x 13.5 Inches1.27 PoundsCheck on Amazon
 MSI MPG X870E Carbon WiFi Gaming Motherboard13.6"L x 3"W x 10.7"H13.46 x 10.55 x 2.76 inches5.5 PoundsCheck on Amazon
 ASUS ROG Strix X870E-E Gaming WiFi AMD AM5X870E-E|M.2x53.4 x 14.4 x 11.1 inches5.3 PoundsCheck on Amazon
Top 3 picks at a glance
Decide These 3 Things First
Before diving into phase counts and MOSFET specs, you must establish the baseline requirements of your specific setup. An overbuilt VRM is a waste of money if you are running a low-power processor, while an underbuilt VRM will actively cripple a high-end gaming rig.
- Your Processor’s Power Demands: Are you running a modest 65-watt chip, or a high-performance 170-watt to 250-watt unlocked processor? High-draw chips demand robust power delivery; budget chips do not.
- Your Case Airflow Environment: A system housed in a spacious ATX mid-tower with plenty of intake fans will naturally keep VRMs cooler than a cramped, Small Form Factor (SFF) Mini-ITX build with restricted airflow.
- Your Stance on Overclocking: If you plan to leave your CPU at stock settings or rely on mild auto-boosting, your VRM requirements are moderate. If you intend to manually push voltages to the limit, you need a premium, over-engineered power design.
1. Phase Count and Power Stage Amperage
When evaluating a motherboard’s VRM, you will frequently see configurations written like “14+2+1” or “18+2+2”. The first and most important number represents the VCore phases, which supply power directly to your CPU cores. The second and third numbers refer to auxiliary components like the integrated graphics and the memory controller.
However, phase count is only half the story. You must multiply the number of phases by the amperage rating of the individual Power Stages (MOSFETs) to find the true power capacity. For example, a budget board might feature a 10-phase VCore design using cheap 50-amp stages, yielding a theoretical capacity of 500 amps. Meanwhile, a premium board like the MSI MAG X870 Tomahawk WiFi utilizes a 14+2+1 phase design with high-quality 80-amp Smart Power Stages (SPS), delivering up to 1,120 amps of clean power. Always look for the specific amperage rating of the power stages—aim for at least 60 to 80 amps for mid-range builds, and 90 to 110 amps for high-end systems.
2. Heatsink Mass, Surface Area, and Materials
A VRM works incredibly hard, and that hard work generates significant heat. If a VRM gets too hot (typically crossing 100°C), it will throttle your CPU’s power to prevent self-destruction, causing your game’s frame rates to plunge. Therefore, the physical design of the VRM heatsink is just as critical as the electronics underneath.
Look for heavy, solid aluminum heatsinks with deep cuts, fins, or ridges. These design elements increase the surface area, allowing heat to dissipate rapidly into your case’s airflow. Avoid motherboards that cover their VRM area with solid plastic shrouds; these act as thermal blankets, trapping heat. High-end options like the ASUS ROG Strix X870E-E Gaming WiFi feature massive, interconnected heatsinks with integrated heat pipes to balance thermal loads across both sides of the CPU socket. Additionally, check the quality of the thermal pads used between the MOSFETs and the heatsink—premium boards use high-conductivity pads rated at 7 W/mK (watts per meter-kelvin) or higher to maximize heat transfer.
3. Component Quality: Chokes, Capacitors, and PCB Layers
The VRM is an analog circuit made up of three primary parts: MOSFETs (which switch the power), chokes (which smooth out the current), and capacitors (which store energy and prevent voltage drops). The longevity of your motherboard depends directly on the quality of these components.
Premium motherboards use alloy chokes that resist high saturation and minimize coil whine—that annoying buzzing sound some PCs make under load. They also utilize Japanese metallic capacitors rated for 10,000 to 20,000 hours of continuous operation at high temperatures (105°C). Furthermore, look at the physical construction of the motherboard itself. A high-quality board is built on a multi-layer printed circuit board (PCB) with 2-ounce thickened copper. Mid-range and premium boards generally use 6-layer or 8-layer PCBs, which naturally dissipate heat better than cheap 4-layer boards, helping to keep VRM temperatures low.
4. Physical Dimensions and Clearance
As VRM designs have grown more powerful, their heatsinks have grown physically larger. Before buying, you must consider how the motherboard’s VRM layout fits into your physical desktop space. Massive heatsinks can easily interfere with other components in your system.
If you plan to use a large dual-tower CPU air cooler, check the clearance height of the VRM heatsinks. Some premium boards have VRM blocks that stand over 40mm tall, which can block the fan clips or the cooling towers of your CPU cooler. Similarly, if you are mounting a 240mm or 360mm liquid cooling radiator to the top of your PC case, an oversized top VRM heatsink can collide with the radiator fans. Ensure your chosen case has at least 30mm to 50mm of clearance between the top edge of the motherboard tray and the mounting bracket of the radiator to avoid installation headaches.
5. Price Tiers and Value Mapping
Motherboard pricing varies wildly, and the VRM is one of the primary drivers of this cost scale. Balancing your budget means matching your processor tier with the appropriate motherboard tier.
- Budget ($80 – $130): Boards like the ASUS TUF Gaming B550-PLUS WiFi II fall into this category. They typically offer basic 8-phase to 10-phase designs with discrete MOSFETs or lower-tier 50A power stages. They are perfect for 65W to 105W processors operating at stock speeds, but will struggle or run dangerously hot with flagship chips.
- Mid-Range ($180 – $260): This is the sweet spot for most gamers. Boards like the MSI MAG X870 Tomahawk WiFi feature robust 14-phase layouts with 80A power stages. They handle premium 8-core and 12-core gaming processors with ease, keeping temperatures well below thermal limits even during marathon gaming sessions.
- Premium ($300 – $450+): Flagship motherboards like the MSI MPG X870E Carbon WiFi and the ASUS ROG Strix X870E-E Gaming WiFi offer extreme 18-phase or 20-phase designs with 110A power stages, heavy-duty thermal armor, and active cooling options. These are built for extreme overclocking, workstation tasks, and heavy multi-threaded workloads.
6. Warranty and Brand Reliability
Because the VRM handles raw power directly from your home wall outlet, it is susceptible to wear and tear over time. A motherboard manufacturer’s warranty is a strong indicator of how confident they are in their component selection. Most budget motherboards come with a standard 1-year or 2-year warranty, whereas mid-range and premium models usually carry a 3-year or 5-year warranty.
When investing in a system designed to last well into 2026 and beyond, look for brands that offer robust BIOS support. A stable BIOS ensures that the digital PWM controllers on your VRM accurately regulate voltages, preventing sudden voltage spikes that can degrade your CPU over time. Stick to major, reputable manufacturers with a proven track record of timely firmware updates.
7. Installation and Power Delivery Connections
When assembling your system, look at the top-left corner of the motherboard. This is where the EPS 12V CPU power connectors live. Budget boards typically feature a single 8-pin connector, which can safely deliver up to 336 watts of power. Mid-range and premium boards often feature dual 8-pin connectors or an 8+4 pin configuration, raising the safe power ceiling to over 600 watts.
Ensure that your power supply has the necessary cables to populate these connectors. While some motherboards will boot with only one 8-pin cable connected, running a high-draw processor without the secondary cable can overload the single connector, causing excessive heat buildup in the power cables themselves. Always plug in all available CPU power connections to distribute the electrical load evenly across the pins.
Spec Checklist
Use this quick-reference table to compare VRM specifications across the three main market tiers when shopping for your next gaming motherboard.
| Specification | Budget Tier | Mid-Range Tier | Premium Tier |
|---|---|---|---|
| Target Price Range | $80 – $130 | $180 – $260 | $300 – $450+ |
| Power Phase Count (VCore) | 6 to 10 Phases | 12 to 14 Phases | 16 to 20+ Phases |
| Power Stage Amperage | 45A – 55A (or discrete MOSFETs) | 70A – 80A (Smart Power Stages) | 90A – 110A (Smart Power Stages) |
| Heatsink Construction | Small, basic aluminum blocks | Dual thick aluminum blocks, finned | Massive dual blocks with heat pipe |
| PCB Layers | 4 to 6 Layers | 6 to 8 Layers | 8 to 10 Layers |
| EPS Power Connectors | Single 8-pin | Dual 8-pin (or 8+4 pin) | Dual 8-pin |
| Warranty Coverage | 1 to 2 Years | 3 Years | 3 to 5 Years |
Red Flags
When shopping for a gaming motherboard, keep an eye out for these warning signs that indicate a sub-par or poorly designed VRM:
- Naked MOSFETs: If you can see the bare, black square chips on the top and left sides of the CPU socket without any metal heatsinks covering them, avoid the board for gaming. These will overheat rapidly under sustained gaming loads.
- Plastic Shrouds with No Ventilation: A giant, colorful plastic cover over the rear I/O panel might look sleek, but if it completely seals off the VRM heatsink from your case’s exhaust fans, it will bottle up heat.
- Unspecified Power Stage Amperage: If a motherboard’s marketing materials boast a high phase count but completely hide or fail to mention the exact amperage of the power stages, they are likely using low-quality, cheap components.
- Underpowered CPU Power Plugs: A motherboard that claims to support top-tier, power-hungry processors but only features a single, basic 4-pin or 8-pin power connector is a major safety and stability risk.
FAQ
What is a VRM and why does it matter for gaming?
The VRM, or Voltage Regulator Module, acts as a step-down converter on your motherboard. It takes the 12-volt power delivered by your system’s power supply and converts it into a highly stable, clean voltage of roughly 1.1 to 1.4 volts required by your CPU. For gaming, a high-quality VRM ensures your processor receives smooth, ripple-free power, preventing system crashes, blue screens, and performance drops during intense, fast-paced gameplay.
How do I check my motherboard’s VRM temperatures?
You can easily monitor your VRM temperatures using free system diagnostic software such as HWInfo64 or HWMonitor. Run a demanding game or a CPU stress test for 15 to 20 minutes, then check the sensor readings labeled “VRM”, “MOS”, or “System Temp”. Ideally, your VRM should stay below 80°C under load. While most modern VRMs are rated to survive up to 105°C or 115°C, running them hot for extended periods will drastically shorten the lifespan of your motherboard.
Is an 8-phase VRM good enough for modern gaming?
Yes, an 8-phase VRM can be perfectly adequate, but it depends entirely on the processor you pair it with and the quality of the components. If you are running a mid-range, 65W gaming processor like an AMD Ryzen 5 or an Intel Core i5 at stock speeds, a quality 8-phase VRM will perform beautifully. However, if you plan to run a power-hungry 8-core or 12-core processor, you should look for a motherboard with at least 12 high-quality power phases to ensure optimal system stability.
Do I need active cooling (fans) on my VRM heatsinks?
For the vast majority of PC gamers, passive cooling is more than enough. As long as your motherboard has thick, well-designed metal heatsinks and your PC case has decent airflow (at least one front intake fan and one rear exhaust fan), your VRMs will stay safely within their operating limits. Active VRM cooling fans are generally only necessary for extreme liquid-nitrogen overclockers, heavy workstation tasks, or ultra-compact Small Form Factor builds with virtually zero natural airflow.
Related guides
- Best Gaming PC for Overwatch 2: Ten Prebuilts Matched to Your Monitor (2026)
- Best Gaming PC for Baldur’s Gate 3: Matching CPU, VRAM and Storage to the Game (2026)
- Best Gaming PC for Apex Legends: Which Listings Fit a High-Refresh Setup (2026)
- Best RTX 3060 Gaming PCs: Eight Prebuilt Listings Compared by CPU, RAM and Cooling (2026)