If your game setup feels cramped, cluttered or somehow uncomfortable without an obvious reason, the cause is almost never the PC. In my experience the order of blame runs: desk depth, monitor height, power and cable routing, surface clutter, peripherals, and only then the machine itself. Fix a 22-inch-deep desk by replacing it with something 28 inches or deeper and roughly seven out of ten setups stop feeling wrong immediately. That is the fix. The rest of this article explains why, and works down the list in order of how likely each item is to be your actual problem.
I am Owen Pritchard, Technical Guides Editor, twelve years in. My working area is a diagnostics bench covered in POST cards, swap-test spares and OS images on labelled drives, which means I have rebuilt my own layout more times than any sane person should. I have also spent a lot of those years watching people spend money on the last item in the list while the first item was the problem.
Top 3 picks at a glance
Step 1: measure your desk depth, because it is usually the culprit
As an Amazon Associate we earn from qualifying purchases at no extra cost to you. Product prices and availability are accurate as of the date shown and are subject to change.





Take a tape measure to your desk right now, front edge to wall, and note the number.
Under 24 inches is where the trouble starts. On a shallow desk, a monitor on its stock stand sits roughly 16 to 19 inches from your eyes. For a 24-inch panel that is tolerable. For a 27-inch panel it forces you to move your head to track the edges of the screen, and your eyes to work harder at close focus for hours. People describe the result as eye strain, or a headache, or the screen feeling too big, and they blame the monitor.
The second consequence is worse. With the monitor eating the back of the desk, your keyboard slides to the front edge, which leaves nowhere to rest your forearms. Unsupported forearms mean your shoulders carry the load, and that is the shoulder and neck tightness that shows up at hour three.
The target is 28 to 30 inches deep for a 27-inch monitor, giving a viewing distance in the low twenties of inches with 8 to 10 inches of clear surface in front of the keyboard. A 48-inch-wide desk with proper depth beats a 60-inch shallow one for almost everyone, because width buys you storage and depth buys you comfort.
If replacing the desk is genuinely impossible, a monitor arm is the cheap workaround. It pushes the panel back over the desk edge and reclaims the footprint of the stock stand, which typically recovers 6 to 8 inches of usable depth. That is a real fix, not a compromise.
Step 2: get the monitor to the right height
Second most common cause, and the cheapest to fix. The top of the display should sit at or slightly below your seated eye level, with the screen tilted back a few degrees. Most people run their monitor too low because a stock stand puts the panel bottom on the desk surface, and they compensate by dropping their chin. Hours of that is what produces the ache at the base of the skull.
The test takes ten seconds. Sit normally, close your eyes, and open them looking straight ahead. Your gaze should land in the upper third of the screen. If it lands on the taskbar, the monitor is too low.
Fix it with a monitor arm, a proper riser, or a stack of books if you are testing the theory before spending. Do not fix it by raising your chair, because raising the chair drops your feet off the floor and creates a new problem lower down.
Step 3: sort power before you sort anything else physical
Count the plugs your setup needs. A PC, a monitor, speakers, a lamp, a phone charger and a router is six, and most rooms offer two sockets in the wrong place. What follows is a daisy chain of extension leads on the floor, which is both a fire risk and the reason your caster wheels keep catching on something.
Desks with integrated outlets solve most of this elegantly, because the sockets sit at hand height on the desk edge rather than behind furniture. Use them for monitors, lamps, chargers and speakers. Do not put the PC itself through one; integrated desk outlets run on light-gauge internal wiring to a single feed plug, and a high-draw system belongs on a properly rated surge-protected strip fed straight from the wall. If you are unsure what your setup needs, our guide to a decent power strip for a gaming setup covers the ratings that matter.
While you are down there, do the cable routing properly. Cables on the floor foul chair casters, collect dust that ends up in your intake fans, and make every future hardware change miserable. Adhesive raceways and a handful of ties cost very little and permanently remove a category of annoyance; see our cable management accessories rundown for what actually holds up over time.
Step 4: choose the desk shape only after depth and power
Shape is where most people start and it should be fourth. The question is not which looks better, it is whether you have two distinct zones.
You want an L-shape if you run a PC plus a console, or a gaming rig plus a work laptop, or you stream and need a separate area for a mic arm and capture gear. The corner gives you a natural pivot between two workspaces without moving anything. Budget roughly 53 by 53 inches of floor area, and measure the room before ordering.
You want a rectangular desk if you have one machine and a small room. A deep 48-inch rectangle uses far less floor than an L and gives you every inch of comfort that matters. The only thing you lose is the second zone you did not need.
The specialised shapes, like an R-shaped or Z-shaped gaming table, sit between the two. They are usually narrow and cheap, and they exist to look aggressive rather than to solve a layout problem. That is a legitimate reason to buy one if you know that is what you are buying.
Step 5: reclaim surface by going vertical
Once the desk is right, the clutter problem is nearly always headsets and controllers lying flat, because both are awkwardly shaped and each occupies far more surface than its size suggests. A headset resting on its earcups takes up roughly the footprint of a keyboard’s number pad and gets knocked constantly.
A headset stand with a controller hook removes that entirely for around $20, and it is the single highest return-per-dollar item in this whole list. Hanging a headset also keeps the headband from being crushed, which is the most common way earpads and headband padding deform prematurely.
The same logic applies to anything else that lives on the desk without needing to. Drives, dongles and chargers belong on a hub or a shelf rather than loose. If you are running out of ports as well as space, a powered hub consolidates both problems; our USB hub guide covers which ones handle multiple high-draw devices without dropping connections.
Step 6: peripherals, once the surface is right
Peripherals come sixth because a good keyboard on a bad desk still produces a bad experience, while a cheap keyboard on a properly set-up desk is perfectly usable.
If you are starting from nothing, a bundle covers the gap at a price no individual purchase matches. You are not getting analogue switches or a low-latency wireless sensor at bundle prices, and any article claiming otherwise is inventing specifications. What you get is a full set of working peripherals that lets you spend your money on the parts of the setup that matter more.
If you already own peripherals you are happy with, skip this step entirely. Replacing a working keyboard is one of the most common ways people spend money without improving anything.
Step 7: the PC, and why it is last
The machine is last because it is the most expensive item and the least likely cause of a setup that feels wrong. If your frame rate is genuinely too low, that is a different problem with a different diagnostic path: check the monitor is running at its rated refresh rate, confirm the cable supports it, verify the GPU is not thermally throttling, and check that the game is not running on integrated graphics.
If you do need a machine and you are not building one, an entry-level prebuilt gets you playing at 1080p on older and less demanding titles for around the cost of a mid-range GPU alone. Understand what that means: last-generation parts, modest expansion room, and a system that will want a GPU upgrade within a couple of years. Building yourself gets more performance per dollar and is genuinely approachable, which our step-by-step build guide walks through if you have the patience.
Gear comparison
| Item | Price | Fixes | Footprint | Buy if |
|---|---|---|---|---|
| Korfile 48″ Gaming Desk | $82.99 | Depth, power | 48″ rectangular | One machine, small room |
| ODK 53″ L Shaped Desk | $89.98 | Depth, storage, power | 53″ corner | Two zones, best value L |
| AODK L Shaped Desk | $109.99 | Depth, power | Corner | Corner layout, LED wanted |
| PRAISUN L Shaped Desk | $109.99 | Depth, power | Corner | Alternative L at same price |
| BestOffice 47″ Gaming Table | $55.99 | Surface only | 47″ R-shaped | Lowest spend, look matters |
| KDD RGB Headset Stand | $21.95 | Surface clutter | Tiny | Everyone, no exceptions |
| Orzly Hornet RX-250 Bundle | $49.99 | Missing peripherals | Standard | Starting from zero |
| STGAubron Gaming PC Desktop | $499.99 | No machine | Mid tower | 1080p on a hard budget |
Note that the two cheapest items on that table fix the two most common problems. That is not a coincidence, it is the whole argument of this article.
The gear, item by item
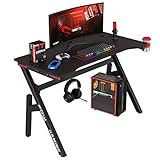
Korfile 48″ Gaming Desk with Power Outlet, LED, Carbon Fiber Black Finish
At $82.99 this is the rectangular desk I would point most people toward, because it addresses the two problems at the top of the diagnostic list in one purchase: usable depth and accessible power.
The 48-inch width is enough for a monitor, keyboard, mouse and a small speaker pair without feeling tight, and the integrated outlets put your monitor and lamp plugs at hand height instead of behind the furniture. The carbon fibre-effect surface is a laminate, and its real virtue is that it does not show mouse-pad wear or fingerprints the way a gloss finish does.
Assembly is the usual flat-pack routine: frame first, then top, then cable management hardware. Budget 40 minutes and use a proper screwdriver rather than the bundled one, which is soft enough to round out a screw head under real torque. A basic screwdriver set pays for itself across a single furniture build.
Skip it if you need two zones, or if your room is wide enough that an L-shape costs you nothing.
ODK 53″ L Shaped Gaming Desk with Shelves, LED & Outlets, Black
At $89.98 this is the best-value L-shape here, and the shelves are the reason. Most L-desks give you a corner and nothing else; the integrated shelving is where the headset stand, a small speaker, spare drives and a controller live, which is the difference between a corner desk and a corner desk that stays tidy.
The 53-inch corner footprint is the practical number to check against your room before ordering. Measure both walls and leave at least 30 inches of clearance behind the chair so you can actually roll back.
Integrated outlets and LED lighting are on board, same caveat as everywhere else: monitors and lamps yes, the PC itself on a proper surge-protected strip. Take a look at our surge protector guide if you have never checked the joule rating on the strip you are using.
Skip it if your room is small, or if you only run one machine and would be better served by more depth in a rectangle.
AODK L Shaped Desk Gaming Desk with LED Light & Power Outlet
$109.99 buys a cleaner-looking corner desk with integrated LED lighting and outlets. It covers the same ground as the ODK without the shelving, and the finish quality is a step up in a way that matters if the desk is the visual centre of the room.
What you are paying the extra $20 for, honestly, is appearance and slightly better hardware rather than function. Both desks fix depth, both give you power at hand height, both take about an hour to assemble.
Skip it if you would use shelves, because the ODK’s storage is worth more day to day than a nicer edge profile. Skip it too if the LED lighting is the selling point for you, since a $15 strip does the same job on any desk.
PRAISUN L Shaped Gaming Desk with LED Lights & Power Outlets
Also $109.99, and effectively an alternative to the AODK at the same price with a different colour and hardware treatment. The feature set matches: corner layout, LED lighting, built-in outlets.
Where these two separate is availability and finish preference rather than capability. If one is discounted and the other is not, buy the discounted one. That is genuinely the whole analysis, and any article claiming a meaningful performance gap between two laminate corner desks at identical prices is padding.
Skip it for the same reasons as the AODK: no shelves, and a corner footprint your room may not have.
BestOffice | 47″ Gaming Table | Red | R-Shaped Computer Desk
At $55.99 this is the cheapest way to get a purpose-shaped gaming surface, and I want to be clear about what it does and does not fix.
It gives you a stable 47-inch surface with a distinctive shape and a red finish, and it is easy to assemble. It does not give you the depth that solves the number one problem on this list, and it has no integrated power. If your current desk is a dining table or a shelf on brackets, this is an upgrade. If your current desk is a shallow 22-inch computer desk, this is a sideways move with better aesthetics.
Buy it if the look is the point and the budget is hard. Skip it if you came here because your setup felt uncomfortable, because that specific complaint is a depth problem and this desk does not solve it. Spending $27 more on the Korfile does.
KDD RGB Headset Stand with 9 Light Modes – Controller Holder for Desk – Rotatable Headphone Stand & Detachable Controller Hook for PC Earphone Accessories(Black)
$21.95, and the highest return per dollar in this entire article. It gets the headset and a controller off the desk, which reclaims more usable surface than any other change at this price, and it stops the headband being crushed under whatever gets stacked on top of it.
The rotatable head means you can angle it to the edge of the desk rather than losing depth at the back, and the detachable controller hook is genuinely detachable rather than a moulded lump you cannot remove. The nine light modes are decoration, and you will settle on one within a week.
Practical note: put it on your non-mouse side, near the back corner. Headset stands placed on the dominant side get knocked constantly.
Skip it only if you already hang your headset from a hook or a monitor mount. Otherwise this is the first $22 I would spend on almost any setup.
Gaming Keyboard and Mouse and Mouse pad and Gaming Headset, Wired LED RGB Backlight Bundle for PC Gamers and Xbox and PS4 Users – 4 in 1 Edition Hornet RX-250
$49.99 for a keyboard, mouse, mouse pad and headset. Judged against buying four separate items, this is straightforwardly good value. Judged against individual enthusiast peripherals, it is not competitive, and it does not claim to be.
The honest description: everything works, everything is wired, the RGB backlighting is uniform enough, and the mouse pad is large enough to matter. I will not quote sensor or switch specifications because reliable figures are not published for this bundle, and inventing them is how buyers end up disappointed.
Buy it if you are assembling a setup from nothing, building a second machine, or setting up for someone whose preferences you do not yet know. Skip it if you already own peripherals you like, since replacing working gear is the classic way to spend money without improving anything.
STGAubron Gaming PC Desktop,Core I7,RX 580 8G,16G RAM,512G SSD
$499.99 for a complete system with a Core i7, an RX 580 8GB, 16GB of RAM and a 512GB SSD. Set expectations correctly and this makes sense; set them wrong and it disappoints badly.
What it is: a machine built from previous-generation parts that will run older and less demanding titles at 1080p at playable frame rates, plus esports titles comfortably. The 16GB of RAM and the SSD are the right decisions at this price, because both are the components whose absence makes a cheap system feel slow in everyday use rather than just in games.
What it is not: a machine for current demanding releases at high settings, and not a long-term platform. The RX 580 is a well-understood card with a known ceiling, and you will want a GPU upgrade sooner than you would from a current-generation build.
Skip it if you have the patience to build. The same money assembled yourself buys a meaningfully faster system, and the process is far less intimidating than it looks. Buy it if you need something working out of the box today and $500 is the number.
Assembly order that saves an afternoon
Build the desk in the room where it will live, not in another room, because a completed L-desk does not fit through most doorways. Lay the top face-down on the flat-pack carton to protect the finish, attach the frame, then flip with a second person if the top is longer than about 48 inches.
Start every bolt by hand before tightening any of them. Fully torquing the first corner pulls the frame out of square and the last bolt will not line up. This is the single most common flat-pack mistake and it is entirely avoidable.
Fit the cable management hardware before you put anything on the desk. Threading a raceway behind a monitor and a loaded desk surface is miserable; doing it on an empty desk takes five minutes.
Re-check every bolt at 30 days. Desk frames settle exactly like chair frames do, and a wobbly desk is nearly always two loose bolts rather than a design flaw.
Desk stability, and the wobble test nobody runs
Laminate desks in the $55 to $110 range all use similar steel tube frames, and the difference between a solid one and a wobbly one is usually assembly and load placement rather than the product itself.
Run this test after building: put both hands flat on the desk at the front edge and push forward, then rock the desk side to side. Lateral movement of more than about half an inch at the front edge means either the cross brace is not fully tightened or the desk is on an uneven floor. Both are fixable in ten minutes; neither is a reason to return the desk.
Load placement matters more than people expect. A mid tower sitting on the desk rather than on the floor puts 20 to 30 lb at one end of a frame designed for even loading, and that is where sag and wobble come from on a wide surface. If the PC must be on the desk, put it directly over a leg rather than in the middle of an unsupported span.
Floor surface is the other variable. On carpet, desk feet sink unevenly and the frame twists slightly, which reads as wobble. Small hard pads under each foot cost almost nothing and eliminate it.
Audio placement, the cheap fix people never make
Once the desk is right, speaker position is the last free improvement available. Desktop speakers are almost always placed too low and too far apart, firing at your chest rather than your head, and no amount of driver quality compensates for that.
Aim for tweeters at ear height, angled inward so the axes cross just behind your head, and the pair no wider than the outer edges of your monitor for a single-screen setup. Raising a small speaker by four inches on a stand or a stack of books often produces a bigger perceived change than upgrading the speakers would.
Pull them a few inches away from the wall as well. A speaker pushed against a wall gains an exaggerated bass lift that muddies dialogue and footsteps, which is exactly the information competitive players need to hear clearly.
A 90-minute rebuild that costs nothing
Before you buy anything at all, try this. Take everything off the desk. Everything. Clean the surface. Then put back only the items you touched in the past week, and place the monitor first, pushed as far back as its stand allows, with the top edge at or just below your eye level.
Next, set your keyboard so there are 8 to 10 inches of clear surface in front of it for your forearms. If that is impossible, you have confirmed a depth problem and you now know exactly what to spend money on.
Then route the cables. Bundle everything running to the floor into a single path down one desk leg. Unplug anything you have not used in a month.
Finally, sit down and work for an hour. A significant number of setups feel dramatically better after this alone, and it costs an evening rather than $100. If it still feels wrong afterwards, the diagnosis is now much cleaner, because you have eliminated clutter and layout as variables.
What not to buy, and why
Do not buy a wider desk to fix a depth problem. Width gives you room for more objects; depth gives you comfort. People buy 60-inch shallow desks and wonder why nothing improved.
Do not buy RGB lighting to fix an ambience complaint before you have fixed glare. A monitor facing a window or a bright light behind the screen causes more visual fatigue than any lighting product will resolve, and repositioning the desk costs nothing.
Do not buy a new PC because the setup feels sluggish, until you have confirmed the monitor is at its rated refresh rate and the GPU is not thermally limited. A machine running a 144 Hz panel at 60 Hz because of a display setting feels exactly like a machine that is too slow.
Do not run a gaming system through a desk’s integrated outlets. It is the one genuine safety point in this article and it is worth repeating.
Where I would put the money
With $110 total: the Korfile desk at $82.99 and the KDD headset stand at $21.95. That combination fixes depth, power access and surface clutter, which are the three most common causes of a setup that feels wrong.
With $200: the ODK 53-inch L-shaped desk at $89.98, the headset stand, and a monitor arm. Two zones, storage, correct screen height, and power at hand.
With $250 and no peripherals at all: the ODK desk, the headset stand and the Orzly bundle at $49.99. That is a complete working station for the price of one mid-range keyboard.
With $500 and no machine: the prebuilt, and then fix the desk next month. It is the only case where the last item on the diagnostic list moves to the front, and only because you cannot game without a computer.
Work down the list in order. The cheapest fixes really are the ones most likely to solve your problem, and the expensive one at the bottom is usually the last thing that needed changing.